Strategy ONE
Pages
This setting corresponds to the properties and values defined for the <pages> node in the Page Configuration File (pageConfig.xml located in WEB-INF\xml inside the MicroStrategy Web installation folder). The <pages> node contains a series of <page> nodes specific for each MicroStrategy Web page. Each <page> node, in turn, has a number of properties and child nodes specific to that page.
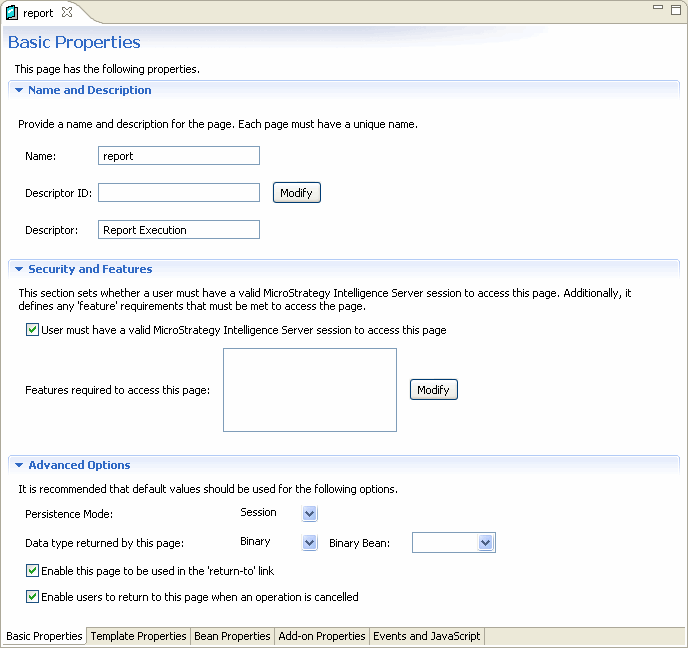
The Report Execution page when accessed through the Application Settings view is shown below. It displays the basic properties such as name, description and security, and features for the Report Execution page.
You can view information about the page template and layout for the Report Execution page by clicking the Template Properties tab at the bottom.
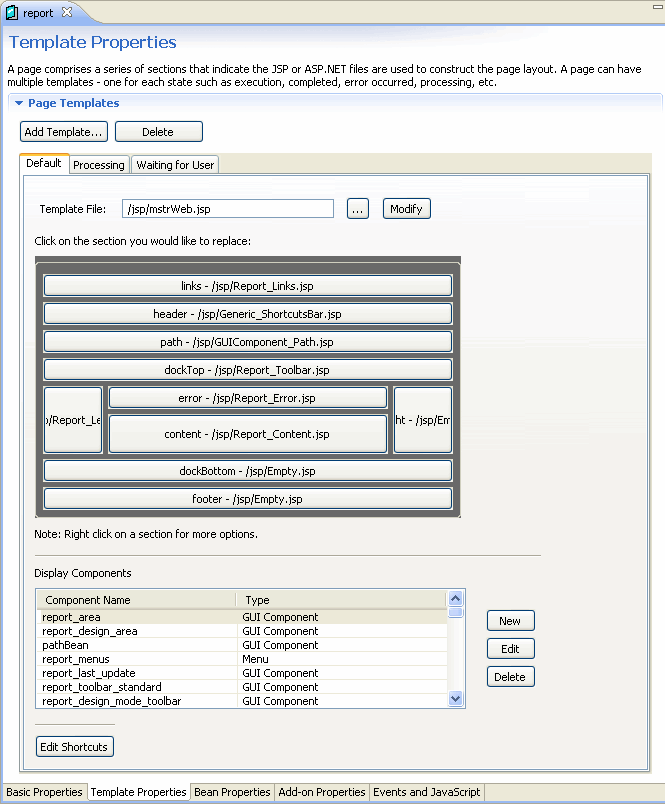
The Template Properties screen (as shown above) allows you to add, modify or delete page templates and page sections. You can see the different templates used by the page by clicking the tabs within the gray area. In this example of the Report Execution page, there are three page templates used—Default, Processing and Waiting for User.
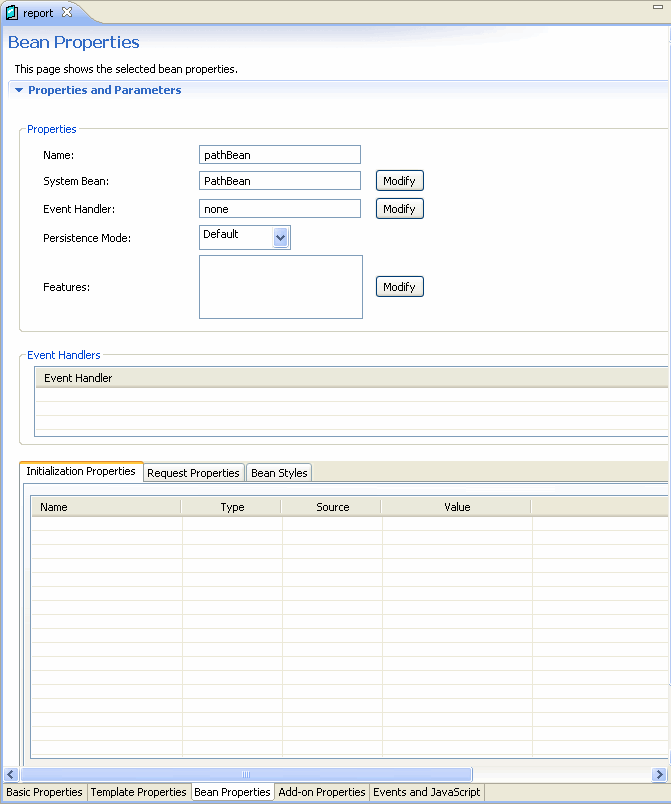
You can view information about the various beans used by the Report Execution page by clicking the Bean Properties tab at the bottom of the main Eclipse window. The picture below shows the properties for the pathBean as they are defined in the Report Execution page. You can also see the initialization properties, request properties and the bean styles for the bean.
There are two ways to specify an event handler for this bean.
-
Under Properties, you can add the fully-qualified class name for the event handler.
The Web Customization Editor uses this value to add an event-handler attribute to the <web-bean> node for this bean in the Page Configuration file. This is the most common way to specify that an event handler should handle the events for a web bean. The event handler specified by an event-handler attribute applies to this specific <web-bean>. Any child beans of a different type must have their own event handlers specified in the event-handler attributes of their <web-bean> nodes.
-
Under Event Handlers, you can add the fully-qualified class name for one or more event handlers.
The Web Customization Editor uses any value entered here to add a child <event-handler> node to the <web-bean> node for this bean in the Page Configuration file. This method must be used to specify event-handlers for "implicit child beans" of report beans, report writer beans, and document beans. Implicit child beans are beans that do not appear in the bean hierarchy in the Page Configuration file, but instead are created programmatically by the parent bean implementation class. Report beans and report writer beans can have prompt beans and view beans as implicit children; document beans can have prompt beans as implicit children.
Because there are no separate <web-bean> nodes in the Page Configuration file for implicit child beans, there are no event-handler attributes with which to specify a custom event handler class. Instead, for implicit child beans, you must add one or more <event-handler> child nodes to the parent <web-bean> node. The event handlers specified in these <event-handler> child nodes are propagated down from the parent bean level to implicit child beans where applicable.
Adding multiple <event-handler> child nodes to a <web-bean> node is appropriate only for beans that can have implicit child beans—report beans, report writer beans, and document beans. Although you can specify multiple event handlers, you should specify only one event handler per bean type. For example, do not define two custom ReportBean event-handlers. If you define multiple event handlers for the same bean type, only one will be used.
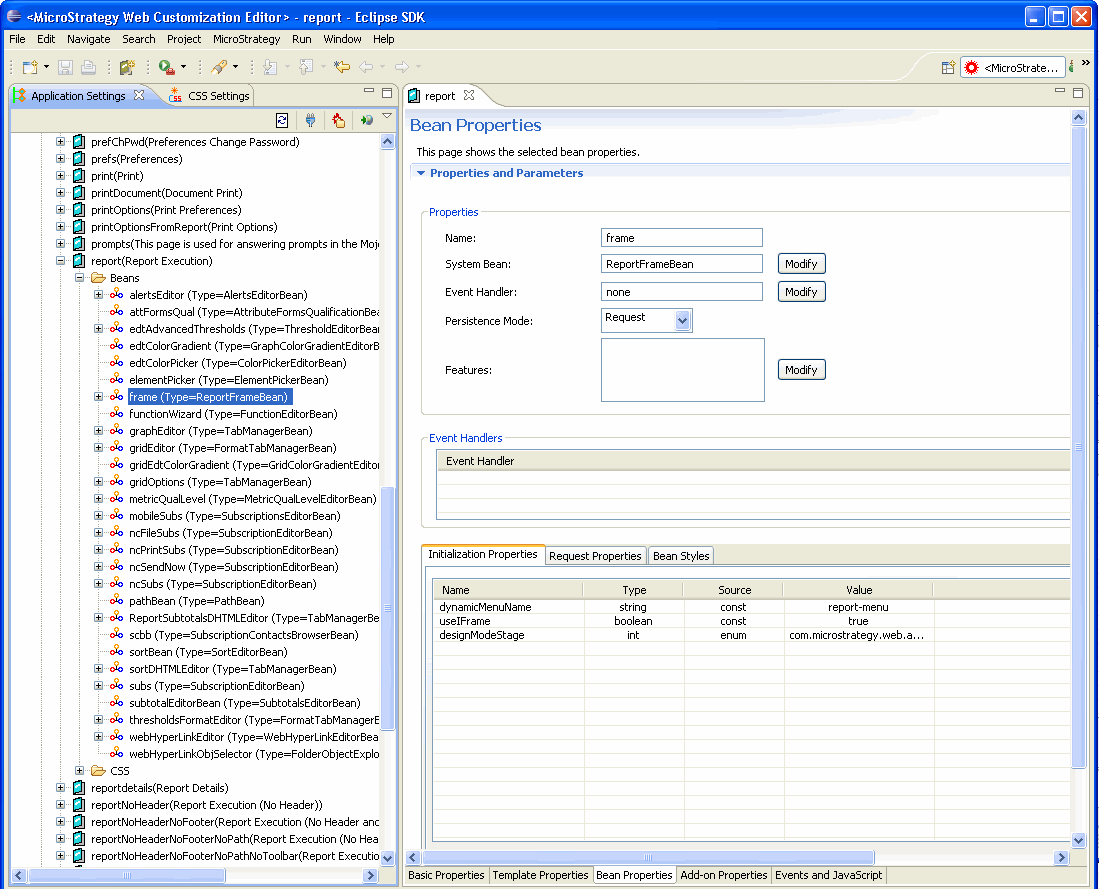
To view the list of beans used in the Report Execution page, you can navigate down the hierarchical tree for the Report Execution page. Clicking on the bean (frame bean as shown below) displays the properties for that bean on the Bean Properties section of the Report Execution page in the editor. You can also see the initialization properties, request properties and the bean styles for the bean.
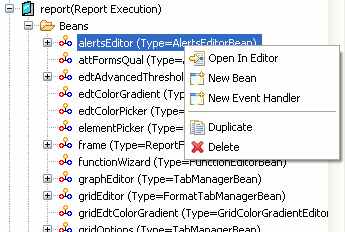
You can use the right-click menu by clicking on a bean in the hierarchical tree. The menu allows you to create a new bean or an event handler and delete the existing bean. Since this menu is context sensitive, it will only show the relevant options for that bean.
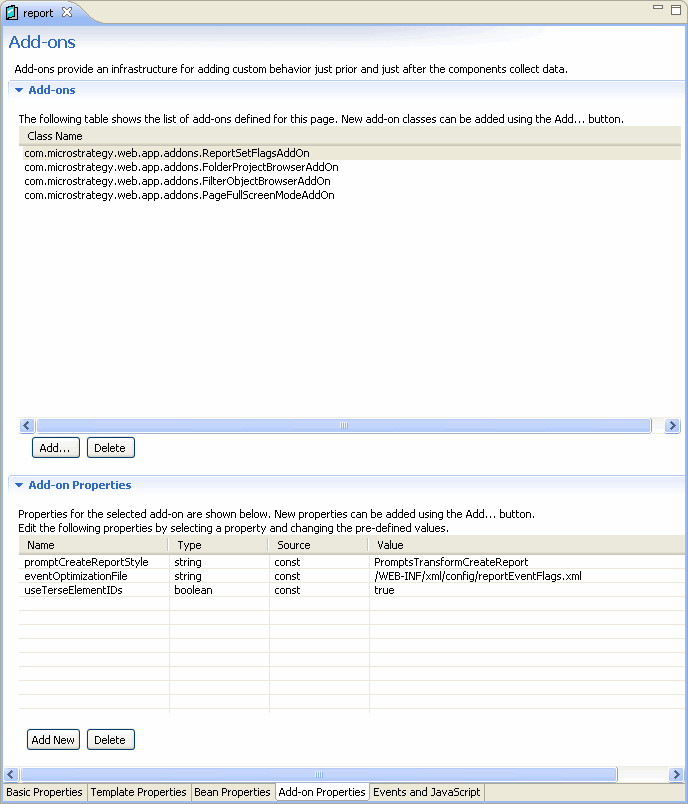
You can view information about add-ons used by the Report Execution page and their properties by clicking the Add-On Properties tab at the bottom. The picture below shows the list of add-ons defined for the Report Execution page.
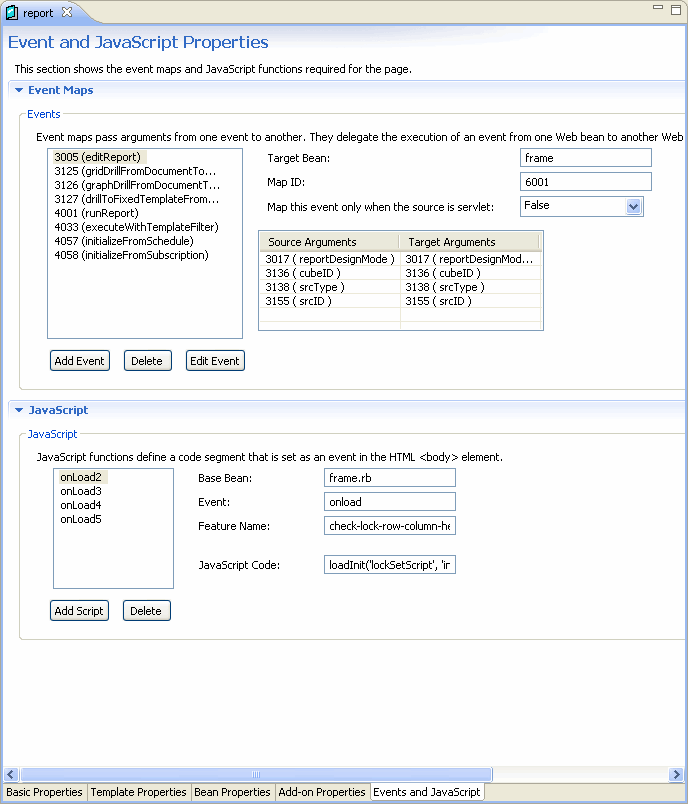
You can view information about events and JavaScript functions required for the Report Execution page by clicking the Events JavaScripts tab at the bottom. The picture below shows the list of events, event maps and JavaScript functions defined in the Report Execution page.
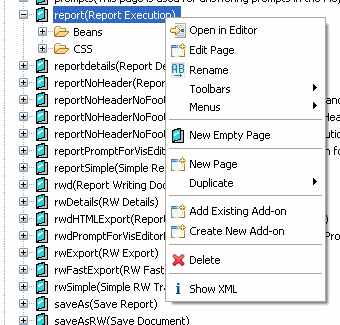
You can use the right-click menu by clicking on a page in the hierarchical tree. The menu offers several options such as creating a new page, empty page, add-on, duplicating the existing page, modifying toolbar or menu items, and so on. Since this menu is context sensitive, it will only show the relevant options for that page.
All MicroStrategy Web pages available in the editor also display a CSS folder in addition to the Beans folder. The picture below shows the CSS folder for the Report Execution page.
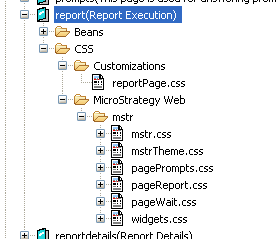
Folders— Customizations and MicroStrategy Web exist as another level of hierarchy below the CSS folder.
-
The Customizations folder, by default, displays a CSS file that has a name identical to that of the page (reportPage.css in this example). Changes made to this CSS file are applied only to this MicroStrategy Web page. Thus all CSS customizations for the Report Execution page will be made to reportPage.css.
-
The MicroStrategy Web folder displays the CSS files responsible for changes that are applied to that particular MicroStrategy Web page (Report Execution page in this example). These CSS files are defined in the Links page section, Report_Links (JSP or ASP .NET), of the Report Execution page. For additional flexibility, global CSS files from the Global_Links file (JSP or ASP .NET) are also displayed if you decide to apply the customization changes to all the MicroStrategy Web pages and not just the Report Execution page. In such a case, the CSS file will be saved to the Customizations folder under the Global CSS setting.
Use these settings typically for applying CSS changes to a specific MicroStrategy Web page. If you wish to apply your CSS changes globally (that is, across all MicroStrategy Web pages), use the settings available in CSS Settings.
See also:
