Strategy ONE
Changing Prompt Layout on the Prompt Question Page
By default, when you display all of a report’s prompts on a single page in MicroStrategy Web, they are stacked vertically (that is, each prompt question appears below the previous one). In some cases, you may want to conserve space and reduce the amount of scrolling necessary by displaying prompt questions horizontally, rather than vertically.
In this customization scenario, you display three prompt questions side-by-side instead of placing the next prompt question below.
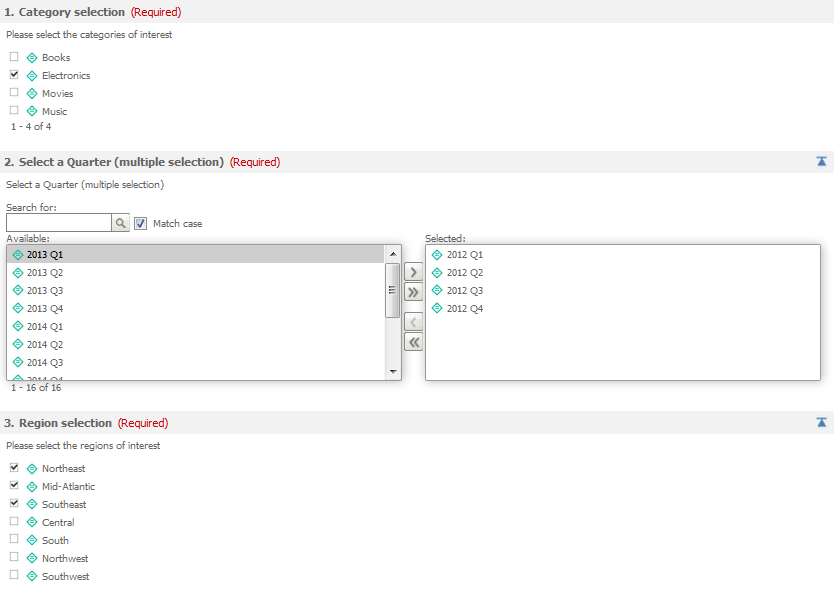
Before customization:
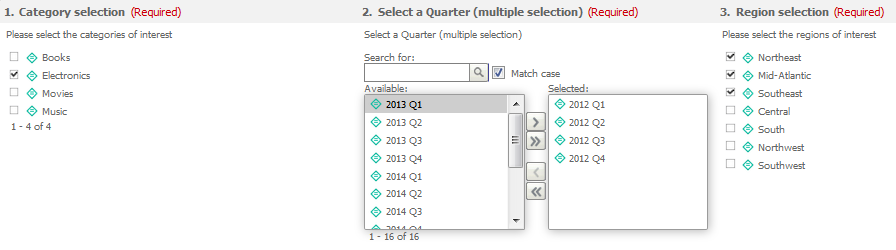
After customization:
This customization can be accomplished using either of the following methods:
Deploying the plug-in provided with MicroStrategy SDK
MicroStrategy SDK provides a plug-in (ZIP file) that can simply be extracted to thepluginsfolder to view the customization in MicroStrategy Web. The following steps guide you in locating the plug-in and deploying it.
-
Access the plug-in: JSP version or ASP .NET version.
-
Extract the plug-in to the plugins subfolder inside the MicroStrategy Web installation folder.
-
Launch MicroStrategy Web to view the customization.
Using the Web Customization Editor to create a plug-in
MicroStrategy SDK provides a Web Customization Editor that can be used to create a customization plug-in. The following steps guide you in creating the plug-in and deploying it.
-
Create a new plug-in and give it a meaningful name. For example: ChangingPromptLayout.
-
Exit the Web Customization Editor.
-
Create an XML file, PromptQuestionHorizontalViewRoll.xml. The sample, PromptQuestionHorizontalViewRoll.xml,contains the entire code for this layout definition file.
-
Save this custom XML file, PromptQuestionHorizontalViewRoll.xml, in the plugins\pluginName\WEB-INF\xml\layoutsCS\mstr\layouts subfolder inside the MicroStrategy Web installation folder. For example: plugins\ChangingPromptLayout\WEB-INF\xml\layoutsCS\mstr\layouts.
-
Create layout definition files PromptsContainerLayout_widget.xml (if you wish to view the customization in DHTML mode) and CustomPromptsSampleLayout.xml (if you wish to view the customization in HTML mode). The samples, PromptsContainerLayout_widget.xml and CustomPromptsSampleLayout.xml contain the entire code for the layout definition files.
-
Paste the files in your customization plug-in folder. For example: plugins\ChangingPromptLayout\WEB-INF\xml\layouts.
-
Open this copy of PromptsContainerLayout_widget.xml for editing and replace the default plug-in name DefaultPlugin with the name of your customization plug-in.:
Before customization:
<mstrlayout:bSetProperty path="layoutClass" value="@DefaultPlugin:mstr.layouts.PromptQuestionHorizontalViewRoll"/>
After customization:
<mstrlayout:bSetProperty path="layoutClass" value="@ChangingPromptLayout:mstr.layouts.PromptQuestionHorizontalViewRoll"/>ZYZ
-
If the Web Customization Editor is closed, launch it again and access your plug-in.
-
Click on MicroStrategy Web Configuration inside the Application Settings view to expand the hierarchical tree. The expanded list comprises the different settings that can be modified to perform customizations.
-
Click on Styles to expand the list of styles used in MicroStrategy Web.
-
Double-click PromptsContainerStyle_Widget to open the Style Properties editor in the right frame.
-
Click the Style Layouts tab at the bottom.
-
Click ... and navigate to the custom layout definition file, PromptsContainerLayout_widget.xml in the plugins\ChangingPromptLayout\WEB-INF\xml\layouts subfolder inside the MicroStrategy Web installation folder.
-
Click Open.
-
Save your changes.
-
Double-click PromptsTransformClassic to open the Style Properties editor in the right frame.
-
Click the Style Layouts tab at the bottom.
-
Click ... and navigate to the custom layout definition file, CustomPromptsSampleLayout.xml in the plugins\ChangingPromptLayout\WEB-INF\xml\layouts subfolder inside the MicroStrategy Web installation folder.
-
Click Open.
-
Save your changes.
-
Launch MicroStrategy Web to view the customization.
See Also
-
Fundamentals of Customization: Data Presentation