Strategy ONE
Modifying the Icons Based on a MicroStrategy Web Color Theme
MicroStrategy Web has several default color themes that can be applied to all the pages. These color themes can be selected from the Preferences page. In this customization scenario, you modify the folder icon for the Shared Reports page such that the custom icons are displayed only when the Blue color theme is applied. For all other color themes, the default folder icon is displayed.
To change the folder icon for all the color themes, refer to Modifying the Icons Used on the Folder Browsing Pages (Shared Reports and My Reports pages).
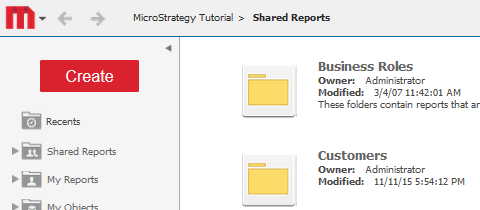
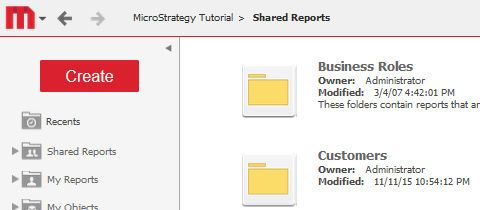
Before customization:
Both, the Blue and the Red color themes display the same folder icons.

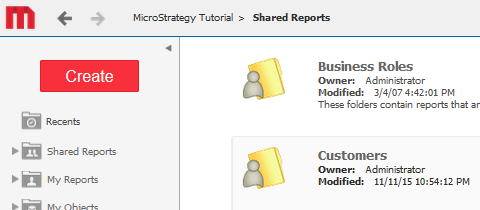
After customization:
The folder icons are modified only for the Blue color theme; not for the Red color theme.
This customization can be accomplished using either of the following methods:
Deploying the plug-in provided with MicroStrategy SDK
MicroStrategy SDK provides a plug-in (ZIP file) that can simply be extracted to thepluginsfolder to view the customization in MicroStrategy Web. The following steps guide you in locating the plug-in and deploying it.
-
Access the plug-in: JSP version or ASP .NET version.
-
Extract the plug-in to the plugins subfolder inside the MicroStrategy Web installation folder.
-
Launch MicroStrategy Web to view the customization.
Using the Web Customization Editor to create a plug-in
MicroStrategy SDK provides a Web Customization Editor that can be used to create a customization plug-in. The following steps guide you in creating the plug-in and deploying it.
-
Click on MicroStrategy Web Configuration inside the Application Settings view to expand the hierarchical tree. The expanded list comprises the different settings that can be modified to perform customizations.
-
Click on Pages to expand the list of pages used in MicroStrategy Web.
-
Click on shared (Shared Reports) to expand the child nodes under it.
-
Double-click on CSS to expand the child nodes under it.
-
Click on Customizations to expand the child nodes under it.
-
Right-click sharedPage.css and select New Selector to launch the New CSS Element dialog.
-
Enter .Blue .mstrIcon-lg-f in the Selector text field and click OK. The selector .Blue .mstrIcon-lg-f is created inside the CSS file "sharedPage.css".
-
Right-mouse .Blue .mstrIcon-lg-f and select New Property.
-
Enter background-image in the Property text field.
-
Click on Utils >> to view the Utilities panel.
-
Click the Image button on the Utilities panel to navigate to the image.
-
Select the image and click OK. The location of the image gets added in the Value text field.
-
Append the text !important after the location of the image in the Value text field as shown in this example (ignore the quotes): "url(images/myNewImage.gif) !important". This ensures that this background-image property gets priority over any other background-image property defined elsewhere.
-
Click OK. This new background-image property gets added under the .Blue .mstrIcon-lg-f rule inside the CSS file "sharedPage.css" under shared (Shared Reports)->CSS->Customizations.
-
Right-mouse .Blue .mstrIcon-lg-f and select New Property.
-
Enter background-position in the Property text field.
-
Enter 0px in the Value text field.
-
Click OK. This new background-position property gets added under the .Blue .mstrIcon-lg-f rule inside the CSS file "sharedPage.css" under shared (Shared Reports)->CSS->Customizations.
-
Launch MicroStrategy Web to view the customization.
See Also
-
Fundamentals of Customization: Data Presentation, Styles and Layout Definitions