Strategy ONE
Removing Document Scrollbars when Two Sets of Scrollbars are Displayed
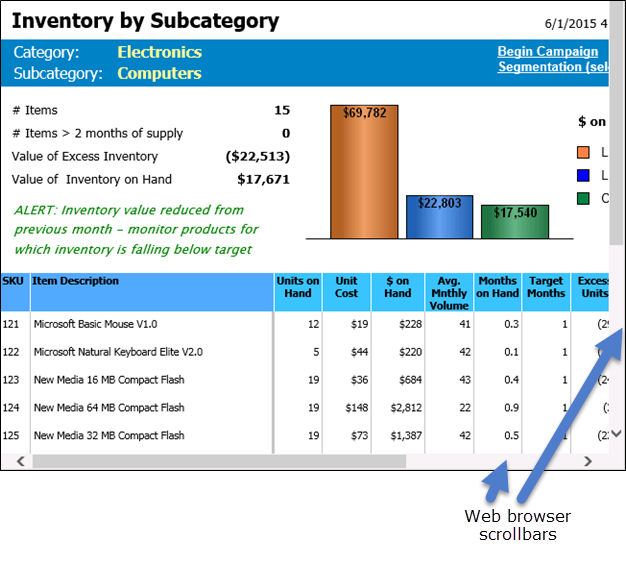
Typically, when the size of a report is greater than the size of the Web browser, Web browser scrollbars appear. The same thing happens when the size of a document is larger than the size of the Web browser, but, in addition, the document itself adds scrollbars. Because this can happen when a MicroStrategy document is displayed inside a portal, the customization performed in this scenario is particularly relevant for customers who use MicroStrategy in a portal environment.
In this scenario, you remove the document scrollbars so that only the Web browser scrollbars are visible. You accomplish this by changing the overflow value on the cascading style sheet (CSS file) that is used to create the HTML output. While this scenario illustrates how to remove scrollbars, the same steps can be used to change other settings provided by the CSS file, such as the height, width, or margins.
When you use document scrollbars to scroll through a document, the document menus and toolbars at the top of the screen remain visible. However, when you use Web browser scrollbars to scroll through a document, the document menus and toolbars are visible only when you view the top of the document. Be aware that after you perform this customization, the document menus and toolbars do not remain visible as you scroll through the document.
Before customization:

After customization:
This customization can be accomplished using either of the following methods:
Deploying the plug-in provided with MicroStrategy SDK
MicroStrategy SDK provides a plug-in (ZIP file) that can simply be extracted to thepluginsfolder to view the customization in MicroStrategy Web. The following steps guide you in locating the plug-in and deploying it.
-
Access the plug-in: JSP version or ASP .NET version.
-
Extract the plug-in to the plugins subfolder inside the MicroStrategy Web installation folder.
-
Launch MicroStrategy Web to view the customization.
Using the Web Customization Editor to create a plug-in
MicroStrategy SDK provides a Web Customization Editor that can be used to create a customization plug-in. The following steps guide you in creating the plug-in and deploying it.
-
Click on MicroStrategy Web Configuration inside the Application Settings view to expand the hierarchical tree. The expanded list comprises the different settings that can be modified to perform customizations.
-
Click on Pages to expand the list of pages used in MicroStrategy Web.
-
Click on rwd (Report Writing Documents) to expand the child nodes under it.
-
Double-click on CSS to expand the child nodes under it.
-
Click on Customizations to expand the child nodes under it.
-
Right-click rwdPage.css and select New Selector.
-
Enter .mstrDocViewer in the Selector text field.
-
Select the radio button for Apply Selector to This Page.
-
Click OK.
-
Right-click .mstrDocViewer and select New Property.
-
Enter height and auto !important in the Property and Value text fields respectively.
-
Select the radio button for Apply to This Page.
-
Click OK.
-
Right-click .mstrDocViewer and select New Property.
-
Enter overflow and visible in the Property and Value text fields respectively.
-
Select the radio button for Apply to This Page.
-
Click OK.
-
Launch MicroStrategy Web to view the customization.