Strategy ONE
Modifying color and font properties on the Prompts page
This scenario shows you how to change the background color and the font color and size for the prompt title bar, italicize the prompt instructions, and change the background color and layout for the prompt shopping cart. You perform these customizations by modifying the CSS file that renders these formatting properties on the Prompts page. You can extrapolate from the steps in this scenario to change other properties on the Prompts page such as font style, border, and margin, or to change these same properties on other pages.
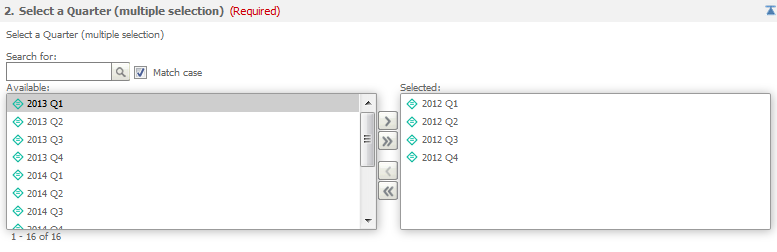
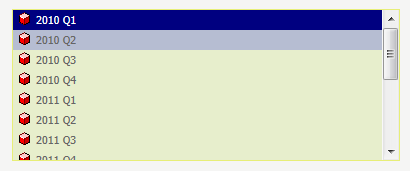
Before customization:
After customization:

This customization can be accomplished using either of the following methods:
-
Using the plug-in provided for you:
This method lets you view the customization right away, without having to do anything except deploying the plug-in provided with the MicroStrategy SDK.
-
Creating the plug-in yourself using the Web Customization Editor:
This method gives you hands-on experience in performing this customization, as it steps you through the process of creating and deploying the plug-in.
Using the plug-in provided for you
The MicroStrategy SDK provides an out-of-the-box plug-in (ZIP file) that customizes the color and font properties on the Prompts page. Follow the simple steps below to deploy the plug-in and view the results in MicroStrategy Web.
-
Access the plug-in: JSP version or ASP .NET version.
-
Extract the plug-in to the plugins subfolder inside the MicroStrategy Web installation folder.
-
Restart your web server.
-
To view your customizations, launch MicroStrategy Web and open a prompted report.
Creating the plug-in yourself using the Web Customization Editor
If you want to understand how the color and font properties are customized, follow the steps below to create the plug-in and deploy it.
-
On the Application Settings tab, click the Select Plug-in icon.:

-
On the Select Plug-in dialog box, click New and enter a meaningful name for the plug-in, such as ModifyingColorFontPrompt.
-
Click OK.
-
On the CSS Settings tab, expand CSS.
-
Expand MicroStrategy WebStyles, then expand style, then expand mstr.
-
Expand widgets.css to view the selectors defined within this CSS file.
-
Right-click .mstrPromptQuestionMeaning and choose New Property. This rule defines the properties for the prompt instructions in each pane on the Prompts page.
-
For Property, enter font-style.
-
For Value, enter italic.
-
For Apply to, select All Pages.
-
Click OK. The new property you added displays your prompt instructions as shown below when the plug-in is applied::

-
-
-
A new CSS file, called global.css, is created under CSS -> Customized Web Styles -> style, with the new font-style property you just added for .mstrPromptQuestionMeaning. Use the next set of steps to add additional selectors and properties to this file to make your other customizations.
-
Right-click the newly created global.css file and select New Selector.
-
Enter .mstrPromptQuestion .mstrPromptQuestionTitleBarTitle as the name of the Selector.
-
For Apply Selector to, select All Pages.
-
Click OK.
-
Right-click .mstrPromptQuestion .mstrPromptQuestionTitleBarTitle and choose New Property. You add a new property that sets the color of the font on the title bar at the beginning of each prompt pane.
-
For Property, enter color.
-
For Value, enter #0000ff. This makes the text in the title bar blue.
-
For Apply to, select All Pages.
-
Click OK.
-
-
Right-click .mstrPromptQuestion .mstrPromptQuestionTitleBarTitle and choose New Property. You add a new property that sets the size of the font on the title bar at the beginning of each prompt pane.
-
For Property, enter font-size.
-
For Value, enter 1.25em. This makes the font 25% bigger and bold.
-
For Apply to, select All Pages.
-
Click OK.
-
-
-
Right-click global.css and select New Selector. You add a new selector that has a property that allows you to set the background color of the title bar at the beginning of each prompt pane.
-
Enter .mstrPromptQuestion .mstrPromptQuestionTitleBar as the name of the Selector.
-
For Apply Selector to, select All Pages.
-
Click OK.
-
Right-click .mstrPromptQuestion .mstrPromptQuestionTitleBar and choose New Property. You add a new property that sets the background color of the title bar at the beginning of each prompt pane.
-
For Property, enter background.
-
For Value, enter #E7CC77. This makes the background color for the title bar orange.
-
For Apply to, select All Pages.
-
Click OK. The three new properties you added display your prompt title bars as shown below when the plug-in is applied::

-
-
Right-click .mstrPromptQuestion .mstrPromptQuestionTitleBar and choose New Property.
-
For Property, enter filter.
-
For Value, enter none.
-
For Apply to, select All Pages.
-
Click OK.
-
-
-
Right-click global.css and select New Selector. You add a new selector that has properties that allow you to set the background color, border, and padding around the prompts shopping cart panes.
-
Enter .mstrListBlockContents as the name of the Selector.
-
Select All Pages for Apply Selector to.
-
Click OK.
-
Right-click .mstrListBlockContents and choose New Property. You add a new property that sets the background color of the prompts shopping cart panes.
-
For Property, enter background-color.
-
For Value, enter #E7EECC. This is the hex value of a light green color.
-
For Apply to, select All Pages.
-
Click OK.
-
-
Right-click .mstrListBlockContents and choose New Property. You add a new property that sets the border of the prompts shopping cart panes.
-
For Property, enter border.
-
For Value, enter 1px solid #E7EE77. This is the hex value of a light green color that is slightly darker than the background color.
-
For Apply to, select All Pages.
-
Click OK.
-
Right-click .mstrListBlockContents and choose New Property. You add a new property that sets the padding around the prompts shopping cart panes.
-
For Property, enter margin.
-
For Value, enter 10px 10px 10px 10px. This is the amount of space that is added around each pane of the shopping cart.
-
For Apply to, select All Pages.
-
Click OK. The new selector and three new properties you added display your prompt shopping cart panes as shown below when the plug-in is applied::
-
-
-
-
-
A new plug-in folder, with the name you gave it, now exists in the plugins folder of your MicroStrategy Web installation directory. Restart your web server to apply the plug-in.
- To view your customizations, launch MicroStrategy Web and open a prompted report.
See Also
- Fundamentals of customization: Data presentation