Strategy ONE
Adding a Custom Page to the List of Default Start Pages and making it the Default Start Page
This scenario deals with making your custom page the default start page after successfully logging into the application. It involves creating a custom page and adding it to the list of Default start pages. Depending on user privileges, you can access the Default start page feature from the list of General Preferences in the MicroStrategy Web products.
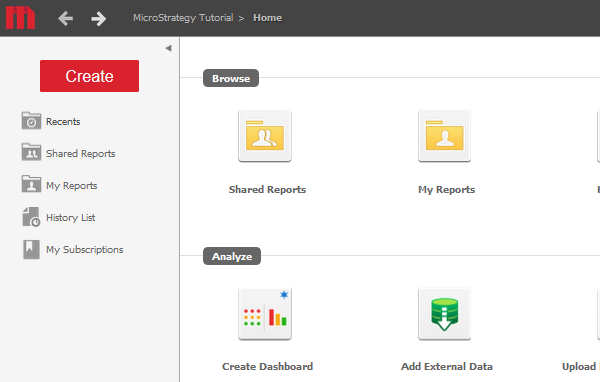
Before customization:
After customization:

This customization can be accomplished using either of the following methods:
Deploying the plug-in provided with MicroStrategy SDK
MicroStrategy SDK provides a plug-in (ZIP file) that can simply be extracted to the pluginsfolder to view the customization in MicroStrategy Web. The following steps guide you in locating the plug-in and deploying it.
-
Access the plug-in: JSP version or ASP .NET version.
-
Extract the plug-in to the plugins subfolder inside the MicroStrategy Web installation folder.
-
Launch MicroStrategy Web to view the customization.
-
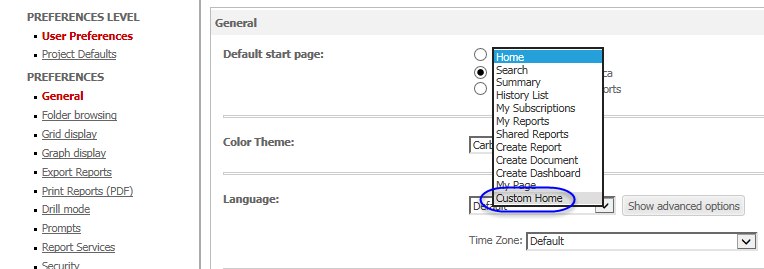
Access Preferences and select the custom page Custom Home from the drop-down menu for Default start page.:
-
Click Apply to save your changes.
-
If you access the Home page or log back into MicroStrategy Web, the custom Desktop page (without the Create section) will be displayed as the start page.
If you decide not to keep this customization, then before removing this plug-in from the pluginsfolder, perform the following steps.
-
Log into MicroStrategy Web and access Preferences.
-
From the drop-down menu for Default start page, select Home or any page other than Custom Home.
-
Click Apply to save your changes.
-
Now you can remove the plug-in from the plugins folder.
Using the Web Customization Editor to create a plug-in
MicroStrategy SDK provides a Web Customization Editor that can be used to create a customization plug-in. The following steps guide you in creating the plug-in and deploying it.
-
Click on MicroStrategy Web Configuration inside the Application Settings view to expand the hierarchical tree. The expanded list comprises the different settings that can be modified to perform customizations.
-
Click on Pages to expand the list of pages used in MicroStrategy Web.
-
Right-click the desktop (Desktop) page and select Duplicate->by inheriting from this page. The new page is titled CopyOfdesktop (Desktop).
-
Enter customdesktoppage and Custom Desktop in the Name and Descriptor text fields for the CopyOfdesktop (Desktop) page.
-
Click the Template Properties tab at the bottom in the right frame to make changes to the Default page template.
-
Right-click the content page section and select Edit current file.
-
Click the Yes button in the prompt to edit Desktop_Content.jsp/ascx.
-
Make changes to Desktop_Content.jsp/ascx such that the Create section is not displayed. To do this, comment the following line of code:
J2EE environment:
<jsp:include page='/jsp/Desktop_Create_Section.jsp' flush="true" />
.NET environment:
<web:include runat="server" flush="false" path="Desktop_Create_Section.ascx" />
-
Save your changes.
-
Launch the Preferences dialog from Window->Preferences, and click MicroStrategy preference added on the left.
-
Select the check box for Show Advanced Options.
-
Click OK.
-
Refresh the Application Settings view.
-
Click on MicroStrategy Web Configuration to expand the hierarchical tree.
-
Click System Pickers.
-
Right-click startPagesPicker and select New Shortcut.
-
Enter customdesktoppage as the name for the new shortcut, and click OK. This shortcut opens in the editor.
-
Enter Custom Home in the Descriptor text field.
-
Click the Advanced Properties tab at the bottom in the right frame.
-
Click Add Event in the Events section.
-
Click Browse to select the enumeration class EnumServletEvents.
-
Select WebEventOpenPage from the drop-down menu for Event to trigger when menu element is selected.
-
Click Add in the EventsArguments section.
-
Select WebEventArgumentTarget from the drop-down menu.
-
Enter customdesktoppage in the Argument Value text field.
-
Click OK.
-
Save your changes.
-
Enable the System Definitions setting from the Show Advanced Options in MicroStrategy Preferences.
-
Click on MicroStrategy Web Configuration inside the Application Settings view to expand the hierarchical tree. The expanded list comprises the different settings that can be modified to perform customizations.
-
Navigate to Web Configuration Settings->System Definitions.
-
Double-click on startPage property under System Definitions to launch the System Definitions editor.
-
Update the text in the Value text field to customdesktoppage.:
If you perform this step, this customization occurs only for those users who have never logged into MicroStrategy Web before. Users who have previously logged into MicroStrategy Web at least once need to perform the next step for the customization to take effect. For details on how user preferences are applied, refer to Preferences XML files.
-
Save your changes.
-
Log into MicroStrategy Web.
-
Access General Preferences and select the custom page Custom Home from the drop-down menu for Default start page.
-
Click Apply to save your changes.
-
If you access the Home page or log back into MicroStrategy Web, the custom Desktop page (without the Create section) will be displayed as the start page.
If you decide not to keep this customization, then before removing this plug-in from the pluginsfolder, perform the following steps.
-
Log into MicroStrategy Web and access General Preferences.
-
From the drop-down menu for Default start page, select Home or any page other than Custom Home.
-
Click Apply to save your changes.
-
Now you can remove the plug-in from the plugins folder.
See Also
Fundamentals of Customization: Application Page Structure
Page Content and Layout: Page Sections
Page Content and Layout: Web Beans and Web-Components