Strategy ONE
Creating a New Ribbon for a Report
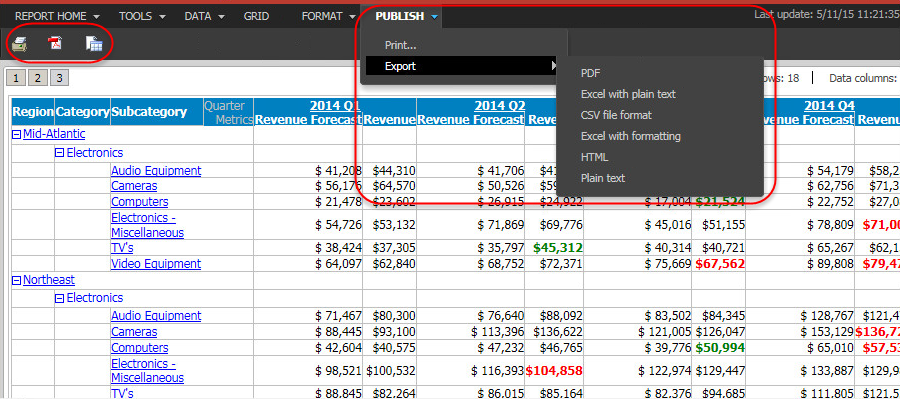
All reports in MicroStrategy Web use the following ribbons: Home, Tools, Data, Grid and Format. And each ribbon has its own toolbar and menu defined for it. In this customization scenario, you add a new ribbon called Publish that displays a new toolbar and menu (and a submenu) with options specific to publishing such as printing and exporting.
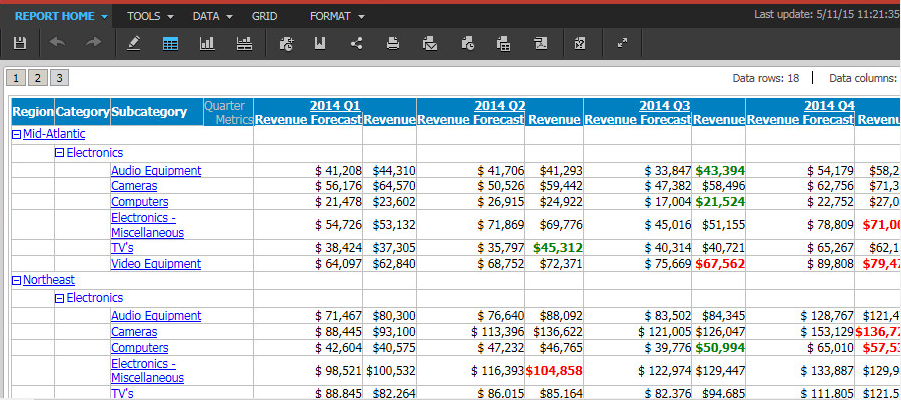
Before customization:
After customization:
This customization can be accomplished using either of the following methods:
Deploying the plug-in provided with MicroStrategy SDK
MicroStrategy SDK provides a plug-in (ZIP file) that can simply be extracted to thepluginsfolder to view the customization in MicroStrategy Web. The following steps guide you in locating the plug-in and deploying it.
-
Access the plug-in: JSP version or ASP .NET version.
-
Extract the plug-in to the plugins subfolder inside the MicroStrategy Web installation folder.
-
Launch MicroStrategy Web to view the customization.
Using the Web Customization Editor to create a plug-in
MicroStrategy SDK provides a Web Customization Editor that can be used to create a customization plug-in. The following steps guide you in creating the plug-in and deploying it.
-
Click on MicroStrategy Web Configuration inside the Application Settings view to expand the hierarchical tree. The expanded list comprises the different settings that can be modified to perform customizations.
-
Click on Toolbars to expand the list of toolbars used in MicroStrategy Web.
-
Right-click any DHTML toolbar (indicated by the letter D) and select New Toolbar.
-
Enter ReportPublishToolbarModel as the name for the toolbar and click OK.
-
Right-click ReportPublishToolbarModel and select New Toolbar Element. This launches the New Toolbar Element wizard. The following steps create the toolbar element for Print.
-
Click Browse and select the icon that will be used for the toolbar element. For this scenario, use tbPrint.gif from the style\mstr\images folder inside the MicroStrategy Web installation.
-
Click ... next to the text field for Tooltip Description and select mstrWeb.314.
-
Under Select the type of action to be triggered when clicking on this toolbar element, select Command for this toolbar item and enter printPDF.
-
Click Modify next to the text field for Select the feature that will determine whether this toolbar element should be shown and select features is-viewable-report, pdf, enable-pdf and pdf-print.
-
Click OK.
-
Enter onselectionchange in the text field for Type in the listener method.
-
Click Next.
-
Click Finish. The new toolbar element tb_tbPrint (Print) gets added under the new toolbar ReportPublishToolbarModel.
-
-
Right-click ReportPublishToolbarModel and select New Toolbar Element. This launches the New Toolbar Element wizard. The following steps create the toolbar element for PDF.
-
Click Browse and select the icon that will be used for the toolbar element. For this scenario, use tbPDF.gif from the style\mstr\images folder inside the MicroStrategy Web installation.
-
Click ... next to the text field for Tooltip Description and select mstrWeb.1877.
-
Under Select the type of action to be triggered when clicking on this toolbar element, select Command for this toolbar item and enter buttonPDF.
-
Click Modify next to the text field for Select the feature that will determine whether this toolbar element should be shown and select features not-datamart, web-export-to-pdf and enable-pdf.
-
Click OK.
-
Enter ongridselectionschange in the text field for Type in the listener method.
-
Click Next.
-
Click Finish. The new toolbar element tb_tbPDF (PDF) gets added under the new toolbar ReportPublishToolbarModel.
-
-
Right-click ReportPublishToolbarModel and select New Toolbar Element. This launches the New Toolbar Element wizard. The following steps create the toolbar element for Export.
-
Click Browse and select the icon that will be used for the toolbar element. For this scenario, use tbExport.gif from the style\mstr\images folder inside the MicroStrategy Web installation.
-
Click ... next to the text field for Tooltip Description and select mstrWeb.246.
-
Under Select the type of action to be triggered when clicking on this toolbar element, select Command for this toolbar item and enter export.
-
Click Modify next to the text field for Select the feature that will determine whether this toolbar element should be shown and select features enable-export and show-report-export-tool.
-
Click OK.
-
Enter ongridselectionschange in the text field for Type in the listener method.
-
Click Next.
-
Click Finish. The new toolbar element tb_tbExport (Export) gets added under the new toolbar ReportPublishToolbarModel.
-
-
Click on Menus to expand the list of menus used in MicroStrategy Web.
-
Right-click any DHTML Menu (indicated by the letter D) and select New Menu.
-
Enter RptPublishMenu as the name for the menu and click OK.
-
Right-click RptPublishMenu and select New Menu Element. This launches the New Menu Element wizard. The following steps create the menu element for Print.
-
Click ... next to the text field for Type in a name for new menu element and select mstrWeb.2109.
-
Under Select the type of action to be triggered when clicking on this menu element, select Command for this menu item and enter printPDF.
-
Click Modify next to the text field for Select the feature that will determine whether this menu element should be shown and select features is-viewable-report, pdf, enable-pdf and pdf-print.
-
Click OK.
-
Enter onselectionchange in the text field for Type in the listener method.
-
Click Next.
-
Click Finish. The new menu element MenuControlModel (Print...) gets added under the new menu RptPublishMenu.
-
-
Right-click RptPublishMenu and select New Sub-Menu Element. This launches the New Menu Element wizard. The following steps create the submenu for Export.
-
Click ... next to the text field for Type in a name for new sub-menu and select mstrWeb.246.
-
Select Use existing menu and select RptHomeExportMenu from the drop-down menu.
-
Click Modify next to the text field for Select the feature that will determine whether this menu element should be shown and select features is-viewable-report and show-report-export-menu.
-
Click OK.
-
Enter onReportReload in the text field for Type in the listener method.
-
Select RptExportMenuBlockLoader from the drop-down menu for Style.
-
Click ... next to the text field for Layout and select HomeExportMenuLayout.xml (located in the WEB-INF/xml/layouts/blocks folder of the MicroStrategy Web installation) .
-
Click Next.
-
Click Finish. The new submenu element SubMenuControlModel (Export) gets added under the new menu RptPublishMenu.
-
-
Click on Ribbons to expand the list of ribbons used in MicroStrategy Web.
-
Right-click report and select New Ribbon.
-
Enter Publish as the name for the ribbon and click OK. This ribbon opens in the right frame for editing.
-
Enter Publish in the text field for Descriptor.
-
Select ReportPublishToolbarModel from the drop-down menu for Select a Toolbar.
-
Select RptPublishMenu from the drop-down menu for Select a Menu.
-
Click Modify next to the text field for Enable this toolbar for this ribbon only if the following feature(s) is(are) available and select feature menu-toolbar.
-
Click OK.
-
Save your changes.
-
Launch MicroStrategy Web to view the customization.
See Also
-
Fundamentals of Customization: Application Page Structure