Strategy ONE
Removing Individual Items from the Navigational or Path Information
Most of the MicroStrategy Web Pages, display navigational or path information that helps in identifying the location of a folder or a report in the project. It also includes individual items such as the Home icon for going to the Desktop page and left/right-pointing arrows (back and forward buttons) for navigating the folder hierarchy, and so on.
In this customization scenario, you remove the left/right-pointing arrows in the navigational or path information for a Folder Browsing page as well as for the Report Execution page.
-
Removing the Navigational or Path Information for a Folder Browsing Page
-
Removing the Navigational or Path Information for a Report Execution Page
Removing the Navigational or Path Information for a Folder Browsing Page
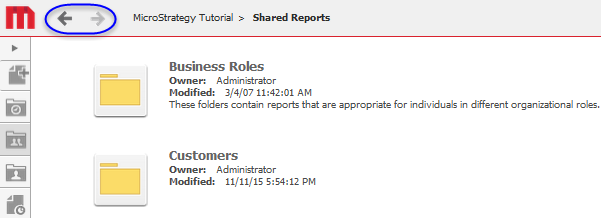
In this customization scenario, you remove the left/right-pointing arrows (back and forward buttons) in the navigational or path information from the Shared Reports page. You accomplish this by modifying the layout definition file for the style that renders this information.
Before customization:
After customization:

This customization can be accomplished using either of the following methods:
Deploying the plug-in provided with MicroStrategy SDK
MicroStrategy SDK provides a plug-in (ZIP file) that can simply be extracted to thepluginsfolder to view the customization in MicroStrategy Web. The following steps guide you in locating the plug-in and deploying it.
-
Access the plug-in: JSP version or ASP .NET version.
-
Extract the plug-in to the plugins subfolder inside the MicroStrategy Web installation folder.
-
Launch MicroStrategy Web to view the customization.
Using the Web Customization Editor to create a plug-in
MicroStrategy SDK provides a Web Customization Editor that can be used to create a customization plug-in. The following steps guide you in creating the plug-in and deploying it.
-
Click on MicroStrategy Web Configuration inside the Application Settings view to expand the hierarchical tree. The expanded list comprises the different settings that can be modified to perform customizations.
-
Click on Styles to expand the list of styles used in MicroStrategy Web.
-
Double-click the FolderBrowsingPathStyle style.
-
Click the Style Layouts tab at the bottom in the right frame.
-
Click the Edit Layout button.
-
Click the Yes button in the prompt to edit FolderBrowsingPathLayout.xml.
-
To prevent the left/right-pointing arrows (back and forward buttons) from being displayed, comment out or delete the code shown in bold below.:
...
<mstrlayout:slot name="navigationButtons">
<div class="mstrPathIcons">
<mstrlayout:render name="HomeButton"/>
<!-- Commenting to prevent display -->
<!--
<mstrlayout:render name="BackButton"/>
<mstrlayout:render name="ForwardButton"/>
-->
<!-- End of comments -->
<mstrlayout:render name="ParentUpButton"/>
</div>
...
-
Save your changes.
-
Launch MicroStrategy Web to view the customization.
Removing the Navigational or Path Information for a Report Execution Page
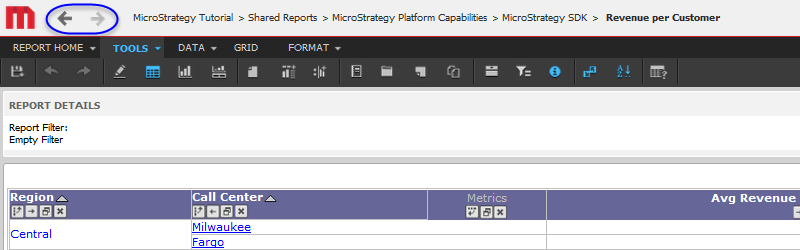
In this customization scenario, you remove the left/right-pointing arrows (back and forward buttons) in the navigational or path information from the Report Execution page. You accomplish this by modifying the layout definition file for the style that renders this information.
Before customization:
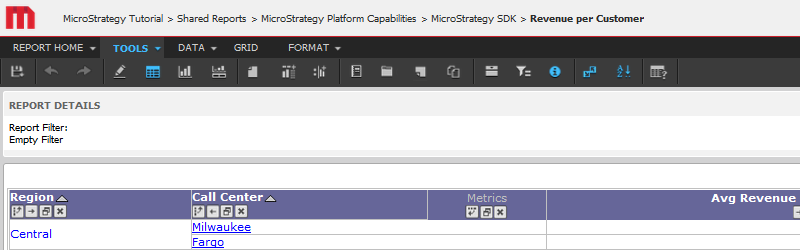
After customization:
This customization can be accomplished using either of the following methods:
Deploying the plug-in provided with MicroStrategy SDK
MicroStrategy SDK provides a plug-in (ZIP file) that can simply be extracted to thepluginsfolder to view the customization in MicroStrategy Web. The following steps guide you in locating the plug-in and deploying it.
-
Access the plug-in: JSP version or ASP .NET version.
-
Extract the plug-in to the plugins subfolder inside the MicroStrategy Web installation folder.
-
Launch MicroStrategy Web to view the customization.
For specific settings that affect whether customization changes are applied automatically or require a restart of the Web server, see Applying customization changes to the application.
Using the Web Customization Editor to create a plug-in
MicroStrategy SDK provides a Web Customization Editor that can be used to create a customization plug-in. The following steps guide you in creating the plug-in and deploying it.
-
Click on MicroStrategy Web Configuration inside the Application Settings view to expand the hierarchical tree. The expanded list comprises the different settings that can be modified to perform customizations.
-
Click on Styles to expand the list of styles used in MicroStrategy Web.
-
Double-click the ReportPathStyle style.
-
Click the Style Layouts tab at the bottom in the right frame.
-
Click the Edit Layout button.
-
Click the Yes button in the prompt to edit PathLayout.xml.
-
To prevent the left/right-pointing arrows (back and forward buttons) from being displayed, comment out or delete the code shown in bold below.:
...
<mstrlayout:slot name="navigationButtons">
<div class="mstrPathIcons">
<mstrlayout:render name="HomeButton"/>
<!-- Commenting to prevent display -->
<!--
<mstrlayout:render name="BackButton"/>
<mstrlayout:render name="ForwardButton"/>
-->
<!-- End of comments -->
<mstrlayout:render name="ParentUpButton"/>
</div>
...
-
Save your changes.
-
Launch MicroStrategy Web to view the customization.
For specific settings that affect whether customization changes are applied automatically or require a restart of the Web server, see Applying customization changes to the application.
See Also
-
Fundamentals of Customization: Application Page Structure