Strategy ONE
Adding Custom Toolbar Items
In this scenario, you perform two customizations:
-
Adding a custom toolbar item that uses existing event and arguments
-
Adding a custom toolbar item that accesses pages outside of MicroStrategy Web
Adding a custom toolbar item that uses existing event and arguments
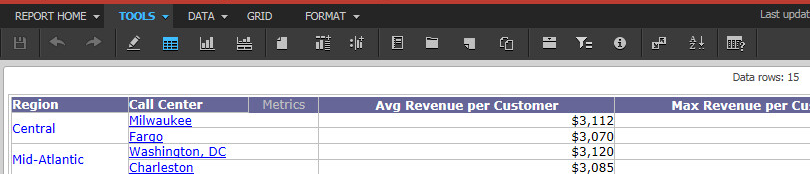
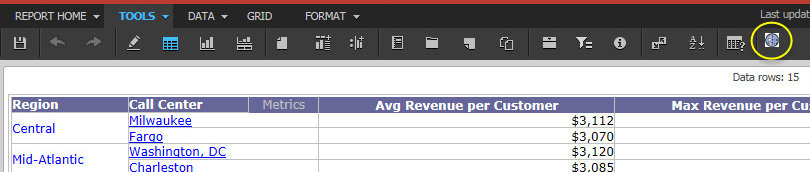
In the first customization of this scenario, you create a new toolbar item on the Report Execution page. When it is clicked, this new toolbar item opens the Preferences Page displaying the grid-related preferences.
Before customization:
After customization:
This customization can be accomplished using either of the following methods:
Deploying the plug-in provided with MicroStrategy SDK
MicroStrategy SDK provides a plug-in (ZIP file) that can simply be extracted to thepluginsfolder to view the customization in MicroStrategy Web. The following steps guide you in locating the plug-in and deploying it.
-
Access the plug-in: JSP version or ASP .NET version.
-
Extract the plug-in to the plugins subfolder inside the MicroStrategy Web installation folder.
-
Launch MicroStrategy Web to view the customization.
Using the Web Customization Editor to create a plug-in
MicroStrategy SDK provides a Web Customization Editor that can be used to create a customization plug-in. The following steps guide you in creating the plug-in and deploying it.
-
Click on MicroStrategy Web Configuration inside the Application Settings view to expand the hierarchical tree. The expanded list comprises the different settings that can be modified to perform customizations.
-
Click on Pages to expand the list of pages used in MicroStrategy Web.
-
Right-click the report (Report Execution) page and select Toolbars->Add Custom Toolbar Elements. This launches the New Toolbar Element wizard.
-
Check the box for toolbar ReportViewToolbarModel.
-
Click Next.
-
Click Browse to select the icon that will be used for the new toolbar item.
-
Enter Open Preferences - Grid Display Section in the text field for Tooltip Description.
-
Select the radio button for An event within MicroStrategy Web.
-
Click Next.
-
To select the event enumeration class, click Browse and enter EnumServletEvents.
-
Select EnumServletEvents from your project and click OK.
-
Select WebEventOpenPreferences from the drop-down menu for Event to trigger when menu element is selected.
-
Click Add in the EventsArguments section.
-
Select WebEventArgumentPreferenceGroup from the drop-down menu and click OK.
-
Enter grid in the Argument Value text field.
-
Click Next.
-
Click Finish.
-
Launch MicroStrategy Web to view the customization.
Adding a custom toolbar item that accesses pages outside of MicroStrategy Web
In addition to being able to add toolbar items that access functionality in MicroStrategy Web, you can also create toolbar items that access any HTML page or web site. This feature is especially useful if you are embedding MicroStrategy Web in a different application or want to provide links to your company’s web site from within MicroStrategy Web. In the second customization of this scenario, you add a custom toolbar item that will open the search capability of the MicroStrategy Web site.
Before customization:
After customization:

This customization can be accomplished using either of the following methods:
Deploying the plug-in provided with MicroStrategy SDK
MicroStrategy SDK provides a plug-in (ZIP file) that can simply be extracted to thepluginsfolder to view the customization in MicroStrategy Web. The following steps guide you in locating the plug-in and deploying it.
-
Access the plug-in: JSP version or ASP .NET version.
-
Extract the plug-in to the plugins subfolder inside the MicroStrategy Web installation folder.
-
Launch MicroStrategy Web to view the customization.
Using the Web Customization Editor to create a plug-in
MicroStrategy SDK provides a Web Customization Editor that can be used to create a customization plug-in. The following steps guide you in creating the plug-in and deploying it.
-
Click on MicroStrategy Web Configuration inside the Application Settings view to expand the hierarchical tree. The expanded list comprises the different settings that can be modified to perform customizations.
-
Click on Pages to expand the list of pages used in MicroStrategy Web.
-
Right-click the report (Report Execution) page and select Toolbars->Add Custom Toolbar Elements. This launches the New Toolbar Element wizard.
-
Check the box for toolbar ReportViewToolbarModel.
-
Click Next.
-
Click Browse to select the icon that will be used for the new toolbar item.
-
Enter Search MicroStrategy Web Site in the text field for Tooltip Description.
-
Select the radio button for A hyperlink to a different page and enter http://www.microstrategy.com/search/index.asp?search=sdk in the text field next to it.
-
Click Next.
-
Click Finish.
-
Launch MicroStrategy Web to view the customization.
See Also