Strategy ONE
Displaying Objects Selected in a Report
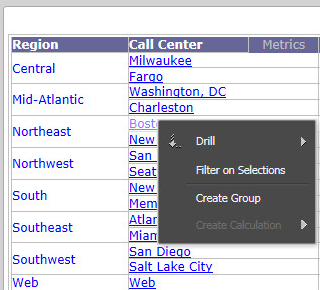
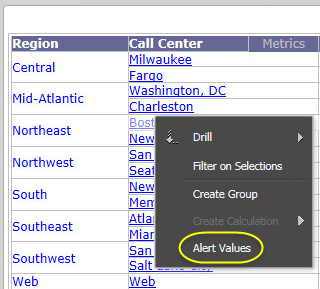
This customization scenario uses JavaScript and context menus to display the selections you make by clicking a report object such as attribute or metric elements in a report grid. By default, when you click an attribute or a metric element, that cell gets highlighted. In this scenario, you can right-click the highlighted cell and select Alert Values from the context menu to see the selection. This scenario also works for multiple selections of report objects.
Before customization:
After customization:

This customization can be accomplished using either of the following methods:
Deploying the plug-in provided with MicroStrategy SDK
MicroStrategy SDK provides a plug-in (ZIP file) that can simply be extracted to thepluginsfolder to view the customization in MicroStrategy Web. The following steps guide you in locating the plug-in and deploying it.
-
Access the plug-in: JSP version or ASP .NET version.
-
Extract the plug-in to the plugins subfolder inside the MicroStrategy Web installation folder.
-
Launch MicroStrategy Web to view the customization.
Using the Web Customization Editor to create a plug-in
MicroStrategy SDK provides a Web Customization Editor that can be used to create a customization plug-in. The following steps guide you in creating the plug-in and deploying it.
-
Click on MicroStrategy Web Configuration inside the Application Settings view to expand the hierarchical tree. The expanded list comprises the different settings that can be modified to perform customizations.
-
Click on Pages to expand the list of pages used in MicroStrategy Web.
-
Double-click the report (Report Execution) page.
-
Click the Template Properties tab at the bottom in the right frame to make changes to the Default page template.
-
Right-click the links page section and select Edit current file.
-
Click Yes in the confirmation dialog. Report_Links (JSP or ASP .NET) opens for editing.
-
Add the following line of code as the last line in the file.
J2EE environment:
<web:resource type="custom-javascript" name="alertvalues.js" />
.NET environment:
<web:resource runat="server" type="custom-javascript" name="alertvalues.js" />
-
Save your changes.
-
Navigate to MicroStrategy Web Configuration->Context Menus->reportCellContextMenus->default.
-
Right-click default and select New Shortcut.
-
Enter alertValues in the text field as the name for the shortcut and click OK.
-
New shortcut alertValues opens in the Shortcut Attributes editor on the right for editing. Note that this new shortcut alertValues is displayed as a new shortcut under the shortcut-list default.
-
Enter Alert Values in the Descriptor text field.
-
Click the Advanced Properties tab at the bottom in the Shortcut Attributes editor.
-
Enter var grid = microstrategy.findBone(microstrategy.activeCXMenu); if (grid && grid.isGrid) grid.alertValues() in the text field for Onclick.
-
Enter var grid = microstrategy.findBone(microstrategy.activeCXMenu); if(grid && grid.isGrid)grid.dhtmlEnabledforAlertValues(); in the text field for DHTML Enabled.
-
Save your changes.
-
Exit the Web Customization Editor.
-
Create a subfolder, javascript, inside the plugins\pluginName subfolder inside the MicroStrategy Web installation folder. For example: plugins\DisplayingObjectsSelectedReport\javascript.
-
Create a JavaScript file, alertvalues.js, that contains the logic for retrieving the selections in a report grid. The sample, alertvalues.js,contains the entire code for this JavaScript file.
-
Save this custom JavaScript file, alertvalues.js, in the plugins\pluginName\javascript subfolder inside the MicroStrategy Web installation folder. For example: plugins\DisplayingObjectsSelectedReport\javascript.
-
Launch MicroStrategy Web to view the customization.
See Also
-
Scenarios: Customizing Existing Functionality: Adding or Removing Context Menu Items
-
Scenarios: Customizing Existing Functionality: Removing Context Menus
-
Scenarios: Extending Existing or Adding New Functionality: Disabling or Removing Context Menu Items for a Specific Object
-
Scenarios: Extending Existing or Adding New Functionality: Adding Context Menu Items that Display Information about the Object
-
Scenarios: Extending Existing or Adding New Functionality: Adding Context Menu Items Not Implemented by Default