Strategy One
Import Data from a Database
You can import a variety of data sources. See the following example to import data from a database:
-
Create a Mosaic model or right-click an existing Mosaic model and choose Edit.
-
In the Sources tab, click Add Database.
-
All available data source connections are listed in the Sources view.
For more information on data sources including creating your own data source, see Create Data Sources.
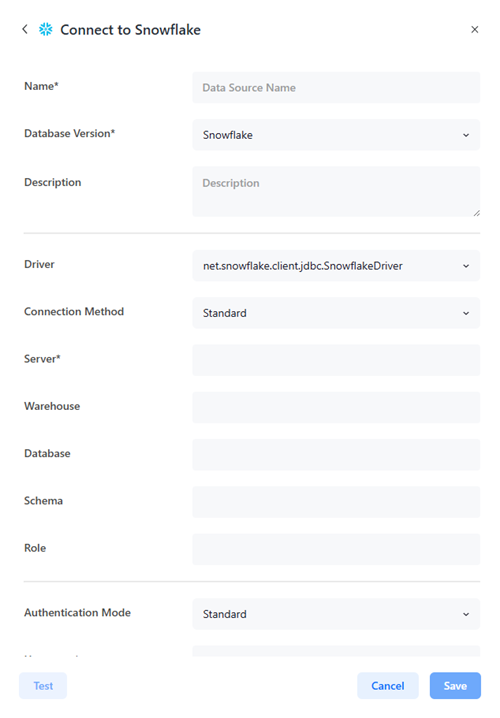
Click here to see an example data source connection with Snowflake.-
Click Add Database.
-
Find and choose Snowflake.
-
Type a Name and optionally type a Description.
-
Expand the Driver drop-down list and choose a driver.
If you choose Other, enter a Connection String and proceed to step i.
-
Expand the Connection Method list and choose Standard or Key Pair.
-
Type your Server name.
-
If you choose the Key Pair connection method, click Select a File in Private Key File, find your file, and click Open.
-
Optionally enter your Private Key File Password, Warehouse, Database, Schema, and Role.
-
Expand the Authentication Mode drop-down list and choose a mode.
If you choose the Key Pair connection method, only Standard authentication is supported.
-
To use a vault connection for your database:
-
Toggle on Use Vault.
-
Expand the Type drop-down list and choose an option.
-
Expand the Vault Connection drop-down list and choose an option.
To create a vault connection, see Create, Edit, and Delete Vault Connections.
-
Expand the Secret Name drop-down list and choose an option.
-
-
Depending on your selections, type a Username, Password, or choose an Authentication Service.
-
Optionally define Advanced Options.
-
Click Test and Save.
-
-
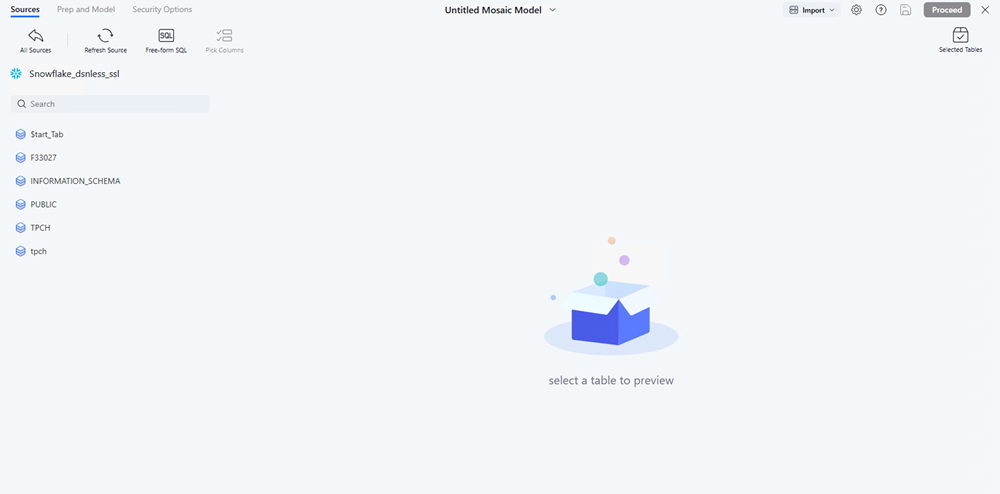
Click a data source connection to connect. The available namespaces display in the Preview page.
-
Expand a namespace to view available tables. To search for a table, type its name in the Search.
-
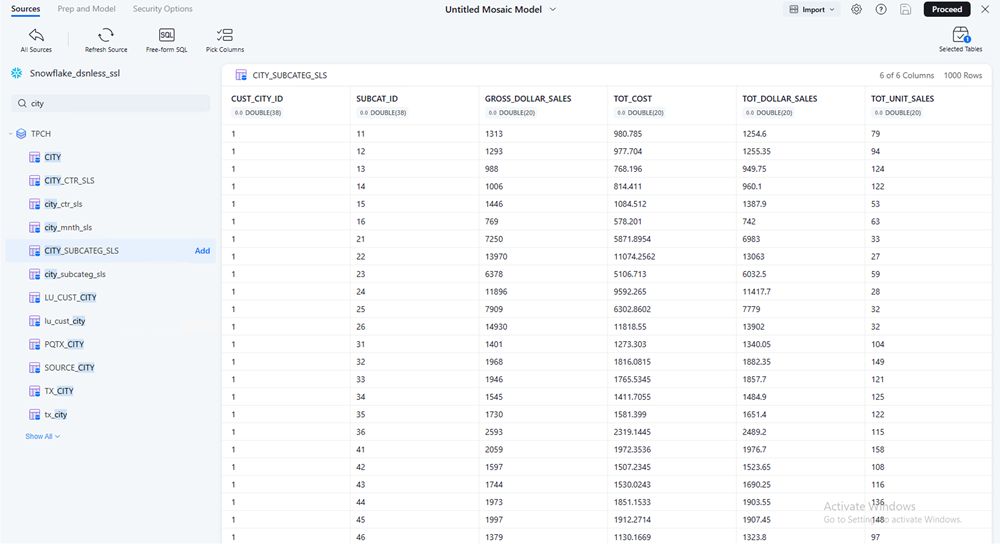
To edit the columns to include or exclude in your Mosaic model, click the View
 toggle next to a column header or click Pick Columns and select the check box next to the columns you want to display.
 -
Add tables to your Mosaic model using one of the following methods:
-
To add a single table to your Mosaic model, hover over a table in the left pane and click Add.
-
To add mutliple tables, hold
ShiftorCtrl, right click a table, and click Add [X] tables.Starting in Strategy One (September 2025), hover over a table, select the check box next to the table, and click Add.
-
-
To import tables from another database, click All Sources and repeat steps 2 to 8.
-
After you choose your tables, click Proceed.
-
A build progress dialog displays in the bottom left corner. If the model build time is estimated to be more than 10 minutes, your model is saved automatically.
If you are creating a new model and auto save is triggered, click Edit
 to manually change the save folder, name, description, and certify status.
 -
View and choose suggestions, view object logical relationships, or automatically create attributes and metrics.
-
Click Save, Save as, or Publish.
-
If you Save or Save as your Mosaic model:
-
Type a Name and Description.
-
Choose a Save in folder location.
-
Optionally, select the check box next to Certify Mosaic Model.
-