Strategy One
Manage Source Tables and Mosaic Models
Starting in Strategy One (December 2025), you can link attributes between Mosaic models. Use the Selected Data panel to manage your tables and models.
Mosaic model links is a preview feature. Contact Strategy Support to enable it.
The Source Tables panel allows you to manage tables and Mosaic models added in the modeling stage. After you complete the table preview and decide to add a table into the model, its added under Newly Added Tables.
Access Source Tables Panel
-
Click Proceed to go to the modeling page.
-
To add more tables and Mosaic models, return to the Data Source view:
-
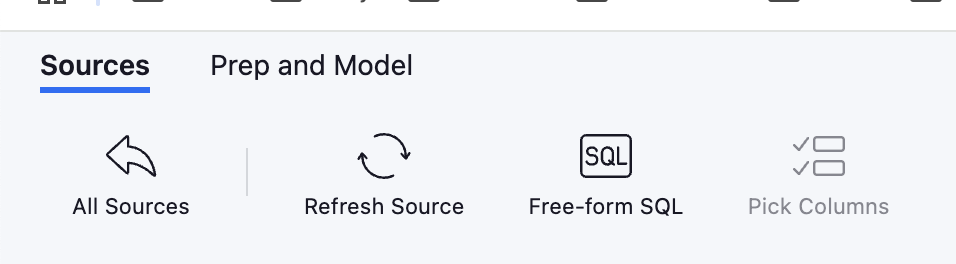
In the top left, click Sources.
-
Click All Sources and Manage Tables.
-
-
To add more data from your available sources, click Add Tables or Add Models and connect to your data.
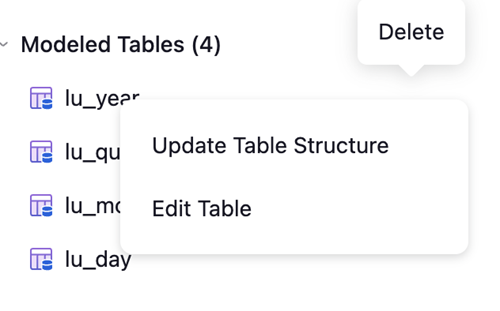
Once you return to the Sources view, the Selected Data panel displays your previously imported tables under Modeled Tables.
-
Hover over the table in the left pane and click Add.
-
Hover over a table and optionally click one of the following options:
-
Delete
-
Update Table Structure (Only available for database tables)
-
Edit Table (Only available for supported sources)
-
-
Click Proceed.
Manage Source Tables and Models
-
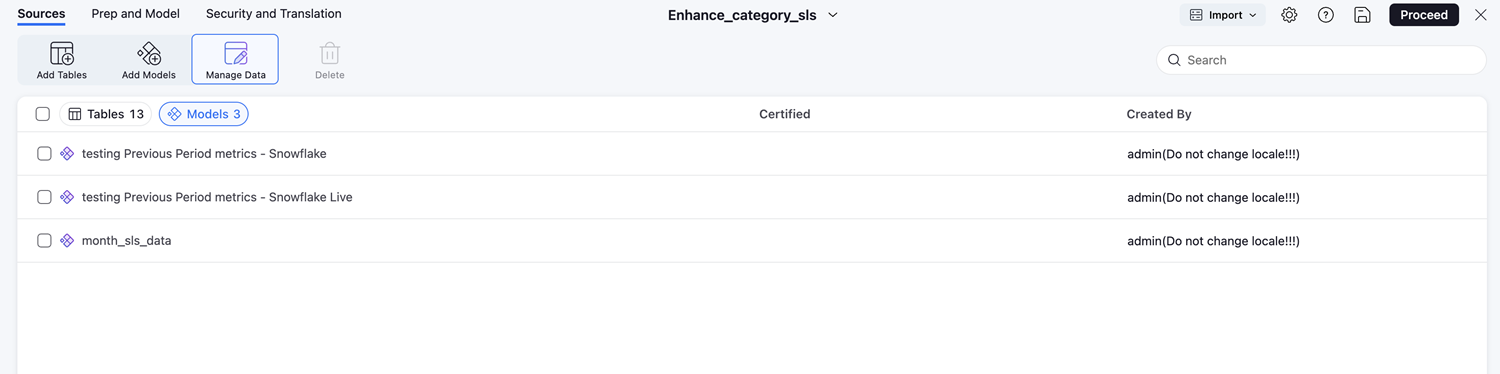
In the Sources page, click Manage Data.
Your source tables display. Newly added tables display New and newly updated tables display Updated.
-
To filter your view based on data type, click Tables or Models in the top of the grid.
-
Hover over your data or select the checkbox next to it to Edit, Regenerate, or Delete.
-
Close the Manage Data dialog.