Strategy One
Exposing the SAP S/4HANA CDS View
SAP S/4HANA Core Data Services (CDS) views are built on existing database tables and views to provide an efficient way of date modeling.
There are several whitelisted CDS views pre-delivered with SAP S/4HANA Cloud, which can be utilized to retrieve data from the SAP S/4HANA Cloud tenant.
SAP S/4HANA Cloud also provides user with the flexibility for creating their own custom CDS views, combining various whitelisted CDS views, to meet their specific requirement of retrieving data.
These custom CDS views can be easily exposed as OData Service (External API), which can then be utilized to fetch data from SAP S/4HANA Cloud.
To create a custom CDS view on SAP S/4HANA Cloud, see Create and Expose a Custom CDS View.
Example
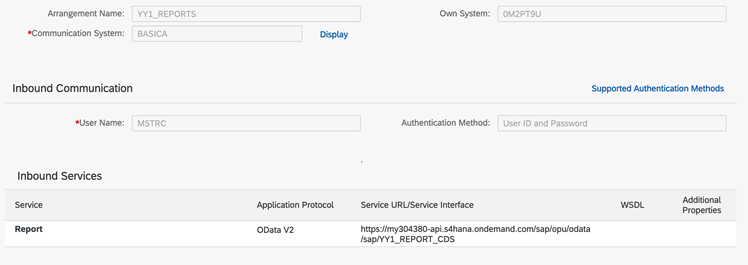
You exposed the CDS view with communication arrangement (Basic Authentication).
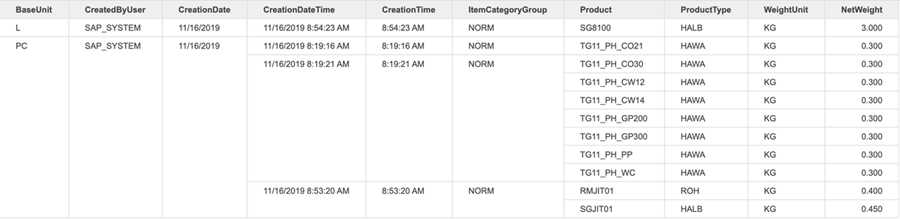
You created a custom CDS view on the service, I_Product, with certain columns specific to the product creation time, date, and details regarding type and weight.

Now take a look at how the data is displayed on SAP S/4HANA Cloud.
The CreationDateTime column displays the data in a raw format. This may not be ideal for an analyst presenting the data.

See how you can utilize this specific CDS view with the Strategy SAP S/4HANA connector.
- Log into Strategy Web.
- Add external data by using the SAP S/4HANA connector.
-
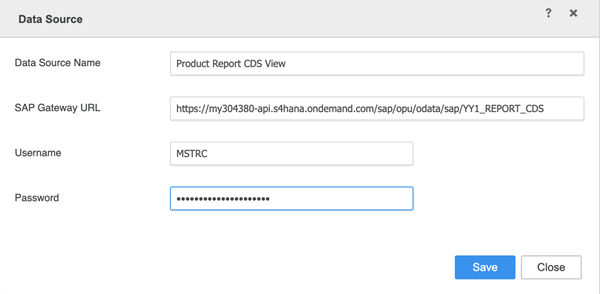
Add a new connection using the Data Source dialog.
-
Click on the newly created connection.
-
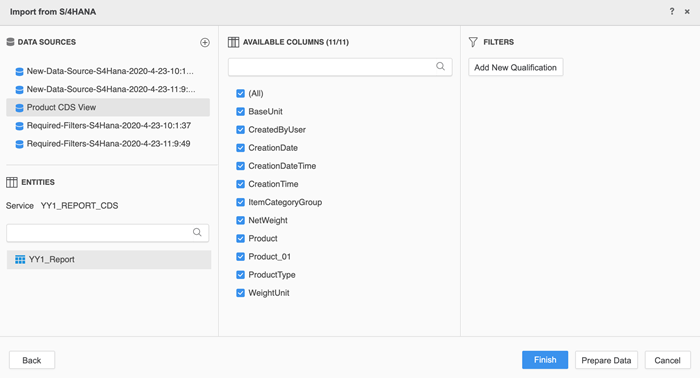
Click Prepare Data to see how the data looks inside this CDS view.
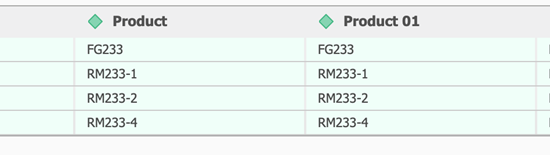
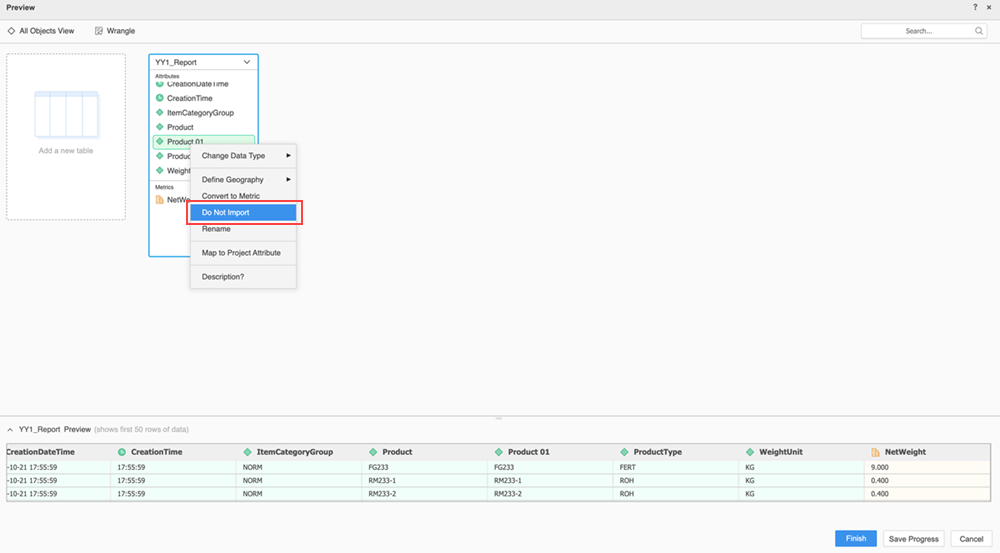
Notice that the Product column is duplicated.
-
To remove the duplicate column, in the Preview dialog, right-click on Product 01 > Do Not Import.
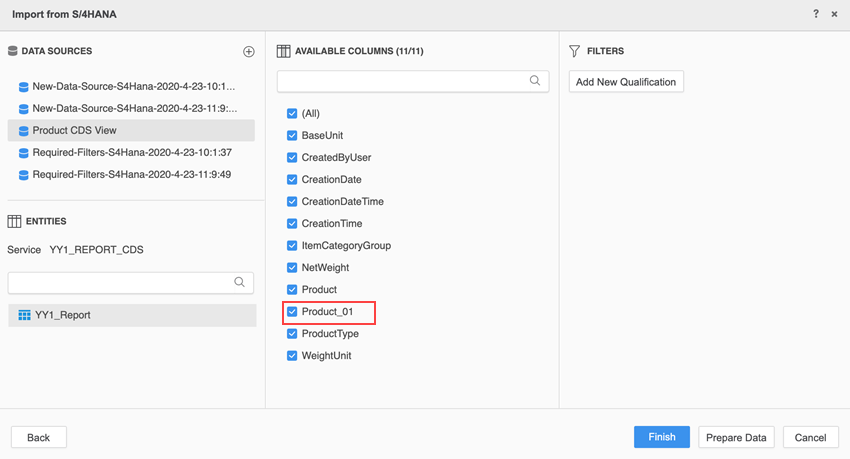
Or in the Import from S/4HANA dialog, under Available Columns, deselect the Product 01 checkbox.
After updating the table in the Preview dialog, the data looks like this:

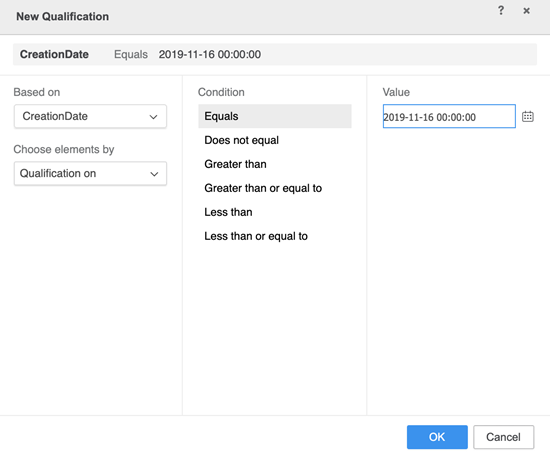
Now you can set a filter to fetch only the products that are created on 2019-11-16.
- Click Add New Qualification to set a new filter.
- From the Based on drop-down, select CreationDate.
- Select the Equals condition.
- In the Value field, enter 2019-11-16 00:00:00.
-
Click OK.
-
Click Refresh.
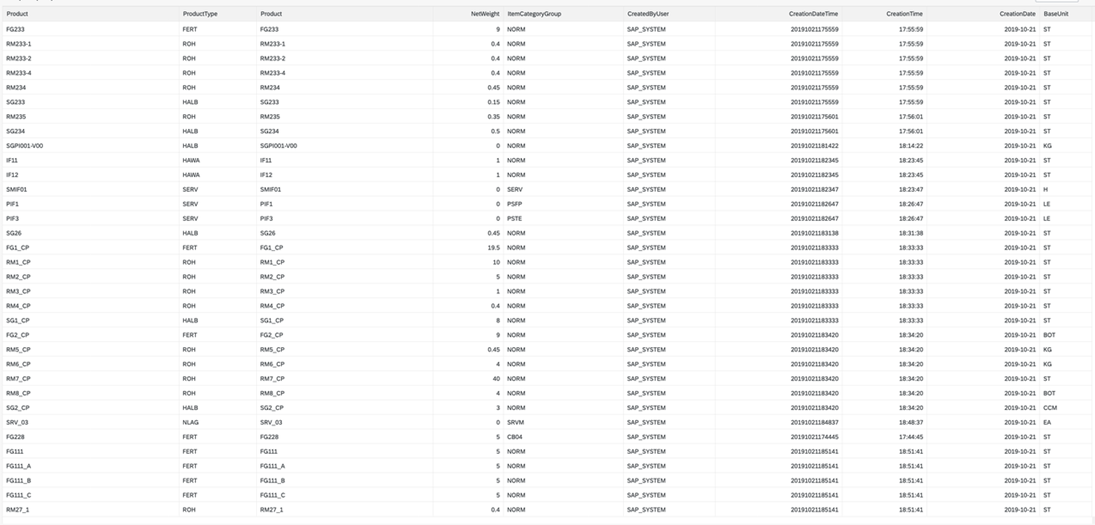
The table is updated with only the rows created on 2019-11-16.

- Click Finish.
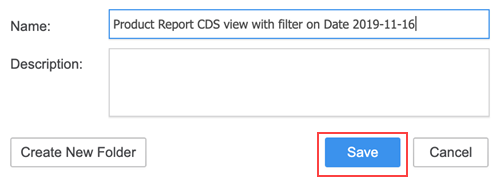
-
Enter a name for your cube and click Save.
 :
:
You can use your published cube to create a dashboard
In summary, this is the view before importing to Strategy:
This is the view after importing to Strategy: