Strategy One
Preview Data and Specify Import Options
Strategy displays a preview of your data while importing. You can select options to modify the data before or after importing it.
Strategy Workstation automatically designates data columns in your file as attributes or metrics based on the values contained in each data column. Attributes appear with a green attribute icon  . Metrics appear with an orange metric icon
  . A geographical attribute for locations such as cities, latitude, longitude, etc., appears with marker
 ![]() icon. You can manually designate data columns as attributes or metrics before the dataset is saved.
icon. You can manually designate data columns as attributes or metrics before the dataset is saved.
To specify data import options using the Preview page
- Create a blank dashboard or open an existing one.
-
Choose Add Data
 > New Data to import data into a new dataset.
or
In the Datasets panel, click More
 next to the dataset name and choose Edit Dataset to add data to the dataset. The Preview Dialog opens. Click Add a new table.
The Data Sources dialog opens.
- Select the data you want to import, according to your data source type.
- Once you have selected the data you want to import, click Prepare Data.
- If you added a table that you do not want to import, you can remove it. In the top pane, click the drop-down arrow at the top of the table and select Delete.
-
Click the drop-down arrow for the table you want to modify and choose Parse. The Parse Your Data Dialog opens. If you are importing .csv or .txt files, see How to Import and Parse .csv and .txt Files.
or
If you are importing from a database, the Parse option is not available. Instead, go to step 10.
-
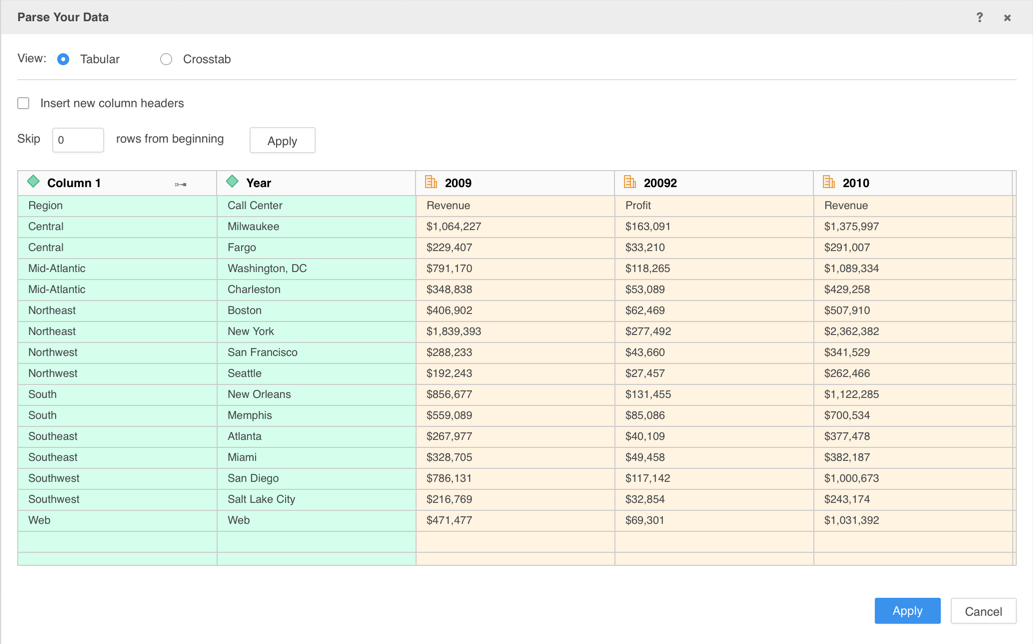
Select Table to import data from a simple tabular layout, where each column in the table contains a separate attribute or metric. This is also the default option. Strategy Workstation uses the first row of data as headers for the imported data columns. The column headers are the names of the attributes and metrics that you define. Go to step 6.
or
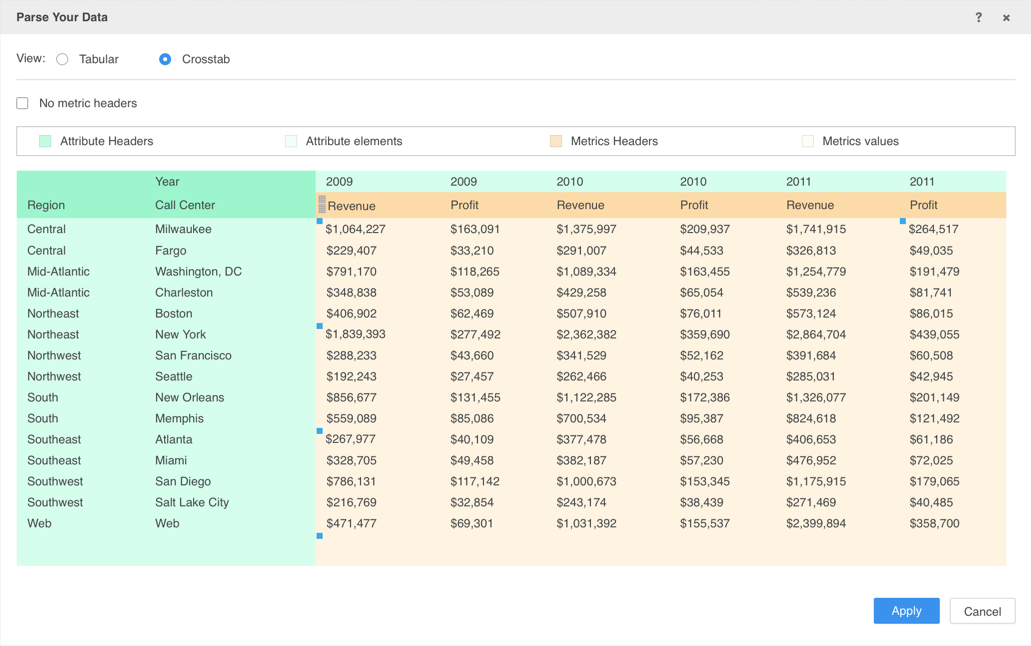
Select Crosstab to import data from a crosstab layout, with attributes and metrics stored in both table rows and columns. A preview of your data appears. Metrics, attributes, and metric header names appear in different colors. Use the legend to view the colors for each data type. Go to step 7.
- To add column headers to your data, select the Insert new column headers checkbox. The columns are given the default names of Column 1, Column 2, etc. Go to step 8.
-
Specify which cells contain metric header information. If there are metric headers in the file, clear the No Metric Headers checkbox. Drag the edges of the yellow Metric Header block area to highlight the cells that contain metric header data.
or
If there are no metric headers in the file, select the No Metric Headers checkbox.
- Click Apply.
- If you added default column headers, you can rename them. Right-click the column in the top pane, select Rename, enter the new column name, and press Enter.
-
Click on the table that contains a data column you want to define. A preview of the table's data appears at the bottom of the page.
Click All Objects View to view, search, and define objects across all tables on the All Objects View dialog. In addition, you can convert multiple attributes to metrics, or multiple metrics to attributes.
- To exclude a column from import, right-click it and choose Do Not Import.
- To redefine a data column as an attribute or metric, right-click the column and choose Convert to Attribute or Convert to Metric.
-
To assign geo roles to columns, right-click the column and choose Define Geography. See Assign Geo Roles for Map Visualizations During Import for more information.
The Define Geography option is not available for data imported from Hadoop.
- To change the data type of the column, right-click the column and choose Change Data Type. Then, select the data type to use (for example, Integer, Float, Email, etc.).
- Each column in a table imports as a separate attribute. If your data contains different attribute forms of the same attribute saved in separate columns, you can create a multi-form attribute to combine the forms into a single attribute.
- Click Finish.
The Do Not Import option is not available for data imported by building or typing a query.
Related Topics
Partition Large Datasets and Create Search Indexes
Refine Data Quality Before Importing