Strategy One
Create an ODBC Connection
Starting in Strategy One (February 2026), you can use Entra ID authentication in your SQL server connection.
- Workstation
- Library
Create a Data Source Using Standard Authentication
-
Open the Workstation window.
-
Connect to an environment.
-
In the Navigation pane, click
 next to Data Sources.
 -
Search for and choose Microsoft SQL Server from the data source list.
-
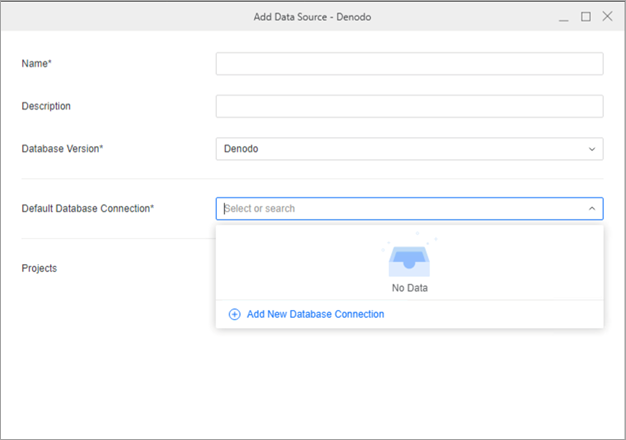
In the Default Database Connection drop-down list , click Add New Database Connection.
-
Type a Name for the database connection.
-
In the Driver drop-down list, choose the Progress SQL Server ODBC driver.
-
Click the Basic tab. .
-
Type a Host Name, Port Number, and Database.
-
In the Authentication Mode drop-down list, choose your preferred authentication mode.
-
If you choose Standard in Authentication Mode, in the Default Database Login drop-down list:
-
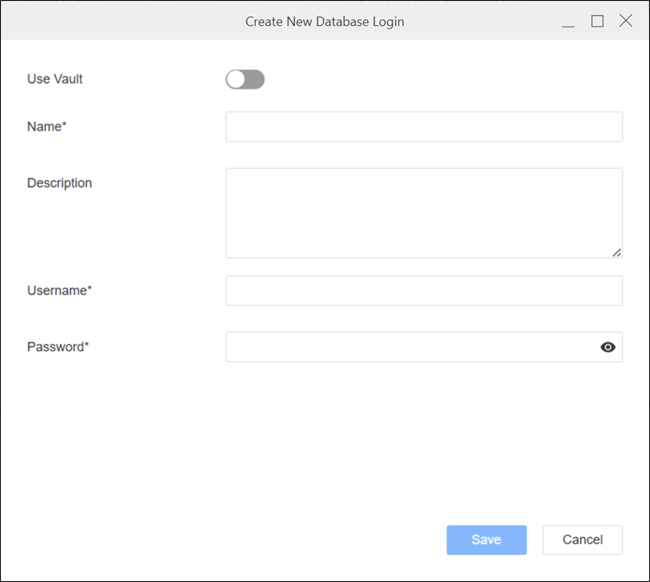
Click Add New Database Login.
-
Type a Name, Username, and Password for the new database login.
-
Click Save.
-
-
Optionally click the Security tab and configure TLS.
-
Click Save.
-
In the Add Data Source dialog, enter a Name, Database Version, and choose Projects for further data manipulation.
-
Click Save.
Create a Data Source Using Entra ID Authentication
Before performing the following steps, setup Entra ID authentication for SQL server using the steps in Tutorial: Set up Microsoft Entra authentication for SQL Server with app registration.
-
Open the Workstation window.
-
Connect to an environment.
-
In the Navigation pane, click
next to Data Sources. -
Search for and choose Microsoft SQL Server from the data source list.
-
In the Default Database Login drop-down list, click Add New Database Connection.
-
Type a Name for the new database connection.
-
In the Driver drop-down list, choose the Progress SQL Server ODBC driver.
-
Click the Basic tab.
-
Type a Host Name, Port Number, and Database.
-
In the Authentication Mode drop-down list, choose Microsoft Entra ID.
-
In Default Database Login, select the database login that contains your Microsoft Entra ID credentials or click Add New Database Login and enter the following:
-
Type a friendly name for the login.
-
Type your Microsoft Entra ID Username and Password.
-
Click Save.
-
-
Click the Security tab and toggle on Use TLS Encryption.
-
In Verification Method, choose an option from the following:
-
No Verification Method: Choose this option if you do not want any verification of server's identity. This option is most often used for development environments.
-
Public Connection: Choose this option for connections that are made over a public network that do not require additional security measures.
-
Private Connection: Choose this option to use a TLS certification from Microsoft Entra ID:
-
Save your Microsoft Entra ID certificate file to an accessible location.
-
Click Select a File.
-
Find your Entra ID certificate file and click Open.
-
Click Save.
-
-
-
Click Save.
-
In the Add Data Source dialog, enter a Name, Database Version, and choose Projects for further data manipulation.
-
Click Save.
Create a Data Source Using OAuth Authentication
Before performing the following steps, setup Entra ID authentication for SQL server using the steps in SQL Server Microsoft Entra ID Authentication Setup.
-
Open the Workstation window.
-
Connect to an environment.
-
In the Navigation pane, click
next to Data Sources. -
Search for and choose Microsoft SQL Server from the data source list.
-
In the Default Database Login drop-down list, click Add New Database Connection.
-
Type a Name for the new database connection.
-
In the Driver drop-down list, choose the Progress SQL Server ODBC driver.
-
Click the Basic tab.
-
Type a Host Name, Port Number, and Database.
-
In the Authentication Mode drop-down list, choose OAuth.
-
In Authentication Service, choose an existing authentication service or click Add New Authentication Service.
For more information, see Manage OAuth Enterprise Security with Identity and Access Management (IAM) Objects.
Parameters such as Client ID, Client Secret, Directory (tenant) ID, and Scope can be found in SQL Server Microsoft Entra ID Authentication Setup.
-
In Scope, enter
https://database.windows.net/user_impersonation. -
Optionally click the Security tab and configure TLS.
-
Click Save.
-
In the Add Data Source dialog, enter a Name, Database Version, and choose Projects for further data manipulation.
-
Click Save.
Import Data Using Your Microsoft SQL Server Data Source
-
Open the Workstation window.
-
Connect to an environment.
-
In the Navigation pane, click
next to Datasets. -
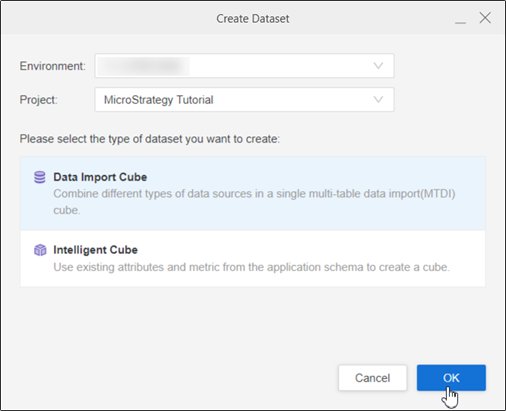
Choose a Project and select Data Import Cube.
-
Click OK.
-
In Data Catalog, click the SQL Server data source you created, choose a namespace, and click Connect.
-
Expand drop-down list next to the namespace and double-click a table to add it to the right pane.
-
Click Preview Data to modify your data or click Save.
-
In Library, choose Create New > Dashboard.
-
Choose a project from the Create Dashboard in drop-down list.
-
Click Blank Dashboard.
-
In the Datasets panel, click New Data.
-
Click
 next to Data Catalog.
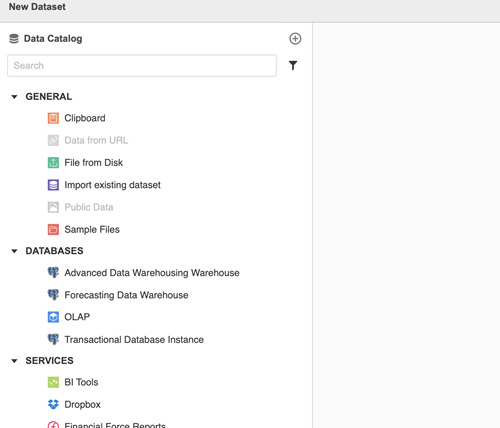
-
Search for and choose Microsoft SQL Server from the data source list.
-
In Default Database Connection, click Add New Database Connection.
-
In the Driver drop-down list, choose the Progress SQL Server ODBC driver.
-
Click the Basic tab.
-
Type a Host Name, Port Number, and Database.
-
From the Authentication Mode drop-down list, choose an option:
Standard
-
Click Add New Database Login.
-
Type your Microsoft SQL Server Username and Password.
-
To use a vault connection, toggle on Use Vault and choose your Type and Vault Connection.
-
Click Save.
Microsoft Entra ID
Setup Entra ID authentication for SQL server using the steps in SQL Server Microsoft Entra ID Authentication Setup.
-
Click Add New Database Login.
-
Type your Microsoft SQL Server Username and Password.
-
To use a vault connection, toggle on Use Vault and choose your Type and Vault Connection.
-
Click Save.
-
Click the Security tab and toggle on Use TLS Encryption.
-
In Verification Method, choose an option from the following:
-
No Verification Method: Choose this option if you do not want any verification of server's identity. This option is most often used for development environments.
-
Public Connection: Choose this option for connections that are made over a public network that do not require additional security measures.
-
Private Connection: Choose this option to use a TLS certification from Microsoft Entra ID:
-
Save your Microsoft Entra ID certificate file to an accessible location.
-
Click Select a File.
-
Find your Entra ID certificate file and click Open.
-
Click Save.
-
-
OAuth
Follow the Microsoft SQL Server official documentation to Set up Microsoft Entra authentication for SQL Server with app registration.
-
In Authentication Service, choose an existing authentication service or click Add New Authentication Service.
For more information, see Manage OAuth Enterprise Security with Identity and Access Management (IAM) Objects.
Parameters such as Client ID, Client Secret, Directory (tenant) ID, and Scope can be found in SQL Server Microsoft Entra ID Authentication Setup.
-
In Scope, enter
https://database.windows.net/user_impersonation. -
Click the Security tab and toggle on Use TLS Encryption.
-
In Verification Method, choose an option from the following:
-
No Verification Method: Choose this option if you do not want any verification of server's identity. This option is most often used for development environments.
-
Public Connection: Choose this option for connections that are made over a public network that do not require additional security measures.
-
Private Connection: Choose this option to use a TLS certification from Microsoft Entra ID:
-
Save your Microsoft Entra ID certificate file to an accessible location.
-
Click Select a File.
-
Find your Entra ID certificate file and click Open.
-
Click Save.
-
-
-
-
Click Save.
-
Type a Name.
-
Click Save.
-
In Data Catalog, click the Microsoft SQL Server data source you created, choose a namespace, and click Connect.
-
Expand the drop-down list next to the namespace and double-click a table to add it to the right pane.
-
Click Preview Data to modify your data or click Save.
-
Create your dashboard using your imported data.