Strategy One
Manage Server Access
Prerequisites
You must have the
Manage Server Access
- Open the Workstation window.
- In the Navigation pane, click Environments.
- Right-click a connected environment and choose Properties.
-
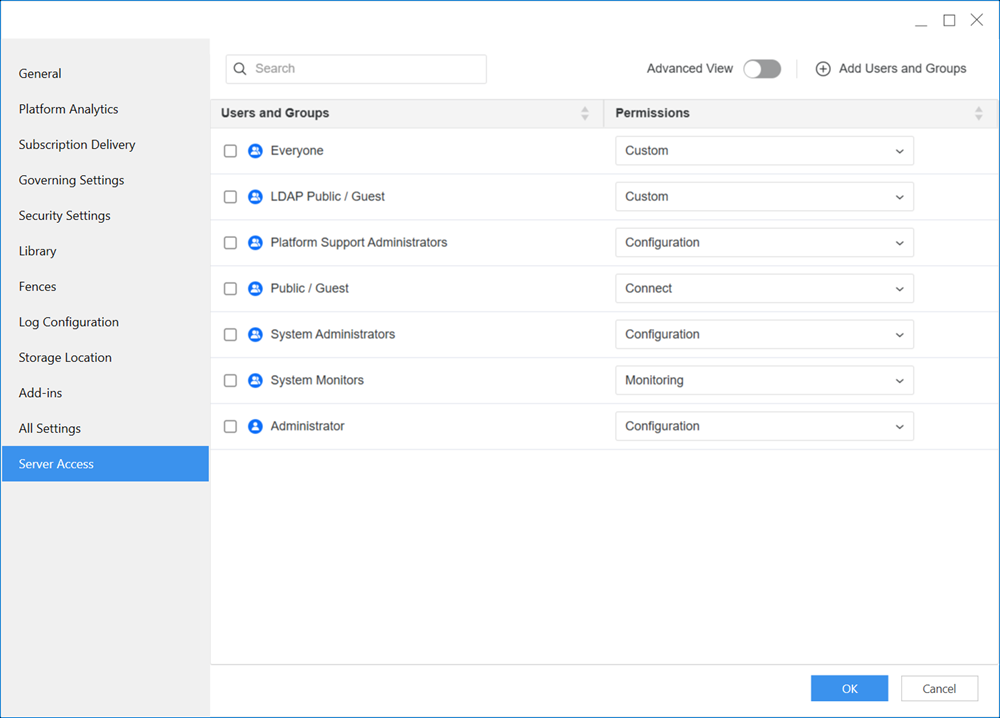
In the left pane, click Server Access.
-
Expand the Permissions drop-down list next to a user or user group and choose a predefined role. The options are:
-
Connect: Provides Browse access.
-
Monitoring: Provides Browse and Read access.
-
Administration: Provides Browse, Read, Use, and Execute access.
-
Configuration: Provides all access.
-
Denied All: Provides no access.
-
-
To provide service access to additional users and user groups:
-
Click Add Users and Groups.
-
Select the check box next to users or user groups.
-
Click Save.
The new user or user group is added to the server access list.
-
Expand the Permissions drop-down list for the user or user group and choose an option.
-
-
Click OK.
-
Restart your Intelligence Server.
Advanced View
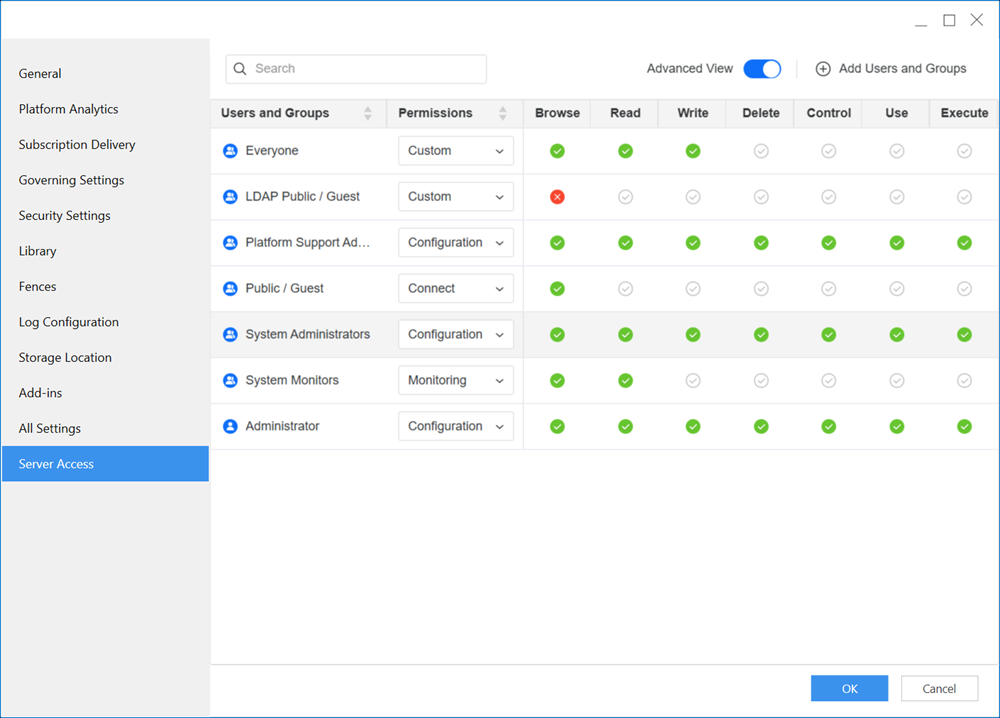
You can use the advanced view to further customize server access permissions outside of the predefined roles.
- Open the Workstation window.
- In the Navigation pane, click Environments.
- Right-click a connected environment and choose Properties.
-
In the left pane, click Server Access.
-
Toggle on Advanced View.
-
View the permissions options:
-
Browse: Allows users to view the structure of the system without being able to access the contents.
-
Read: Allows users to view the contents of the file or objects but not modify it.
-
Write: Allows users to modify files or objects.
-
Delete: Allows users to remove files or objects.
-
Control: Allows users full control over a file or object.
-
Use: Allows users to reference or use an object when creating or modifying other objects.
-
Execute: Allows users to run files or scripts.
-
-
Click the checkmark below a permission to grant, deny, or set the permission to default. Click the checkmark repeatedly until you reach your desired option. The options are as follows:
-
Grant: Provides access to the permission.
-
Deny: Denies access to the permission.
-
Default: Reflects the permission default to grant or deny access.
-
-
Click OK.
-
Restart your Intelligence Server.