Strategy One
Enable Single Sign-On with SAML Authentication
Starting in Strategy One (December 2025), you can sync SAML attributes as a User Language.
Starting in Strategy One (April 2025), you can use optional advanced configuration settings.
Prerequisites
Workstation is deployed with standard authentication and the environment connection is established.
Enable Single Sign-On with SAML Authentication
For information on enabling SAML in Library, see Enable SAML Authentication for Strategy Library.
- Open the Workstation window.
-
In the Navigation pane, click Environments.
- Right-click an environment and choose Configure SAML under Configure Enterprise Security.
- In step 1, enter a Entity ID.
- Expand the Advanced then General menu options and edit the Entity Base URL to match your server URL, if needed.
- Starting in Strategy One (April 2025), enable the following optional settings for SAML:
- Enable SAML Single Logout by setting Logout Mode to Global. For more information.
- Enable SAML relay state as the login redirect URL by enabling Relay State. For more information, see KB488519.
- Map SAML attributes as system prompts by editing Optional SAML Fields / Prompts. For more information, see KB488518.
- Starting in Strategy One (December 2025), sync SAML attributes as a User Language by editing the optional Language field. For more information, see KB489581.
- Generate the Library SPMetadata file:
- Click Download next to the SP Metadata file.
- Send the metadata file to your network or security team and ask them to integrate SAML support. For more information on integrating SAML support with Microsoft Entra ID (formerly Azure AD), see Integrating SAML Support with Entra ID.
- Retrieve the resulting metadata file from your network or security team and rename the file to IDPMetadata.xml.
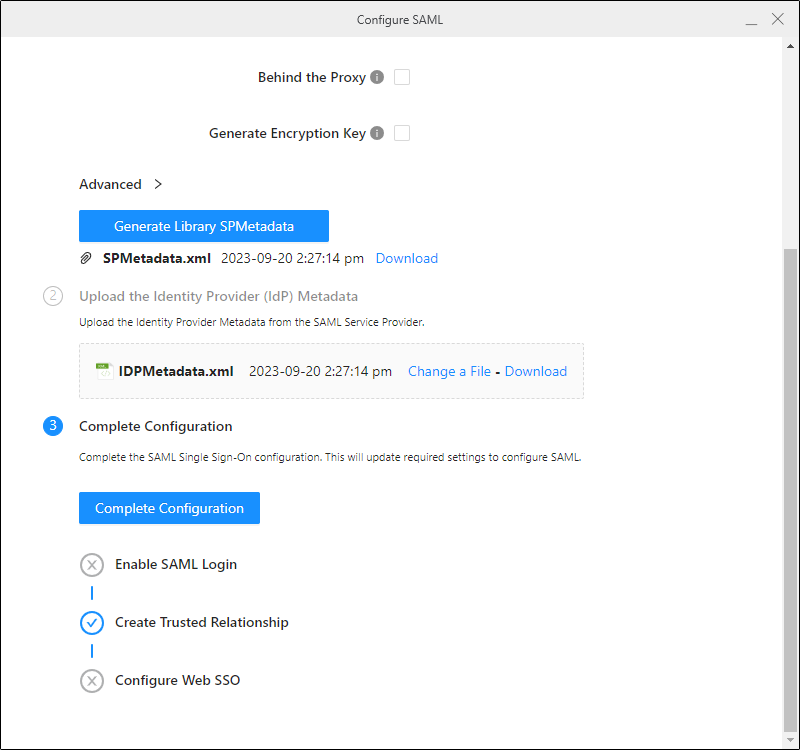
Ensure your network or security team names the application the same value that you entered in the Entity ID field.
- In step 2 of the Configure SAML Workstation dialog, upload the IDP Metadata file.Click here if you are using Azure.
You will need to perform additional steps for Assertion Attribute Mapping
- Open the IDP Metadata file and find the <auth:DisplayName>Groups section.
- Copy the URI.
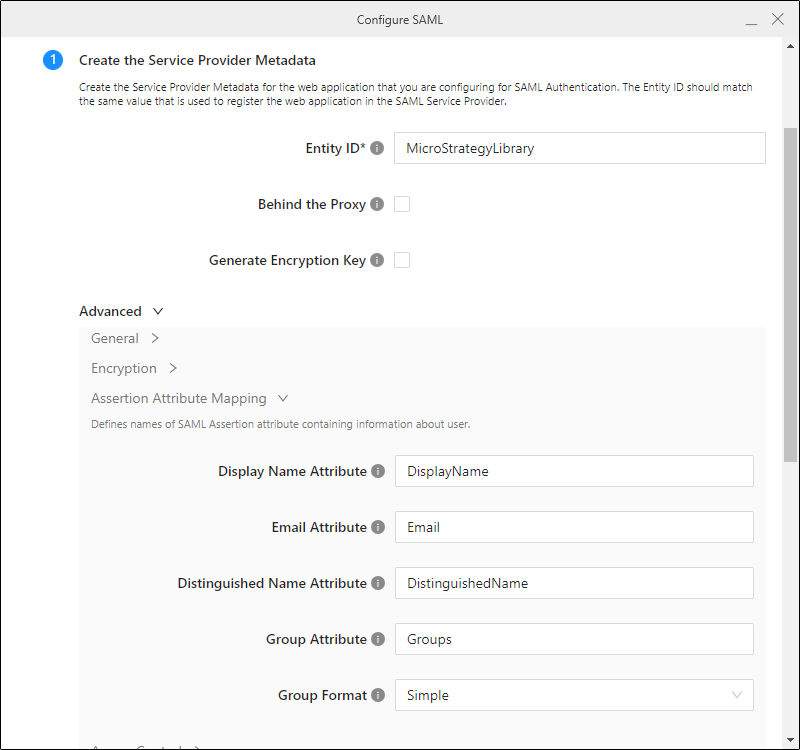
- In step 1 of the Configure SAML Workstation dialog, expand the Advanced then Assertion Attribute Mapping menu options and paste the URI in Group Attribute.
- Repeat steps 1 through 3 for Display Name and Email. The IDP Metadata sections for these URIs are <auth:DisplayName>Display Name and <auth:DisplayName>Email.
- In step 1 of the Configure SAML Workstation dialog, expand the Advanced then Access Control menu options and enter the Azure transmits GUIDs group information in Admin Groups.
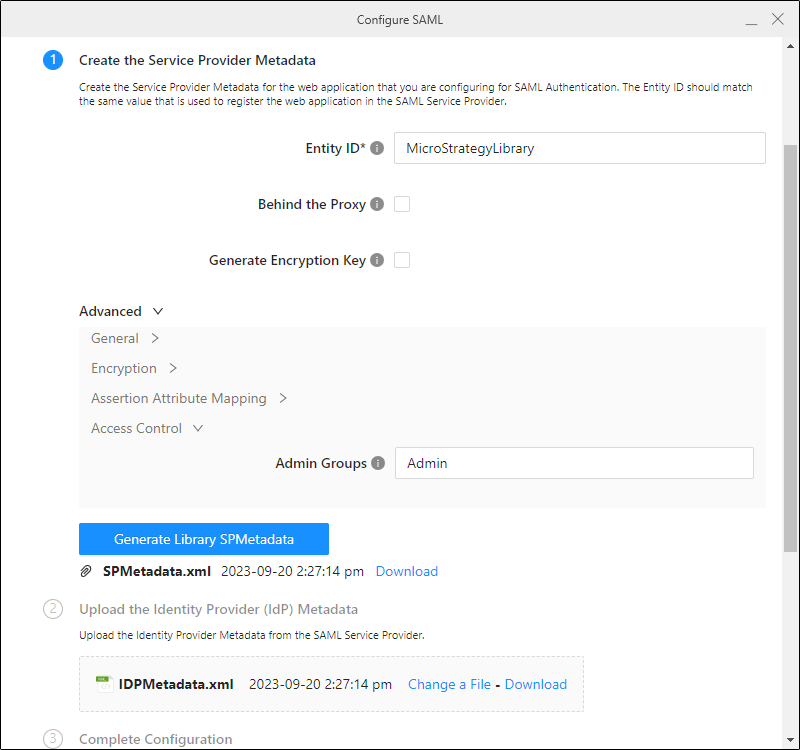
- Click Complete Configuration.
- Close the Configure SAML dialog.
-
If you are using Strategy One (April 2025), the available authentication mode will be set to SAML only. If you want to keep other authentication modes, right click Environments and in the Library tab, enable additional authentication modes.
To configure SAML as the default authentication mode for users, see Set Default Authentication for Library Web in Workstation.
- If you are using a version prior to Strategy One (April 2025), go to the Library Admin control panel and under Authentication Modes, select Standard and SAML.
- Restart Tomcat.
- Access Library and confirm that you can log in with SAML.
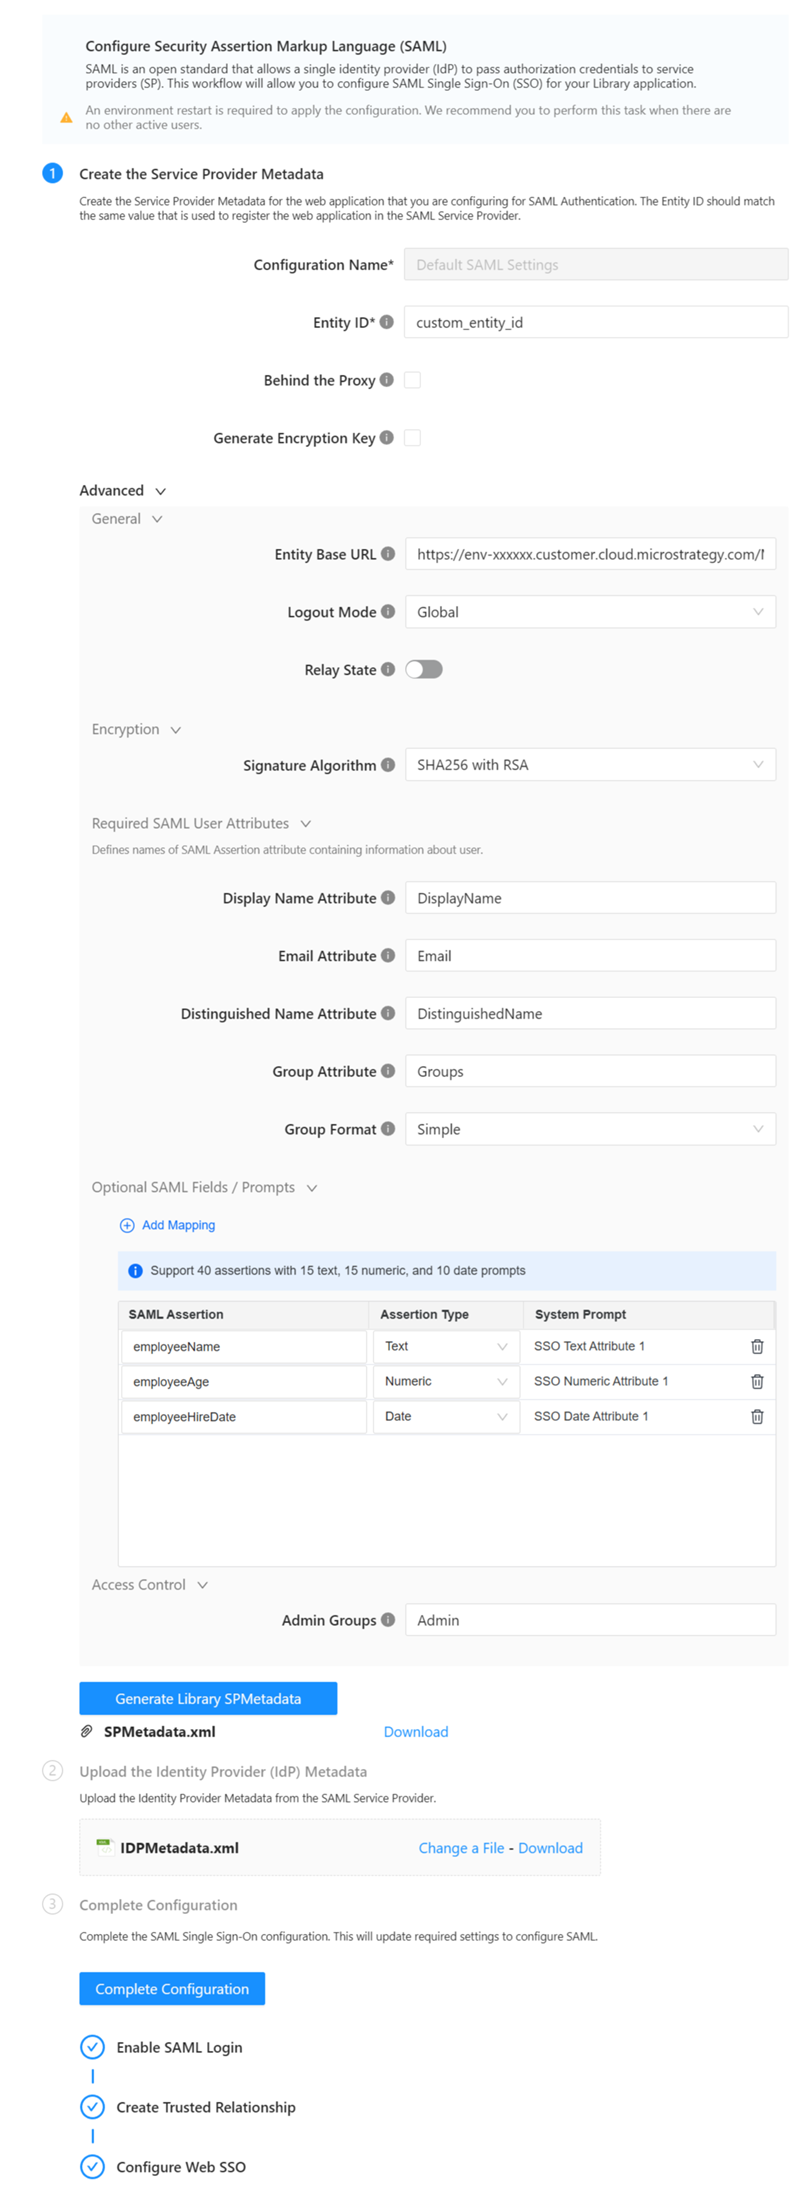
It is common to use "DEV", "QA", or "PROD" in the ID to distinguish between environments.
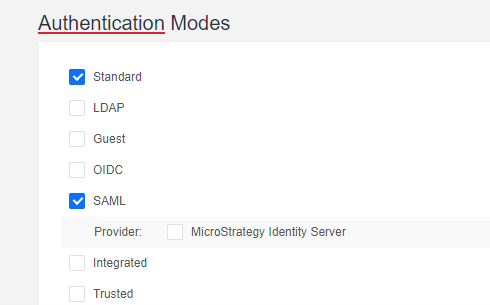
For more information on accessing the Library Admin control panel, see Library Administration Control Panel.
To configure SAML as the default authentication mode for users, see Set Default Authentication for Library Web in Workstation.
Troubleshooting
If a user successfully logs in but does not have access to the Library content, ensure that the user group has the appropriate permissions.
Ensure the assertion attributes were correctly updated in the MstrSamlConfig.xml file as described in Integrating SAML Support with Entra ID. If they are not, you may need to manually edit the file.
