Strategy One
Create a Google BigQuery ODBC DSN for Workstation and Web on Windows
- Log into your Windows machine.
- In the left bottom corner, click Start.
- Search for ODBC Data Sources (64-bit) and open it. The ODBC Data Source Administrator (64-bit) window appears.
- Go to the System DSN tab.
- Click Add.
- Select a platform for which you want to create the ODBC connection.
If creating an ODBC connection for Web on Windows, select Strategy Google BigQuery ODBC Driver and click Finish.
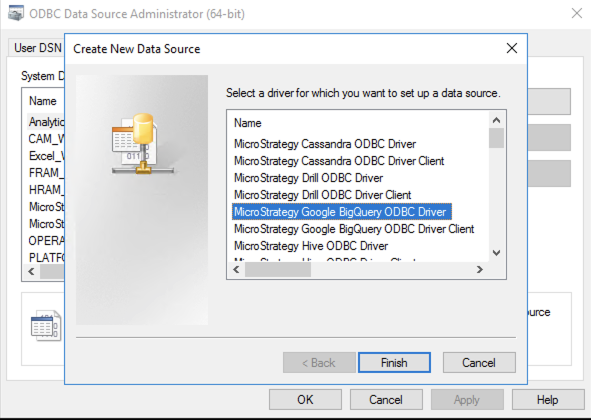
If creating an ODBC connection for Workstation, select Strategy Google BigQuery ODBC Driver Client and click Finish.
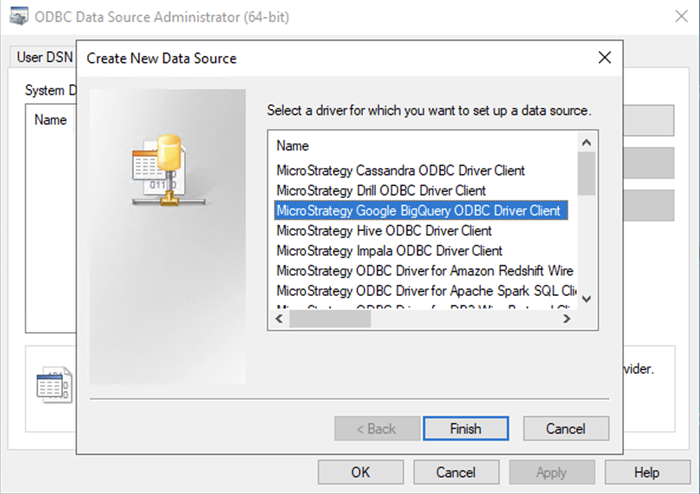
If you do not select the Strategy Google BigQuery ODBC Driver Client option, the connection will not be visible nor usable in Strategy Workstation.
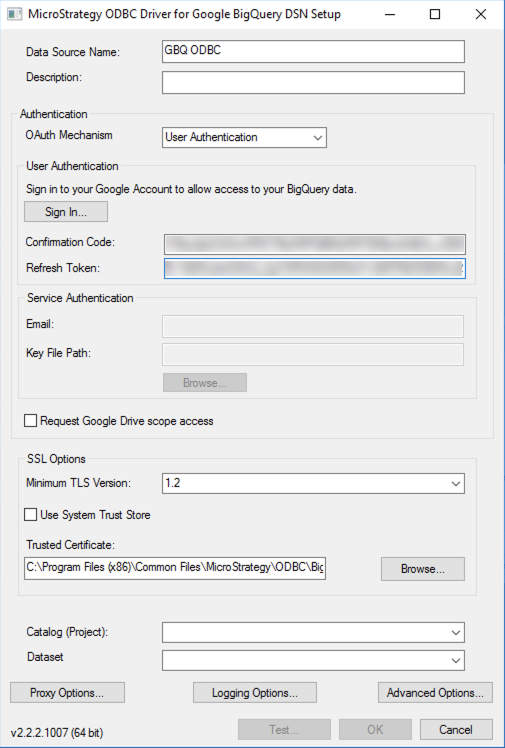
- In the Strategy ODBC Driver for Google BigQuery DSN Setup dialog, enter a data source name.
- From the OAuth Mechanism drop-down, choose User Authentication.
- Click Sign In.
- Log into your Google account.
- Click Allow to allow Strategy to access your Google BigQuery data.
- Copy the confirmation code that is displayed and close the dialog. You are returned back to the Strategy ODBC Driver for Google BigQuery DSN Setup dialog.
- In the Confirmation Code field, paste the confirmation code.
-
Click the Refresh Token field. The refresh token is automatically populated with your refresh token.
-
Select a catalog (project) and dataset.
The selected catalog or project is also your billing project.
-
Click Advanced Options to configure additional parameters.
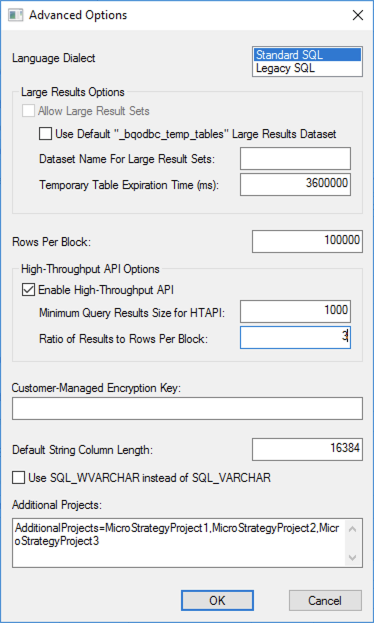
The following are additional parameters:
-
EnableHTAPIenables the high throughput API or faster data transfer. For example,EnableHTAPI=1;. -
AdditionalProjectsallows loading datasets from multiple projects. The value for this parameter is a comma separated list of additional projects. The final list of datasets contains all datasets from the default project and the additional projects listed as a value of this parameter. For example,AdditionalProjects=MicroStrategyProject1,MicroStrategyProject2,MicroStrategyProject3;.
-
-
Click OK.
-
Click Test. A dialog with a success message returns.