Strategy ONE
Specifying that groups are exported to separate Excel worksheets
When you export a grouped document to Excel, you may want to place each element (or page) of a grouping field in its own worksheet, in the same Excel workbook. By default, all elements/pages are exported to the same Excel worksheet.
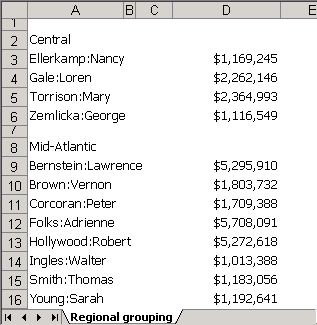
For example, a document is grouped by Region. When it is exported to Excel, all the regions are included in the same worksheet, as shown below. The Excel workbook contains only one tab, named Regional grouping (the document name).
If you specify instead that each group is exported to a separate worksheet, the same document looks like the following after being exported to Excel:
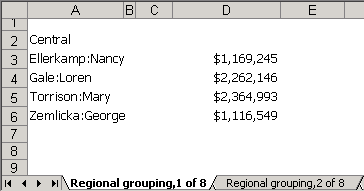
The displayed worksheet lists only those employees in the Central region. Each region has its own tab, labeled with the document name and a number (1 of 8, 2 of 8, and so on).
If you add Call Center to the grouping panel, to the right of Region, when you export the document to Excel, each Call Center is placed in its own worksheet, as shown below:
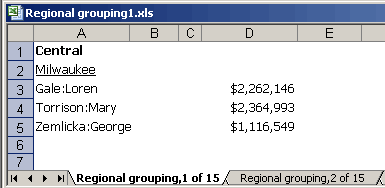
The Excel file contains 15 tabs now, one for each Call Center.
If you change the grouping settings of Region so that regions are not exported to separate worksheets, the exported file looks like the following:
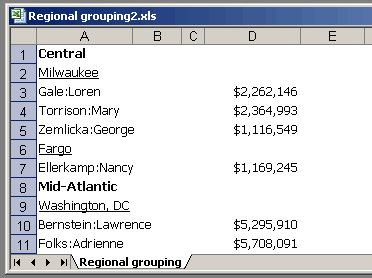
Now only one worksheet is created. When a group is exported to a single worksheet, any of its sub-groups (which are groups to the right of it in the Grouping panel) must also be exported to a single worksheet.
To export a group to separate Excel worksheets
-
In MicroStrategy Web, open the document in Design or Editable Mode.
-
If the document contains multiple layouts, click the tab of the layout that you want to modify.
-
In the Grouping panel, right-click the grouping item and select Grouping Properties. The Grouping Properties dialog box opens.
-
Select the Sheet break between groups check box.
This option is not available if there is a group to the left of the selected group and either of the following is true:
-
The group to the left of the selected group is not defined to export to separate Excel worksheets.
-
The group to the left of the selected group is defined to display horizontally.
-
-
Click OK to apply changes and return to the document.
To export the document to Excel, click the PDF icon in the toolbar to view the PDF, and then select Export to Excel from the File menu.