Strategy ONE
Create a sample invoice document
This section contains step-by-step instructions to walk you through creating a simple invoice with data from the MicroStrategy Tutorial. Because the Tutorial does not contain the precise type of data needed for an invoice, such as Invoice Date and Due Date, we will use data from similar, related attributes as a replacement. You can use this section as a tutorial, bringing together the pieces described in the chapters of this book to create a document.
Dates in the MicroStrategy Tutorial project metadata are updated to reflect the current year. The sample documents and images in this section, as well as the procedures, were created with dates that may no longer be available in the Tutorial project. Replace them with the first year of data in your Tutorial project.
By following the instructions, you will create a document that provides a separate invoice for each customer. Each invoice will contain the following:
-
Company logo
-
Customer name, city, and state
-
Invoice and due dates
-
Purchase date, ID, description, and cost of each item
The completed invoice looks like the following:
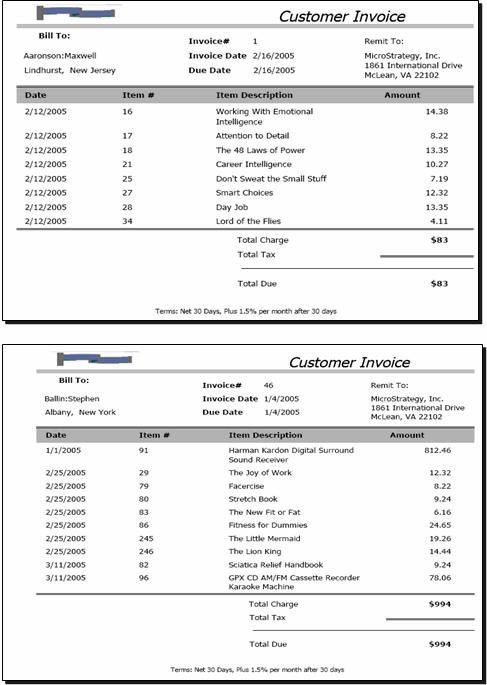
This sample has been altered to fit within the space limitations of this manual.
It may be helpful to print the document and refer to it as you create your own invoice document.
The high-level steps for this procedure are outlined below. While each step is self-contained, they are meant to be completed in order.
Before beginning the instructions, review Creating a document using another document as a template to familiarize yourself with the various components of the Document Editor.
Measurements throughout this tutorial are given in inches.