Strategy ONE
Create and Configure an Environment with Your AWS Account
Before creating a new Strategy Cloud Platform for AWS environment, first create the architecture where you plan to deploy all your environments.
- Go to the Strategy Cloud Platform.
- Log in with your Resource Center account. To learn how to create a Resource Center account, see Create a Resource Center Account.
- Click New Environment.
-
Select Team, Department, or Enterprise.
-
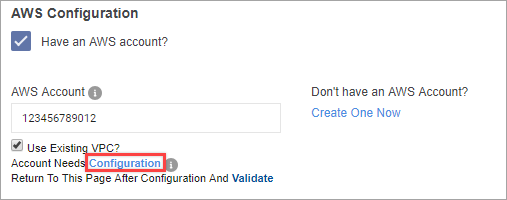
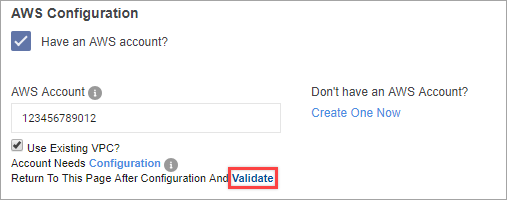
Enter your 12-digit AWS account ID.
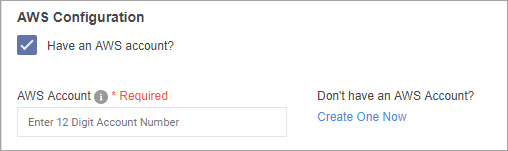
To create an AWS account, click Create One Now and follow the instructions on the AWS website.
You can find your AWS account ID in the AWS Console, under My Account > Account Settings.
-
Select Use Existing VPC.
If left unchecked, Strategy Cloud Platform creates a new VPC to deploy the environment.
-
Click Configuration.
A message appears stating that you are being redirected to the AWS console for the account configuration process.
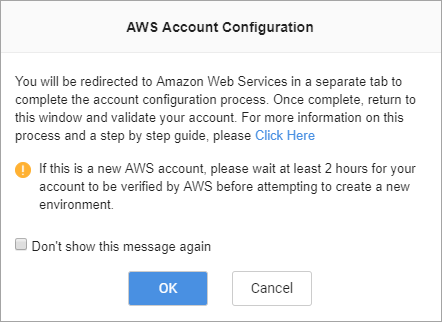
- Click OK.
-
Log in to your AWS account.
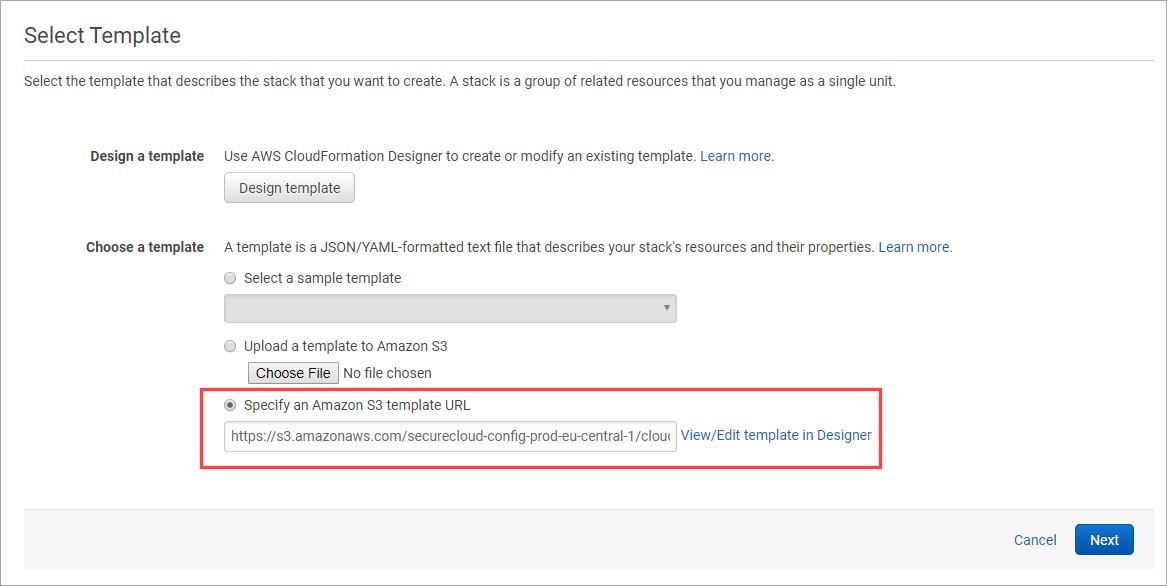
The CloudFormation AWS service starts. CloudFormation templates are used to configure and deploy the Strategy One platform.
-
Click Next.
The CloudFormation Template URL is populated automatically. Do not change the URL.
-
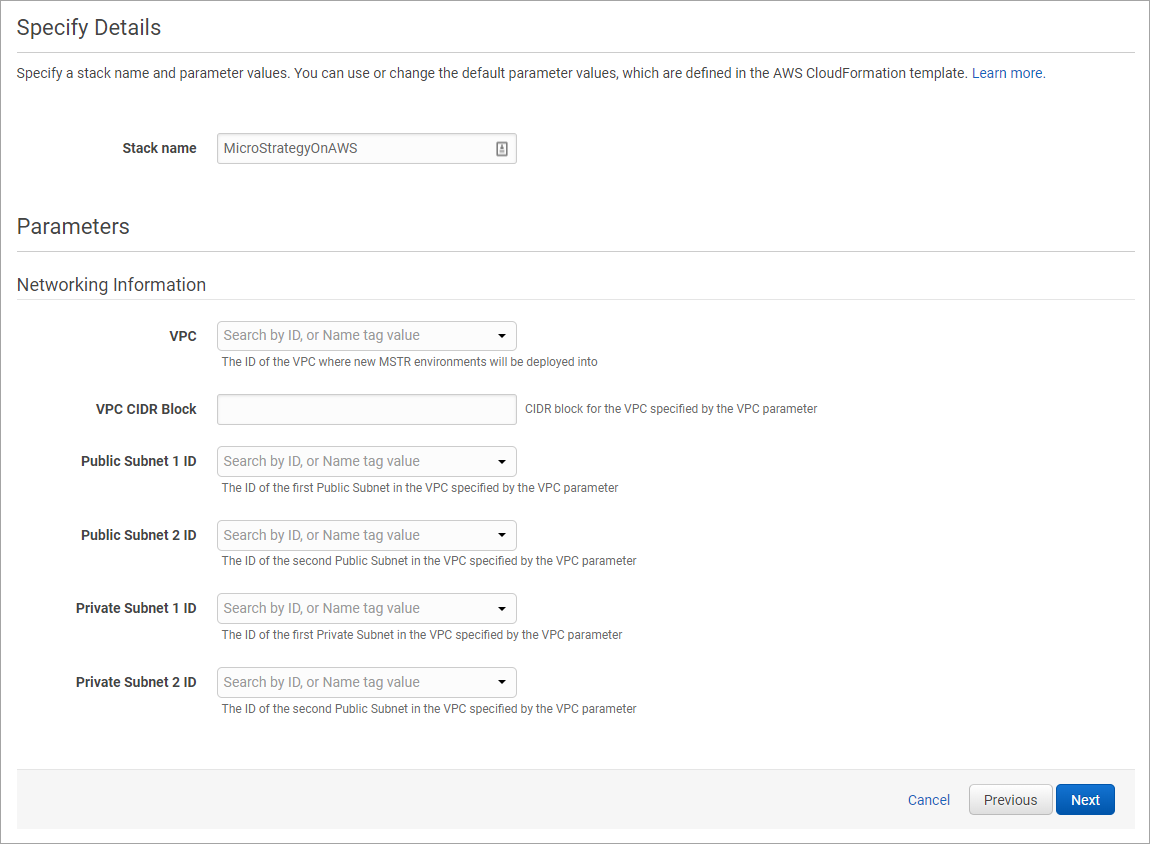
On the Specify Details page, enter the following information.
- Stack Name: Enter the name of the CloudFormation stack. You can use any name you prefer.
- VPC: Select the VPC in which you want to deploy the Strategy One Platform.
- VPC CIDR Block: Enter the CIDR range of your VPC. You can check the CIDR range assigned to your VPC in the VPC drop-down menu. It should follow the pattern: x.x.x.x/x.
- (Optional) Public Subnet 1 ID*: Select the Public Subnet ID.
- (Optional) Public Subnet 2 ID*: Select the Public Subnet ID.
- Private Subnet 1 ID: Select the Private Subnet ID.
- Private Subnet 2 ID: Select the Private Subnet ID.
*Public subnets are optional if you would like to deploy all of the Strategy Cloud Platform architecture into an existing VPC’s private subnets. See Deploy Strategy Cloud Platform for AWS with Only Private IPs for more information.
Contact your AWS administrator if you are unsure of any of these configurations.
- On the Options page, specify tags for the resources in your stack and set advanced options.
- Click Next.
- On the Review page, review and confirm template settings.
-
Under Capabilities, select the checkbox to acknowledge the creation of IAM resources.
We use the AWS Identity and Access Management (IAM) role for the Strategy Cloud Platform to deploy the Strategy One platform in your account.

-
To deploy the stack, click Create.
To monitor the status of stack creation, refresh this CloudFormation page. You can also check the Resources and Events tabs for further status detail. When the status of the stack is CREATE_COMPLETE, the deployment is complete.
Strategy One has now deployed the resources necessary to orchestrate the deployment of Strategy One into your AWS account.

-
To validate the configuration, go back to the Strategy Cloud Platform and click Validate.
To Increase AWS Resource Limits
Strategy Cloud Platform for AWS uses several AWS resources. You should increase your limits for these resources before provisioning new environments.
You are not required to increase resource limits. However, doing so reduces provisioning errors caused by insufficient resources.
To increase AWS resource limits, create a new Support Center Case for each resource on the Support Center dashboard.