Strategy ONE
Deploy Strategy Cloud Platform for AWS with Only Private IPs
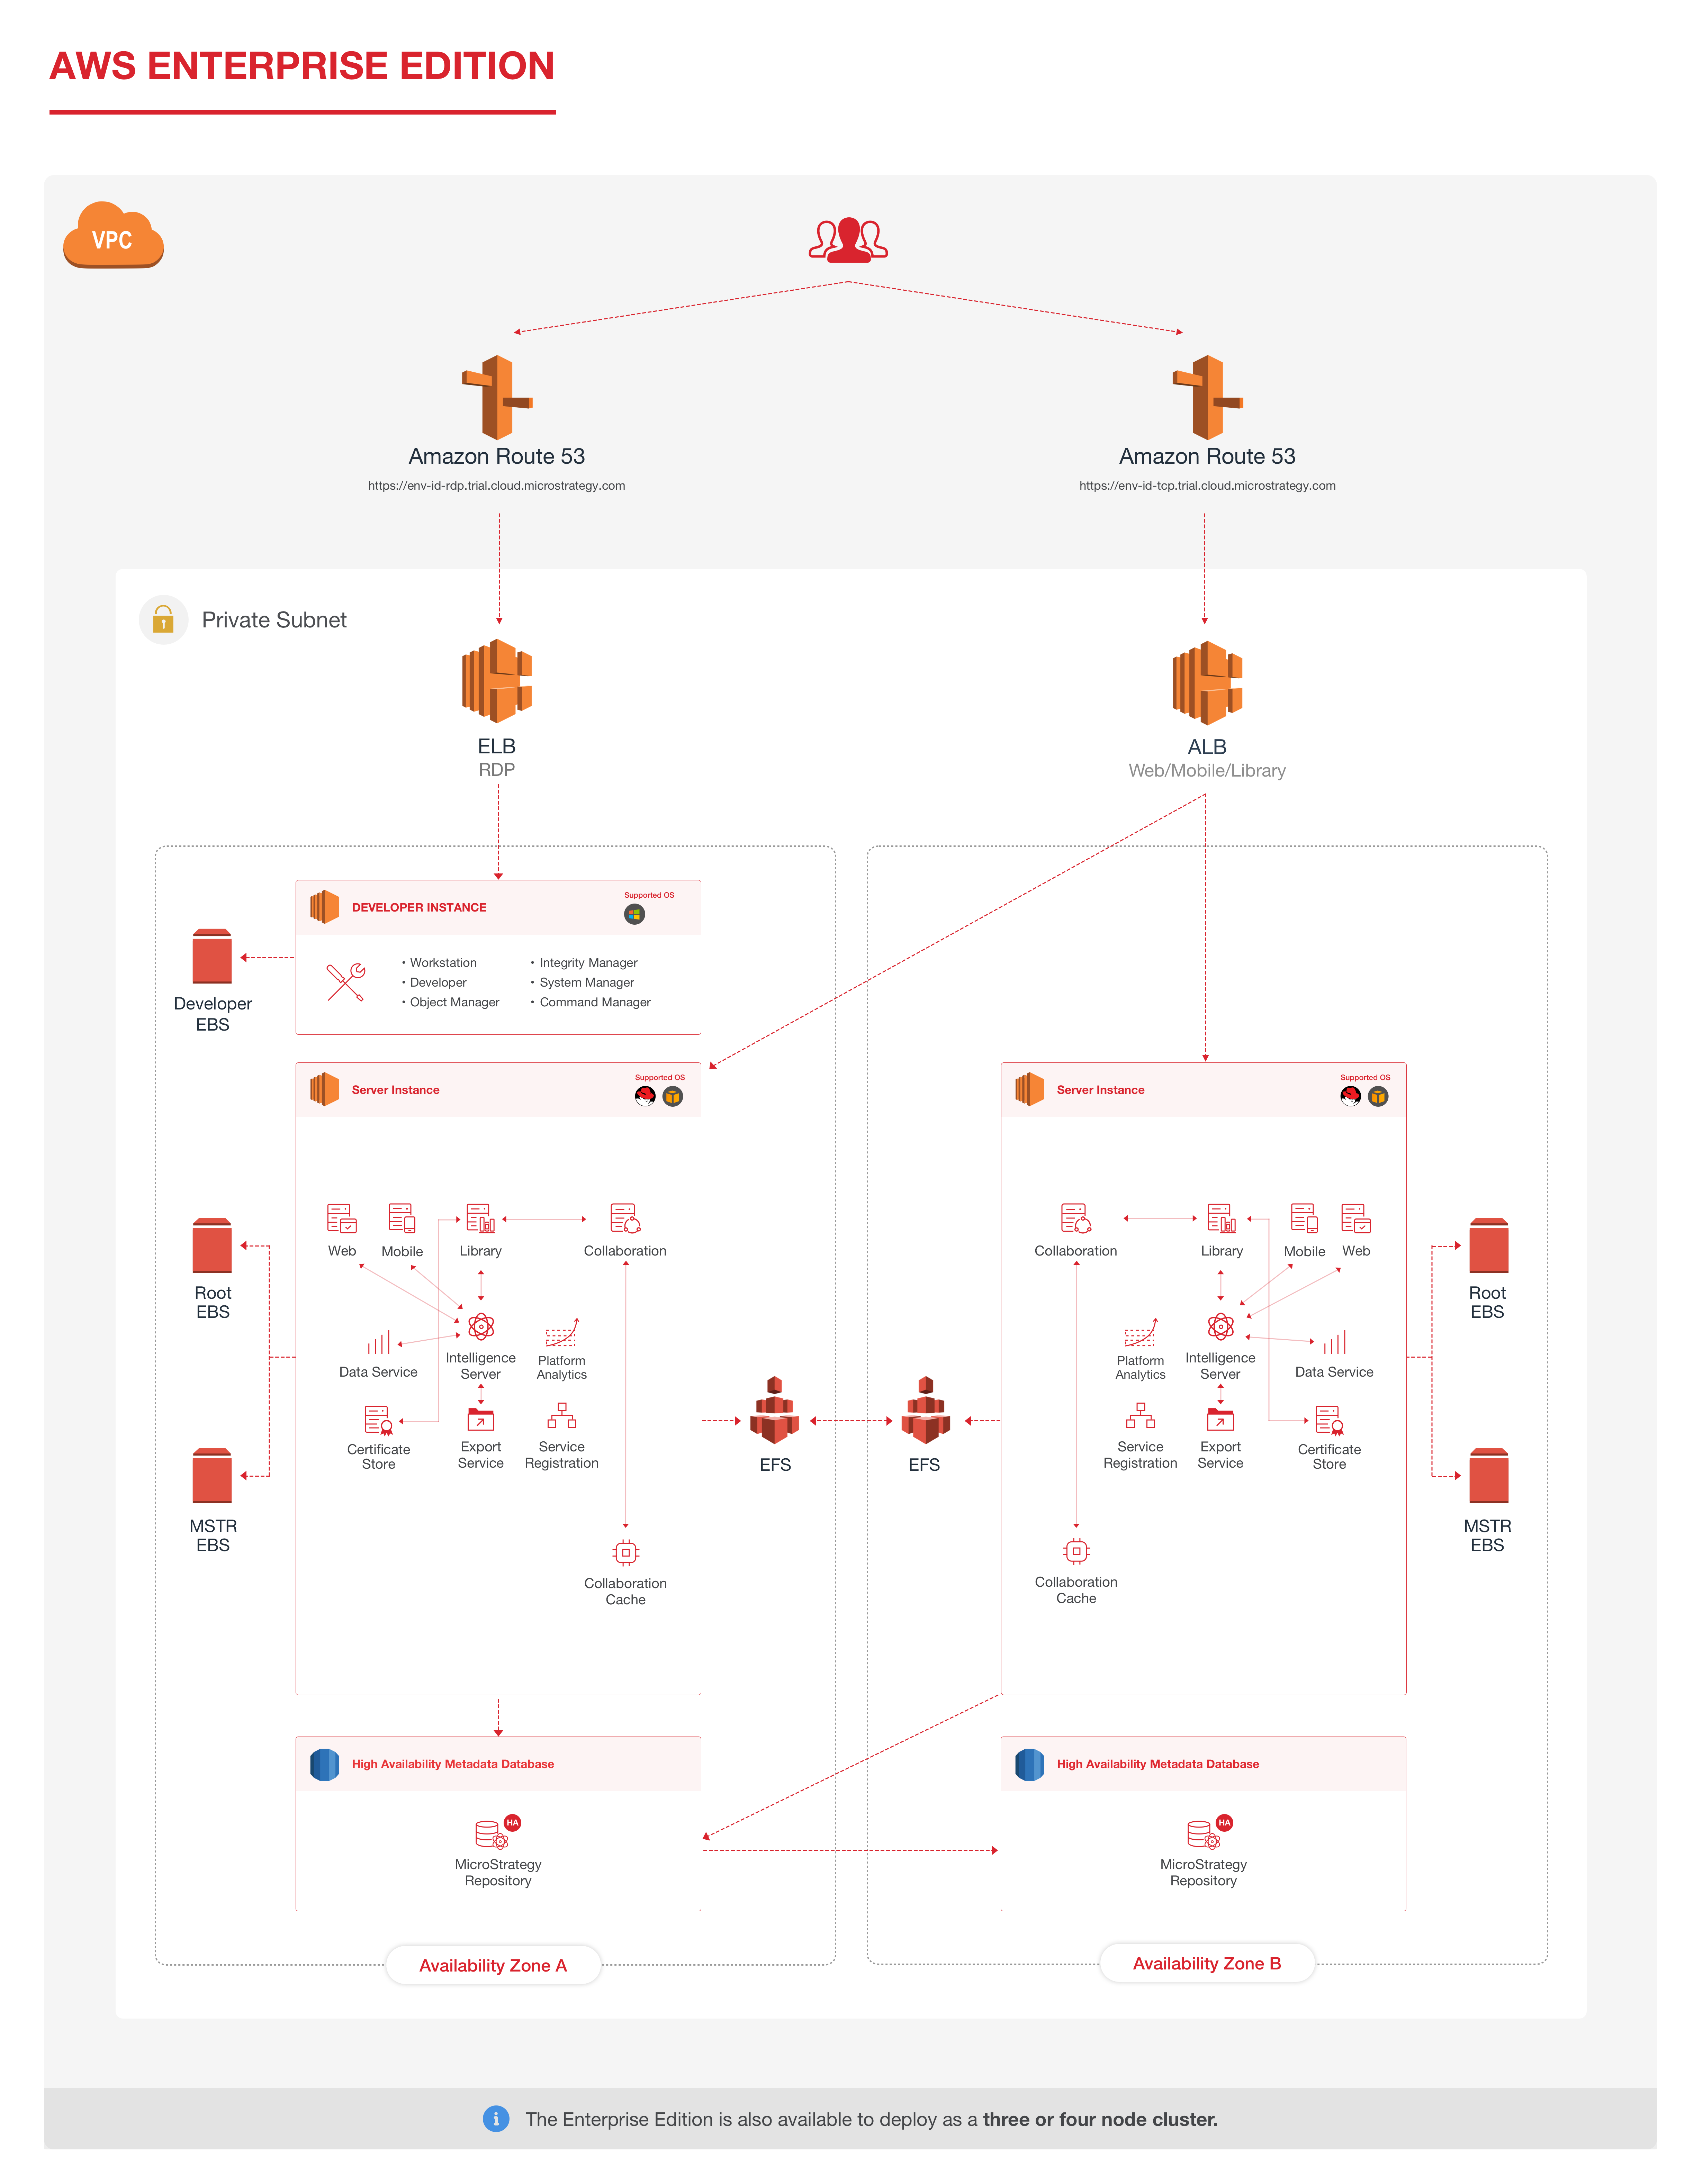
You can deploy Strategy Cloud Platform for AWS so the platform instances and load balancer directing traffic to them are only accessible via private IPs in a private subnet.
In a typical Strategy Cloud Platform for AWS configuration, platform instances are deployed with private IPs into a private subnet, but the load balancer directing traffic to them is accessible from the internet via public IPs in a public subnet. To alleviate this security risk, you can deploy the entire MCP architecture so every component is only reachable within their own existing private subnet, via private IPs, as shown in the architecture diagram below.

EC2 instances created in the VPC need outbound access to the following:
| Hostname | Protocol | Port | Purpose |
|---|---|---|---|
| pypi.org | HTTPS | 443 | Installs and updates Python packages |
| checkpoint-api.hashicorp.com | HTTPS | 443 |
Version checks and security vulnerability updates |
| *.amazonaws.com | HTTPS | 443 | AWS resources, such as CodeDeploy |
|
*.microstrategy.com |
HTTPS |
443 |
Post environment telemetry/status to Strategy console |
- Go to the Strategy Cloud Platform.
- Log in with your Resource Center account. To learn how to create a Resource Center account, see Create a Resource Center Account.
- Click New Environment.
- Select the configuration that fits your requirements. You can go back later and deploy a new environment with a different configuration.
- Enter an environment name.
- Customize your environment as needed.
- Enter your AWS account number
- Select the Use Existing VPC checkbox. This allows you to use your existing infrastructure and networking resources.
- Click on the Configuration link.
- Click OK to be redirected to the AWS Console.
- Log into your AWS account.
- The CloudFormation Template URL is prefilled. Do not change it. Click Next.
-
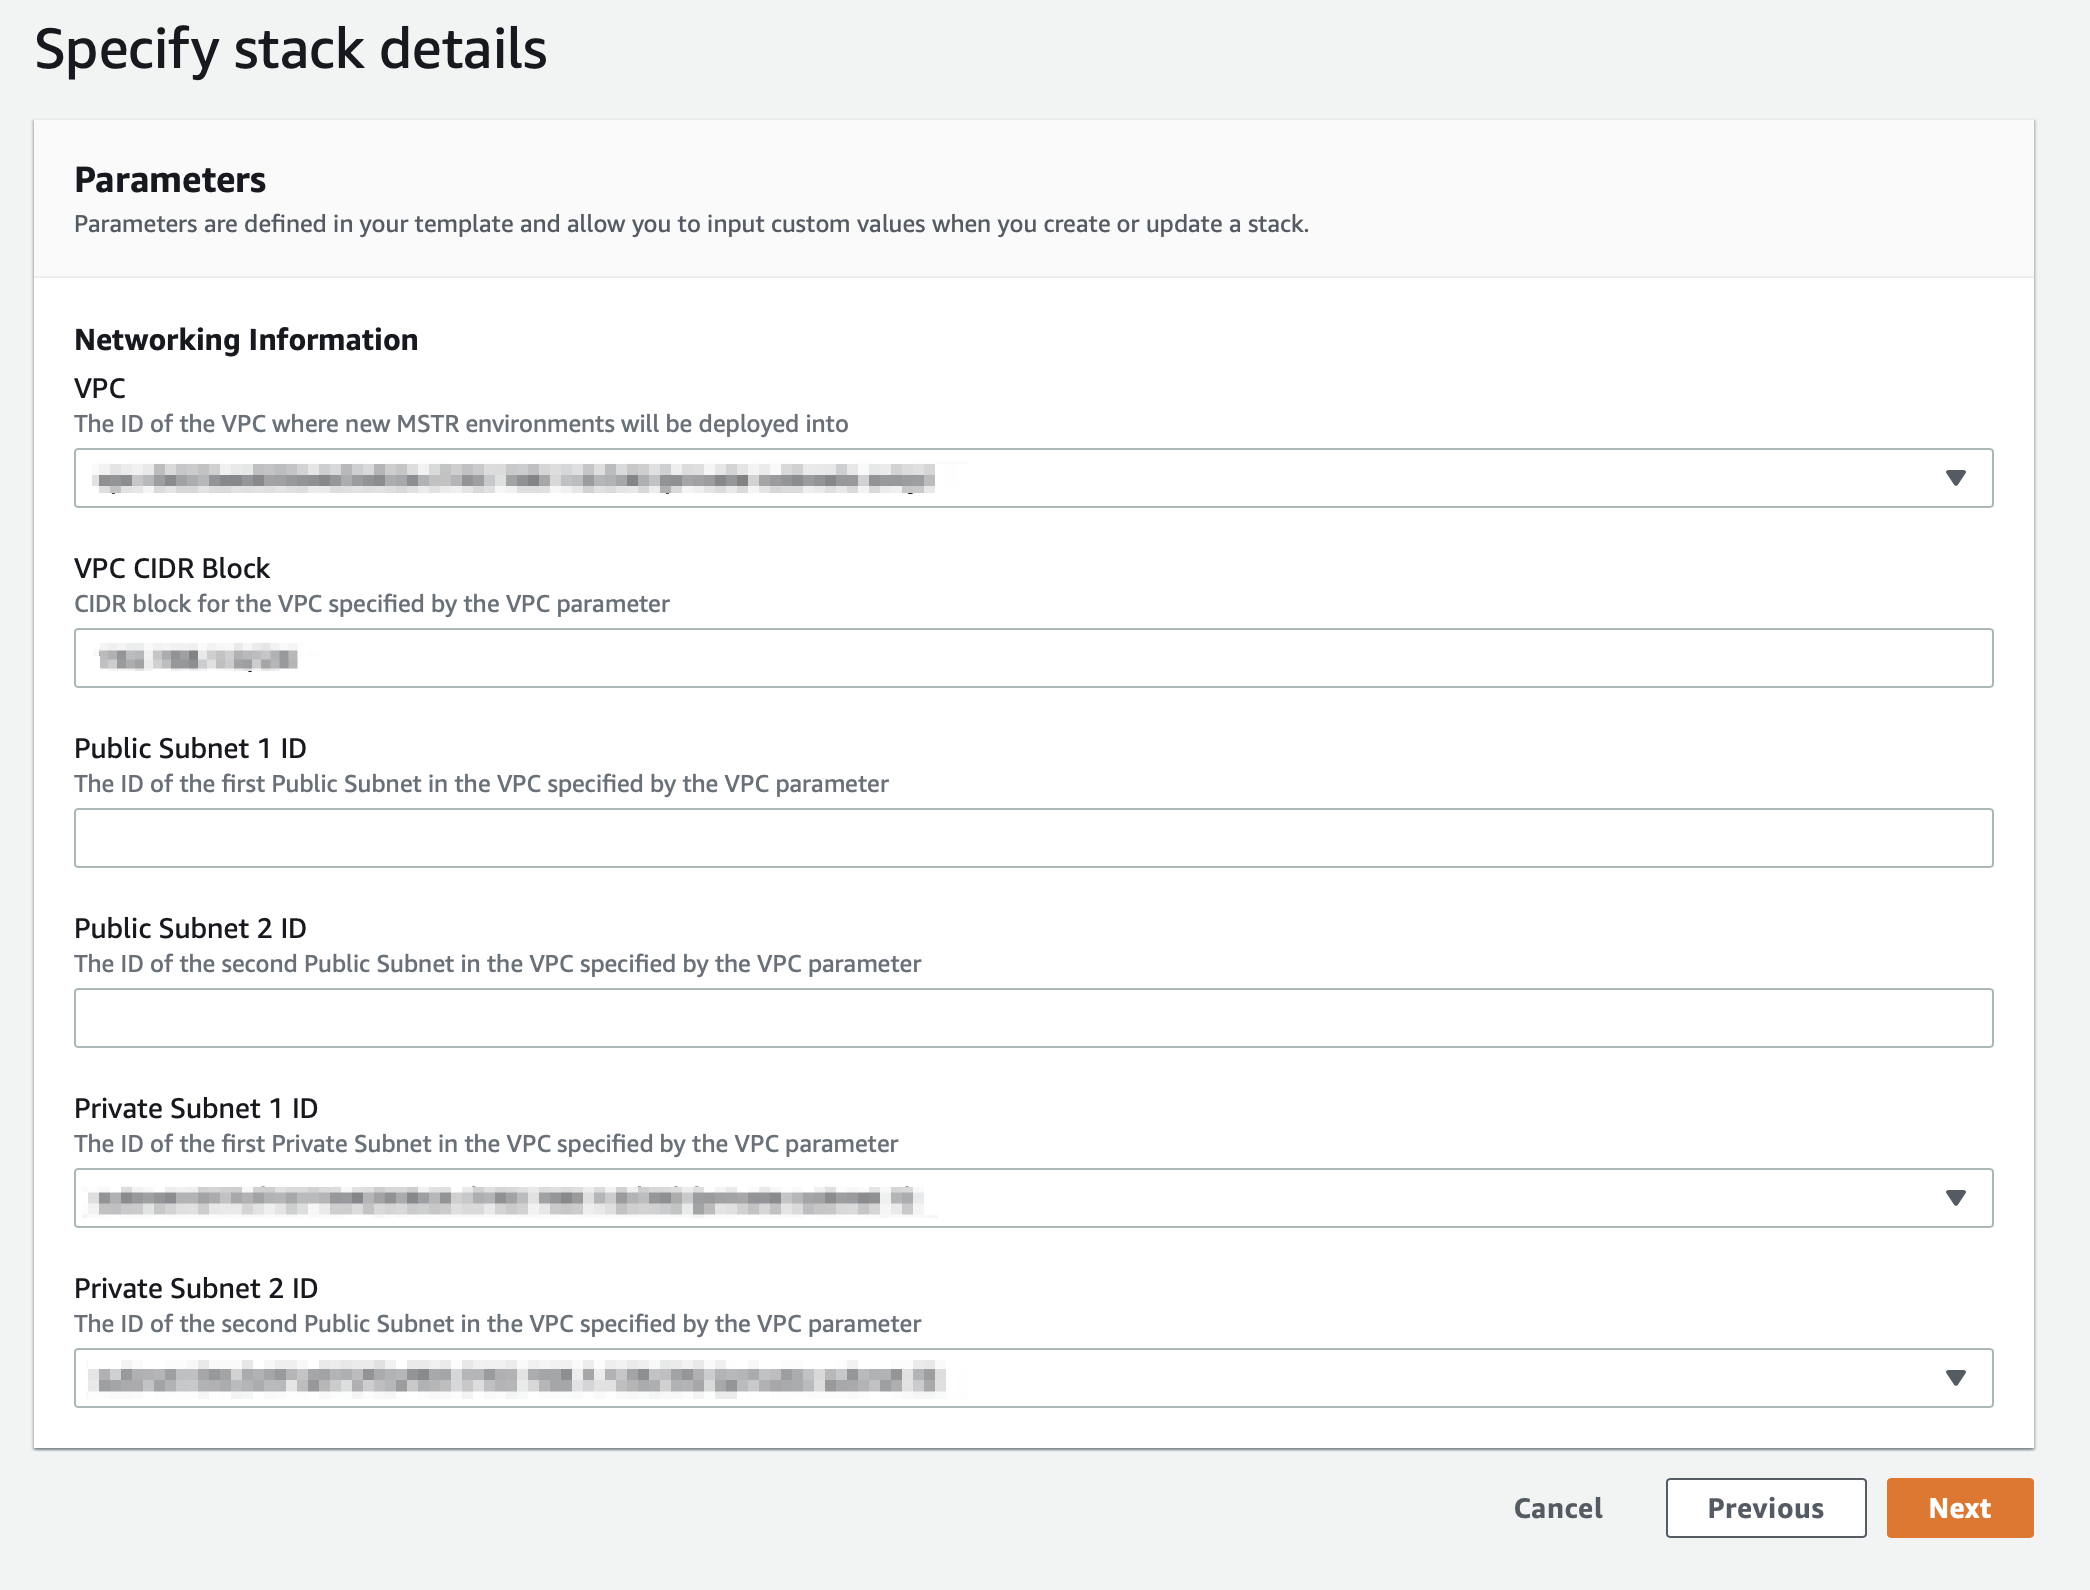
Enter the following information:
Stack Name: Enter name of the CloudFormation stack. Use any name you prefer.
VPC: From the drop-down menu, select the VPC in which you want to deploy the Strategy One Platform.
VPC CIDR Block: Enter the CIDR range of your VPC. You can check the CIDR range assigned to your VPC in the VPC drop-down menu.
Public Subnet 1 ID: Leave this field blank.
Public Subnet 2 ID: Leave this field blank.
Private Subnet 1 ID: Select the Private Subnet ID.
Private Subnet 2 ID: Select the Private Subnet ID.

-
Click Next.
-
On the Options page, specify tags for the resources in your stack and set advanced options, if necessary. Click Next.
-
Confirm your selections on the Review page and click Next.
-
Click Create to deploy the stack. When the status of the stack is CREATE_COMPLETE, the deployment is complete.
-
Return to the Environment Configuration page and click Validate. When validation is successful, a green checkbox appears.
-
Click Create Environment.
