Strategy One
Add Panel Stacks to Dashboards
Panel stacks enable additional flexibility in analytics workflows, while optimizing the use of screen real estate. Panel stacks act as mini dashboard canvases and support all objects you can add to a page, such as shapes, visualizations, text boxes, etc.
Some benefits of using panel stacks:
- Allows designers to be more economical with their dashboard layouts and unlock new avenues for creativity in free-form dashboards.
- Self-service can be difficult because it requires authors to anticipate all needs. Panel stacks solve this by allowing authors to create all views up-front.
Check out the video below to learn more!
Starting in Strategy One (September 2025), you can add a selector panel to enhance the filtering experience. Selector panels can display multiple filters and selectors, so end users can easily view all their choices in one place. End users can also modify multiple filters in bulk and apply all the selections at once. For steps and an example, see Create a Selector Panel or Window.
Create a Panel Stack
-
Open a new or existing dashboard.
- In the top toolbar, click Panel Stack
 and select
Panel Stack.
and select
Panel Stack.A panel stack is added to the page, displaying a single panel named Panel 1, which contains a blank grid visualization.
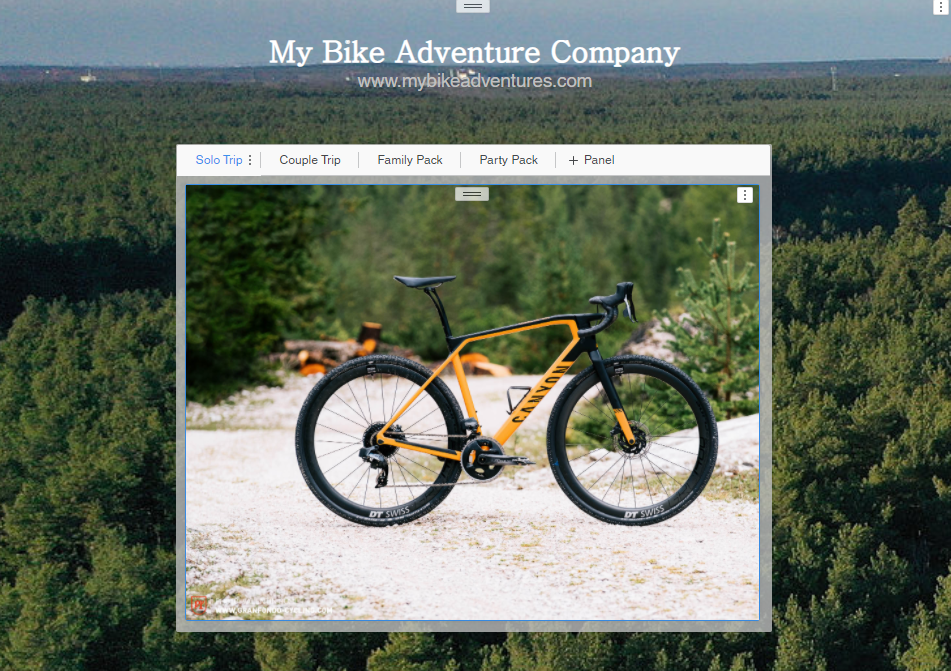
- To add another panel to the panel stack, click + Panel.
- In the Layers panel, select a panel to add objects to it. For example, add a visualization to a selected panel by double-clicking it in the gallery. In addition, from the Layers panel, you can drag and drop existing visualizations and objects from the canvas into panels in panel stacks.
Define the navigation for the panel stack
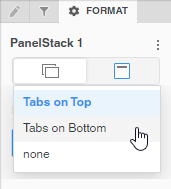
- Select the panel stack and open the Format panel. Click the Panel Stack Options icon
 . From the drop-down list, select whether to display the tabs at the top or bottom of the panel stack.
 - To use panel selectors for additional design and formatting flexibility, choose None from the drop-down list. Use a stand-alone panel selector to move the selector to any location on the page and display panels as a drop-down list or link bar. To create a panel selector:
- In the top toolbar, click Filter
 , choose Panel Selector, and select the panel to target.
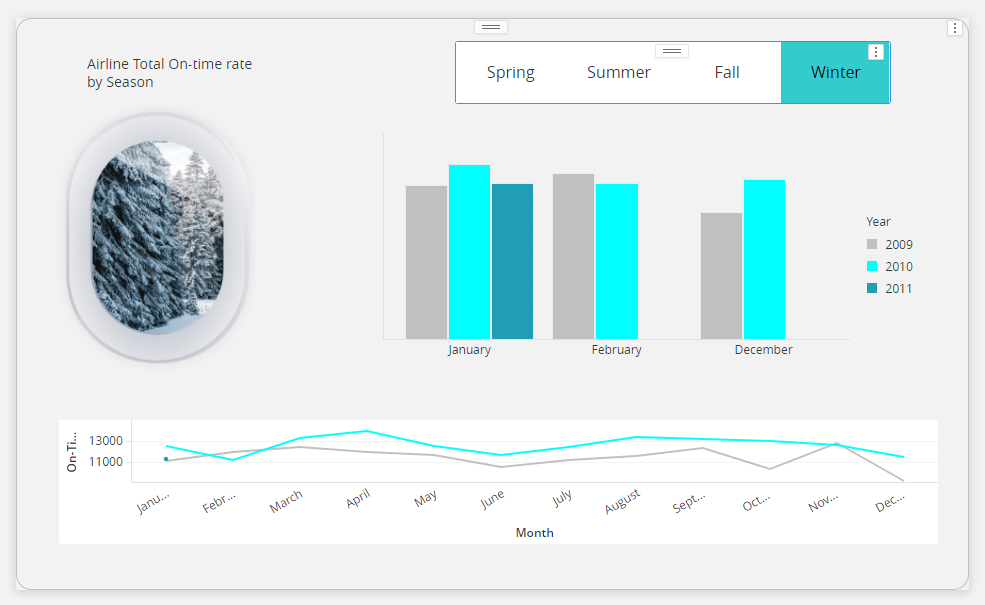
In the example shown below, you use a panel selector to select Spring, Summer, Fall, or Winter.
- In the top toolbar, click Filter
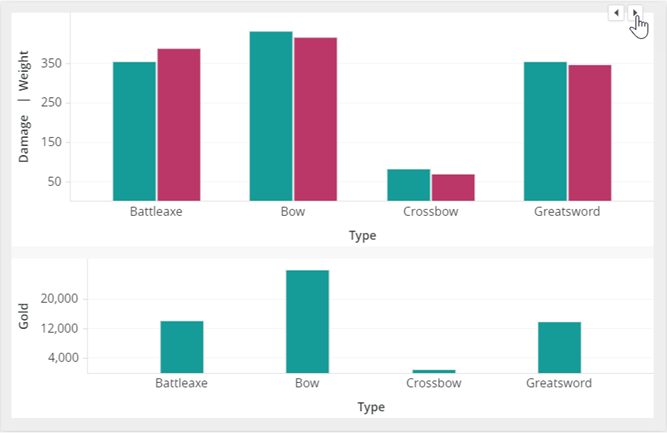
- If you want to change panels by scrolling through them, choose None from the drop-down list. The navigation tabs are hidden and arrow icons display when you hover your cursor over the panel, as shown below:
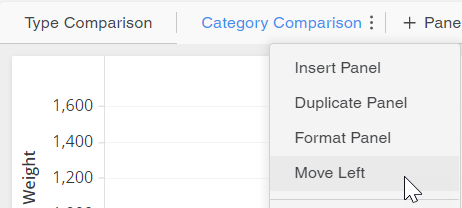
- You can adjust the display order of panels. Right-click the panel to move and select Move Left or Move Right.
Format the panel stack container
- In the Format panel, click the Title and Container icon
 .
.
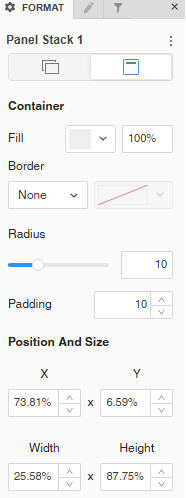
- Select the Fill color and its transparency.
- Select a Border style and color.
-
Beginning in Strategy One (September 2025), you can adjust the Radius of rounded corners for the panel stack container.
-
Use a number between 0 and 40.
-
If the current Padding is less than 50% of the updated Radius, Padding automatically increases to match 50% of the new Radius.
-
- Beginning in Strategy One (July 2025), you can adjust the Padding around the panel stack container. Use a number between 1 and 100.
- Define the position of the panel stack by setting a percentage in the X and Y boxes. For example, if you type 25 in the X box, the top left corner of the panel stack displays 25% from the left edge of the dashboard page. If you type 15 in the Y box, the top left corner displays 15% down from the top of the dashboard page.
- Define the size of the panel stack by setting the Width and Height.
Format a panel
You can format each panel on the panel stack independently.
- Right-click the panel to format and select Format Panel, or select the panel in the Layers panel.
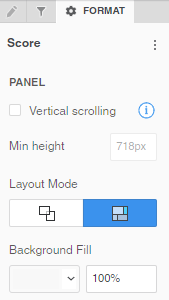
- You can:
- Enable or disable Vertical Scrolling
- If vertical scrolling is enabled, set the Minimum Height
- Change the Layout Mode between free-form and auto
- When free-form layout is selected, choose whether to Stretch the Elements
 to fill the page or Expand the Canvas
  to add more content to the page without resizing the existing canvas.
 Use free-form layout to organize and overlap the visualizations, filters, selectors, images, HTML, and other objects. You can independently position, size, and layer containers on the panel.
Use auto layout to automatically fill the panel's screen area with the objects. The objects can be repositioned around each other.
Each panel on a panel stack can use a different layout type for maximum flexibility.
- When free-form layout is selected, choose whether to Stretch the Elements
- Add a Background Fill and set the transparency.
- Starting in Strategy One (September 2025), you can adjust the padding in Automatic Layout.
- Enable or disable Vertical Scrolling
Only one level of nested panel stacks is supported. That is, you can create a panel stack inside another panel stack. Combine the two levels of panel stacks with chapters and pages to provide additional structure and order while maintaining optimal usability.