Strategy ONE
Initialize a New Custom Visualization
You can automatically generate all of the source code you need to create a custom visualization using the mstr-viz tool. Then, you can modify the source code to create your own custom visualization.
Let's start by initializing a new custom visualization that you can modify later.
- Open a command line as an administrator.
- Navigate to the directory where you want your custom visualization to reside.
-
Run the following command to initialize your new custom visualization. In this example, we use MyVizName as the name of the custom visualization.
Copymstr-viz init MyVizNameA new MyVizName folder is created in the directory where you ran this command. This folder contains all of your custom visualization source code.
In the Custom Visualization Tool version 2.2.3 and newer, use the following command to initialize a custom visualization using the React Format panel with the necessary template file provided in
SampleViz.zip.Copymstr-viz init MyVizName --use-react-config=trueOr simply use:
Copymstr-viz init MyVizNameIf you want to initialize a custom viz without the new React Format panel, use the following command.
Copymstr-viz init MyVizName --use-react-config=false -
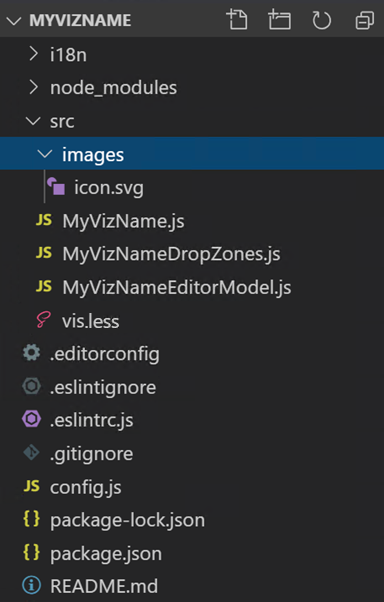
In your text editor, navigate to the new MyVizName folder. The file structure looks similar to the example below.

All of the source code you need to build your custom visualization is in the src folder. If you have developed custom visualizations in the past, you will recognize all of these files except for vis.less. This file replaces both Html5ViPage.css and global.css. The Html5ViPage.css and global.css are still be generated after compilation, with the information from vis.less.
