Strategy One
Create New Users and Groups
Starting in Strategy One (December 2025), you can add encryption keys to users for encrypted delivery devices. The Project Access & Roles and Privileges pages are consolidated into one Roles and Privileges page.
Starting in Strategy One (November 2025), define system prompts for users for testing purposes.
Starting in Strategy One (July 2025), optionally enter a description of your change when saving a user or group.
Administrators can create new users and groups.
- You must have the System Administrator or Application Administrator role.
- You must Manage Environments
- Users
- Groups
Create a New User
A user is an account in Strategy, which represents a person who uses the Strategy features. For example, a user may be someone who creates and owns objects, or someone who opens and analyzes the data in reports and documents within Strategy. The Strategy security model is built around the concept of a user.
To work with Strategy, users must have a user account created for them, which defines what access privileges they have, their login ID and password to log into the system, and so on. Users are defined in the Strategy metadata and exist across projects. You do not have to define users for every project you create in a single metadata repository.
For additional information on users within the Strategy One system, see the System Administration Help.
- Open the Workstation window with the Navigation pane in smart mode.
- In the Navigation pane, click Users
-
-
 .
. -
-
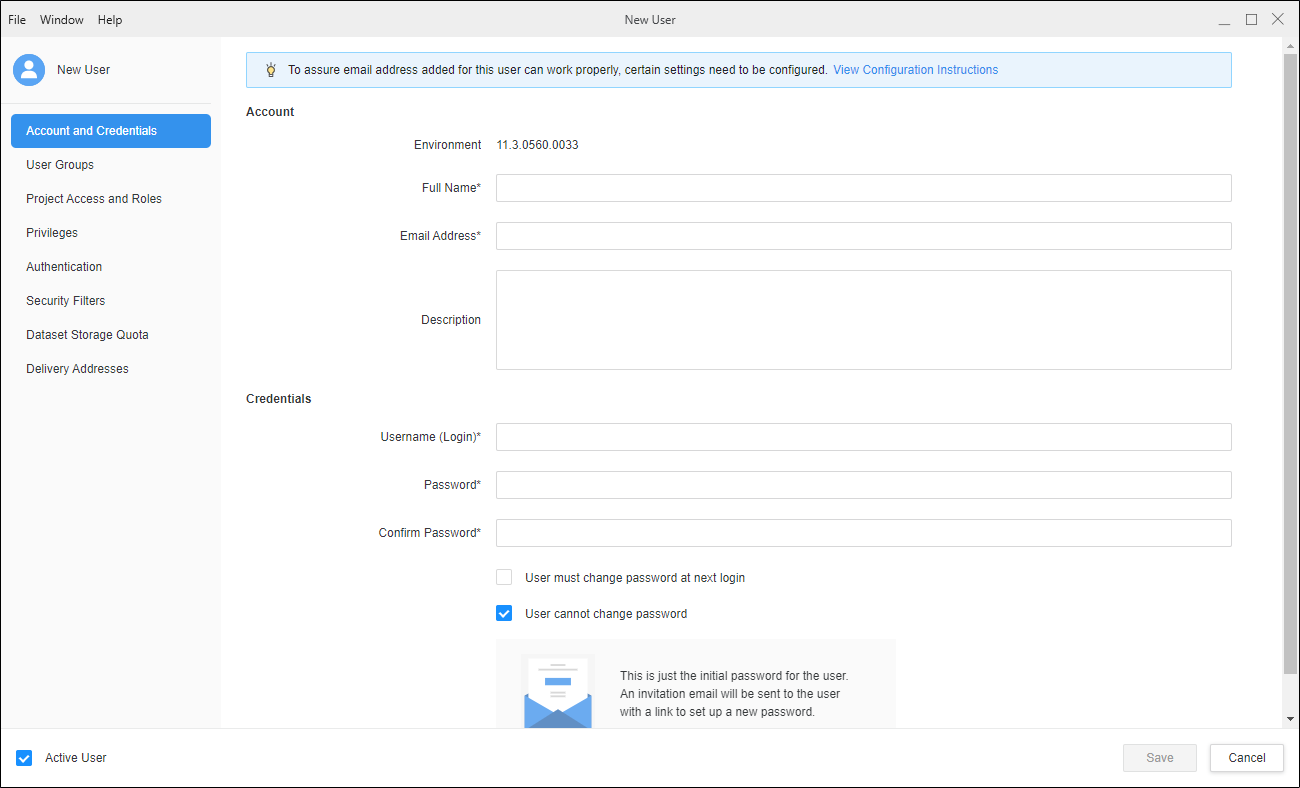
Enter user information in the New User window.
Account and CredentialsEnter the following information:
- Full name of the new user
- Select the type of email and then enter the Email address of the new user
-
Starting in Strategy One (December 2025), if the user is subscribed to an encrypted delivery device, click Encryption Key
 next to Email Address and upload the address' encryption key (the public certificate from the recipient's email address)
 - Description
- Username (Login)
-
Password and confirm it
-
Specify whether a user can change the password themselves
-
If the user can change it, specify whether the user must change the password at their next login
-
If the user can change it, you can Enable Password Expiration
-
Either select the Expiration Date or specify the number of days before Expiration
-
As soon as you do one, the other is automatically filled in
-
To specify how often the password must be changed (optional), specify the Expiration Frequency in days
-
-
Verify Enabled User is selected
For more information on encrypted delivery devices, see Create a Delivery Device
The login ID is limited to 50 characters.
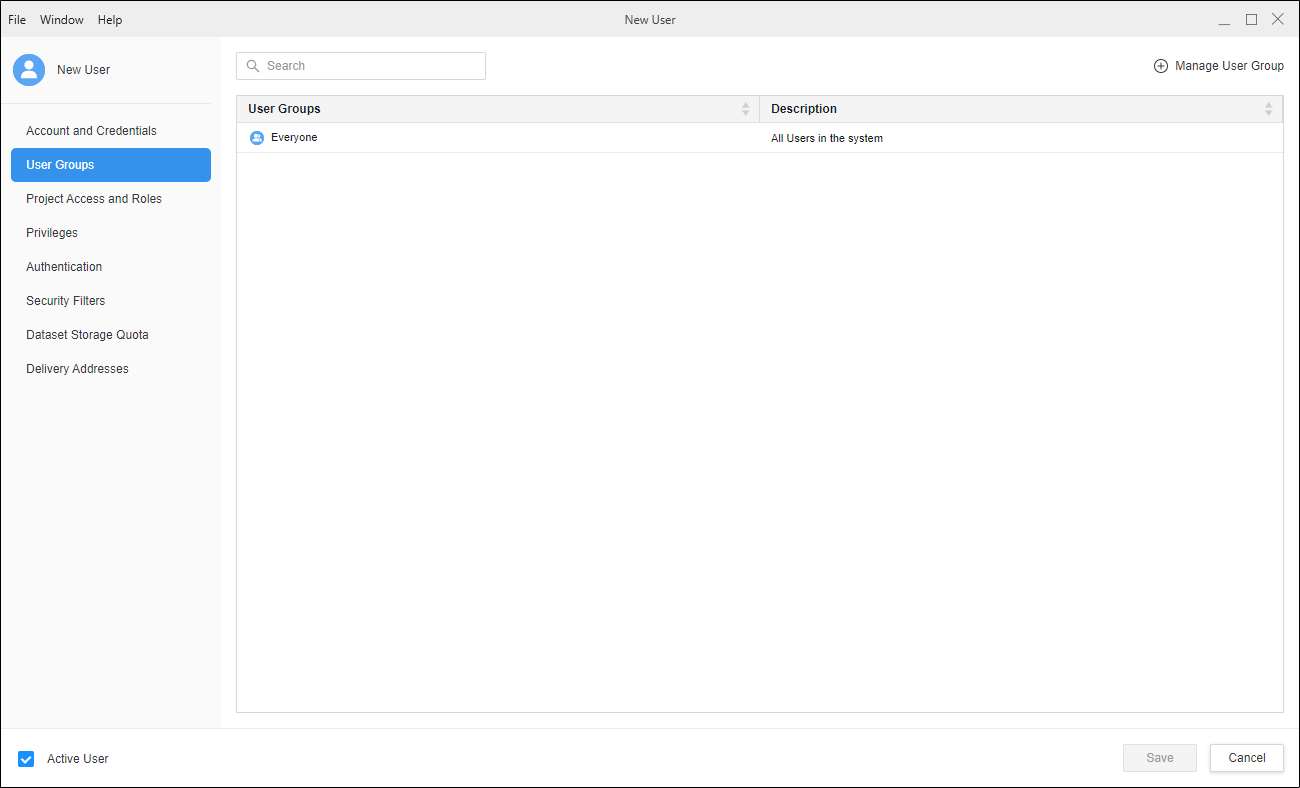
 User Groups
Select the groups to assign the user to. The user inherits privileges from the group, as well as any security filter restrictions from security filters assigned to the group.
-
Click Manage User Group to add a new user group. Select or search for the group to add the user.
-
Click Update.
The Everyone group cannot be deleted or unmapped from the user account.
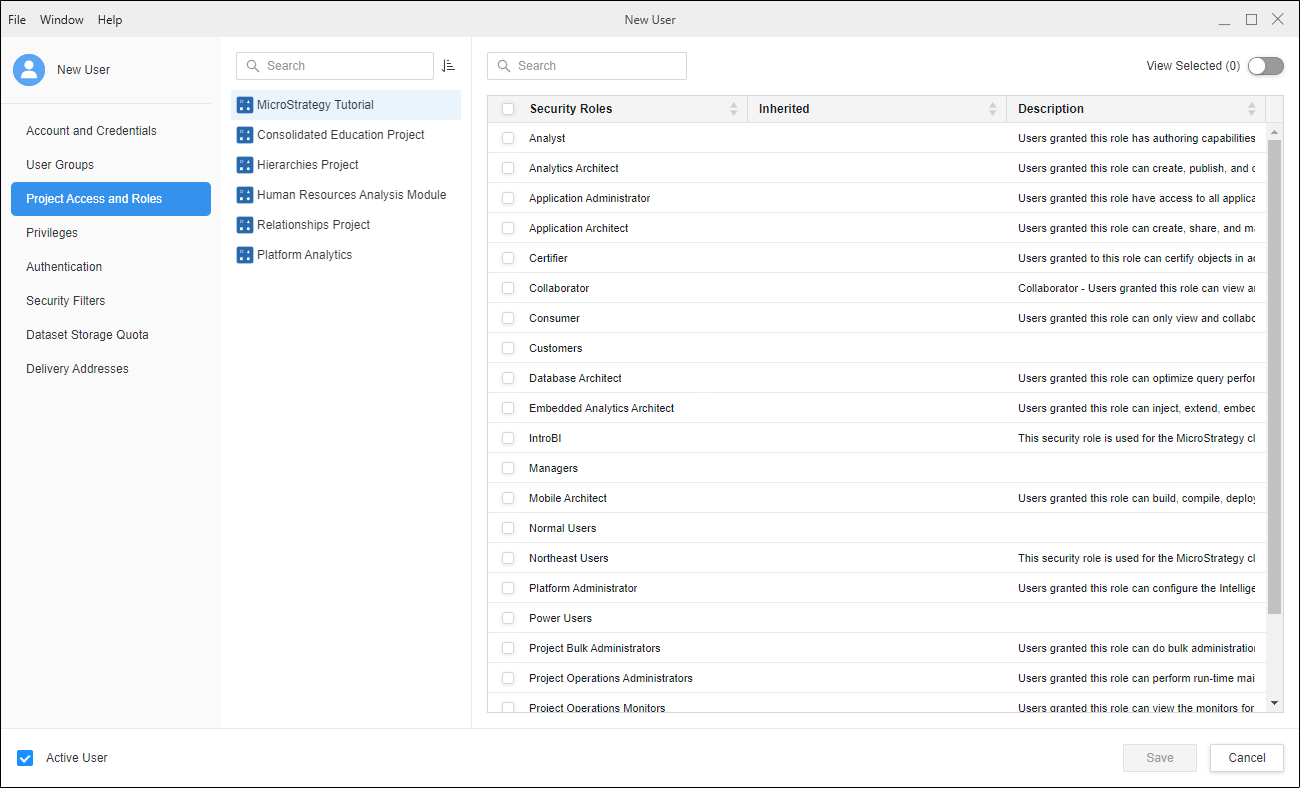
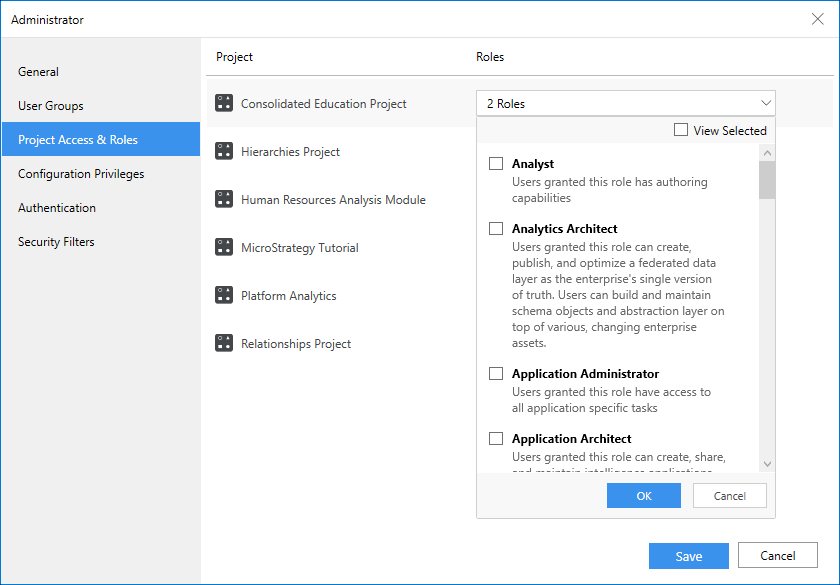
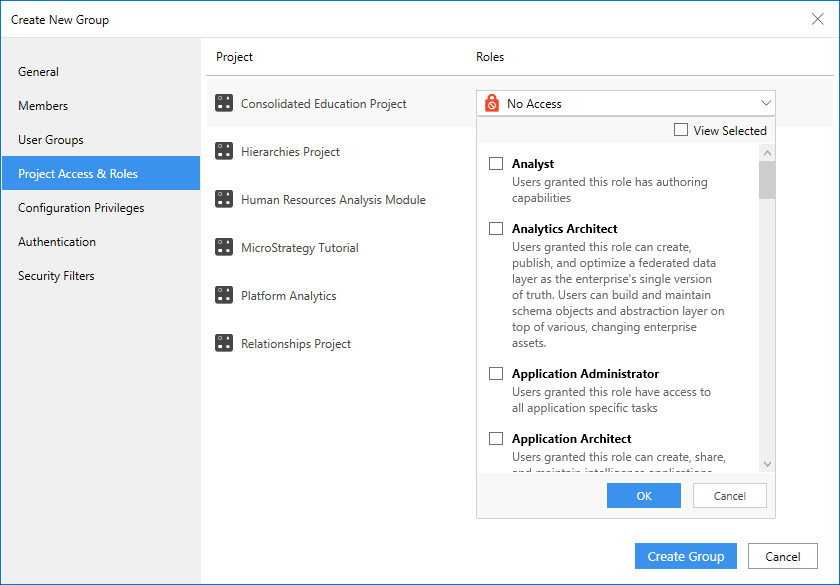
 Project Access & Roles
This dialog is only available if you are using a version prior to Strategy One (December 2025). Starting in Strategy One (December 2025), this dialog is replaced by Roles and Privileges.
Assign the security roles for a user. Security roles enable you to assign a unique set of privileges to users on a per project basis. They are created and maintained at the project source level and assigned to users at the project level.
-
Select or search a project and check all the security roles that the user is required to have for that project.
-
You can select different security roles for different projects based on the user profile.
The user privileges you grant may be broadened or extended depending on the groups to which the user is assigned.
 Roles and Privileges
To apply a privilege to all projects, toggle on Enable next to the privilege.
To apply a privilege to some projects, expand the role drop-down list above each project and choose a security role. For more information on security roles, see Create Security Roles.
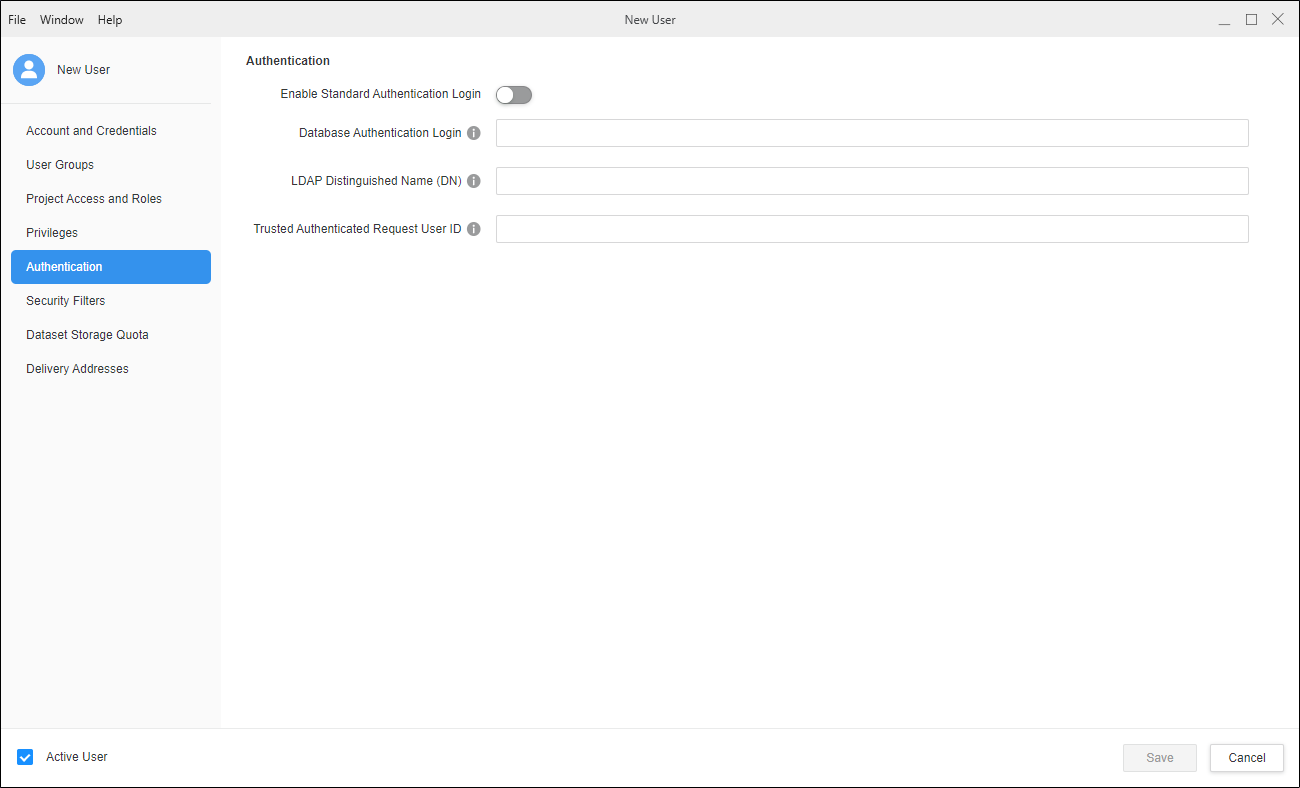
 Authentication
See Configure User Authentication for more information.
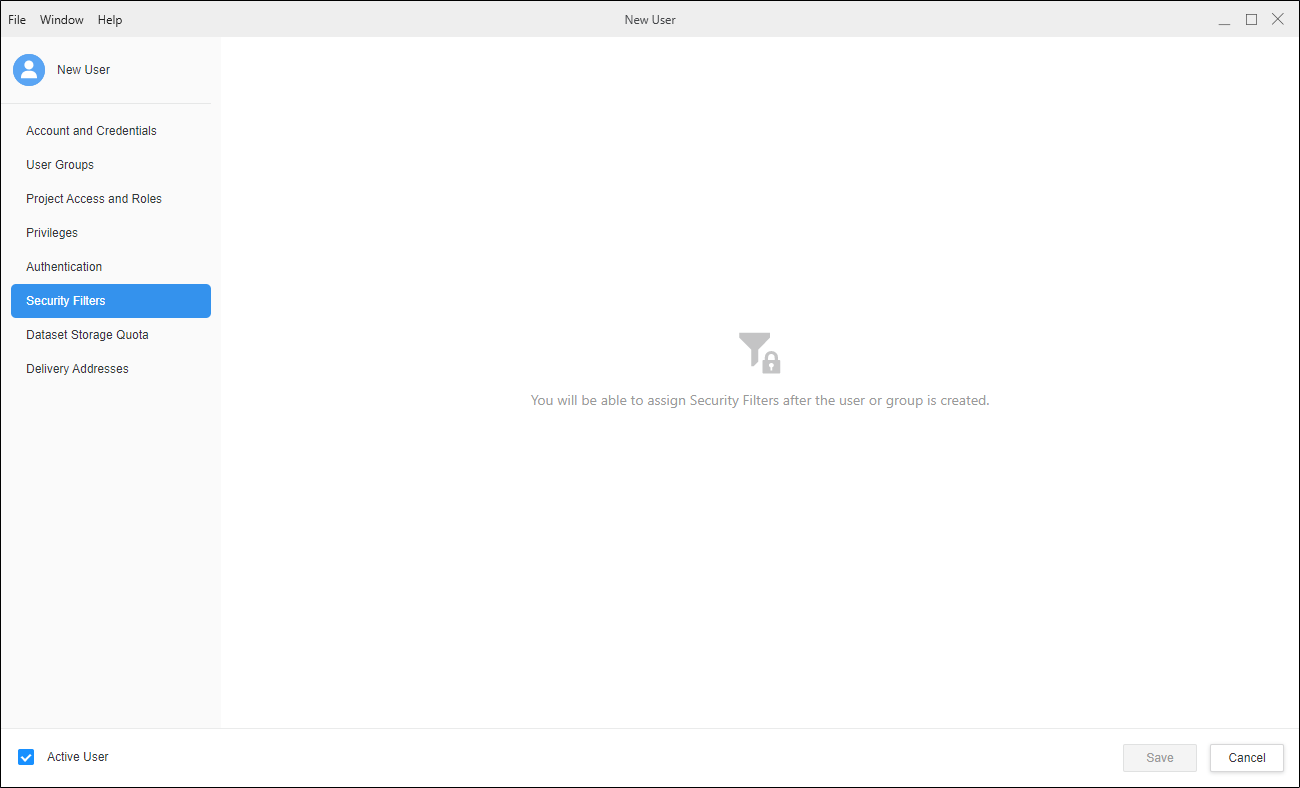
 Security Filters
You must finish creating the user before you can assign security filters.
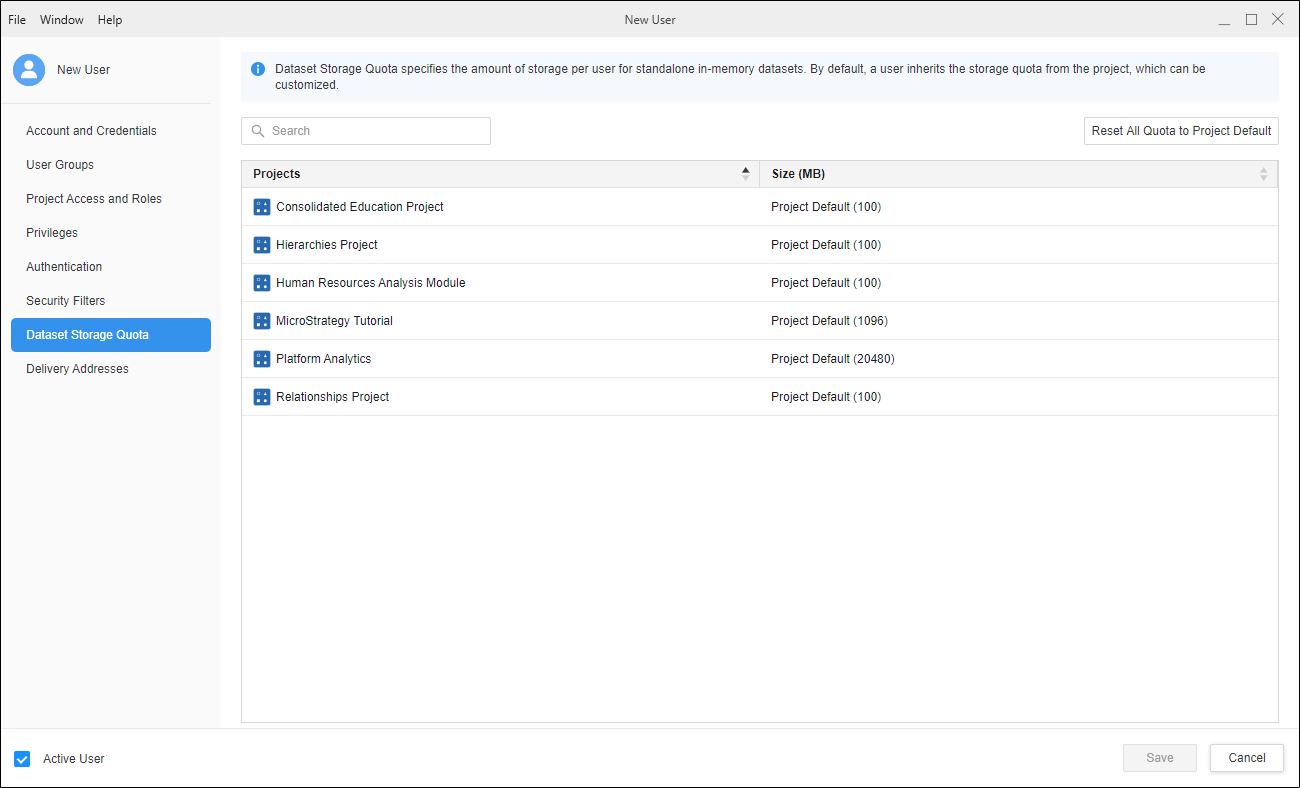
 Dataset Storage Quota
Specify the maximum storage space dedicated to each user in a project. The default user storage quota is project default set on the project configuration and applies to all users who have access to the project. For more information, see Dataset Storage Quota.
 Deliveries
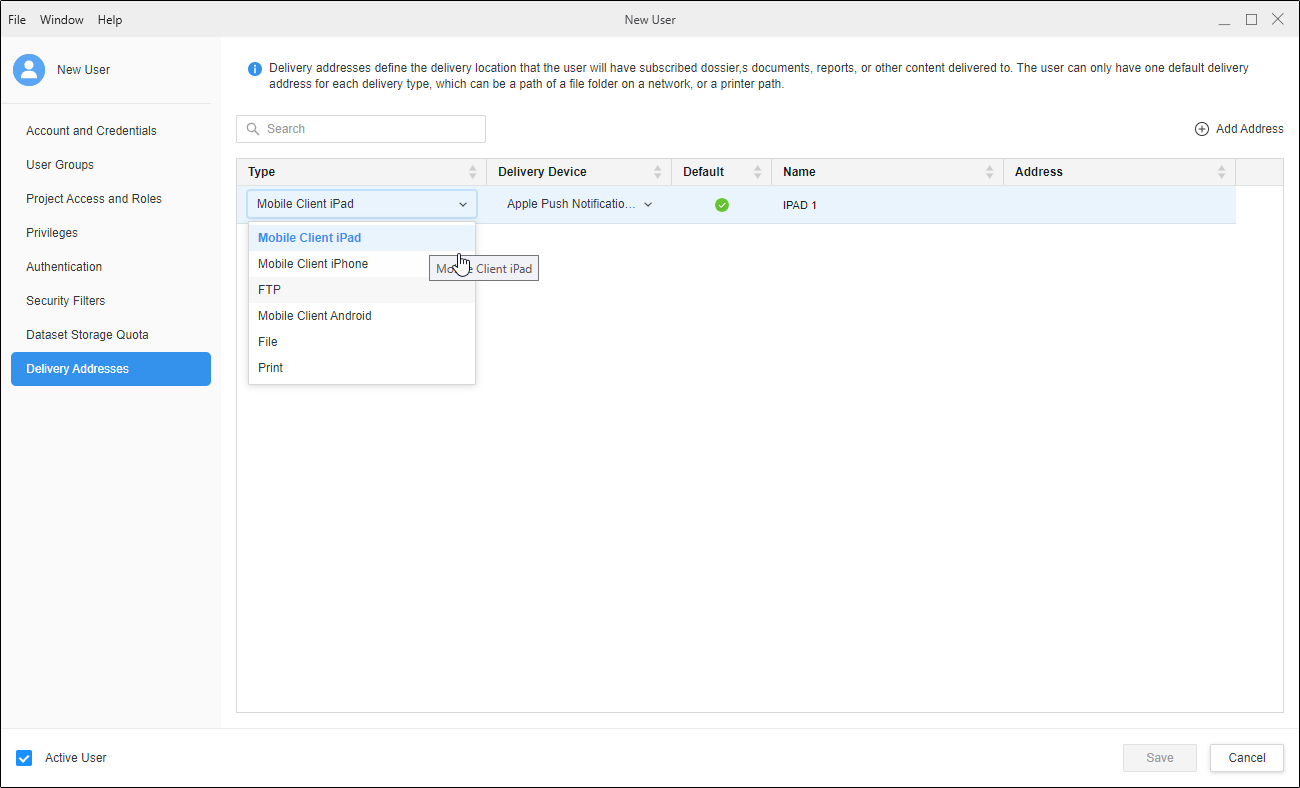
If you are using a version prior to Strategy One (December 2025), this page is named Delivery Addresses.
Add FTP, file, mobile, or printer addresses for the user if the user is subscribing to report and document delivery, or others are subscribing this user to deliveries. Adding an address to the user provides a location to deliver reports and documents for this user. This section displays a list of delivery locations associated with the user. These are locations where this user can receive subscribed reports and documents. You can add new delivery locations or delete existing delivery locations for the user.
-
Click
Add Address to add a new delivery address for the user. -
In the Type column, choose a delivery type. The available types depend on the transmitters configured by your administrator.
-
In the Delivery Device column, chose a delivery device. The available devices depend on the devices configured by your administrator.
-
Add a Name and Address for the delivery address. You can choose to add this information as the default for all deliveries.
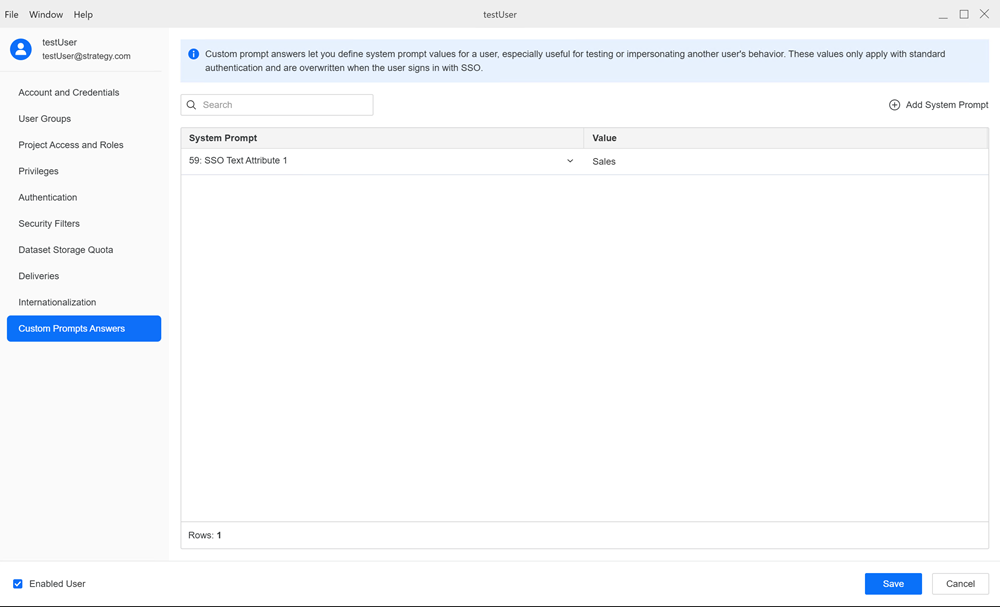
 Custom Prompt Answers
For more information, see Manually Pass System Prompts.
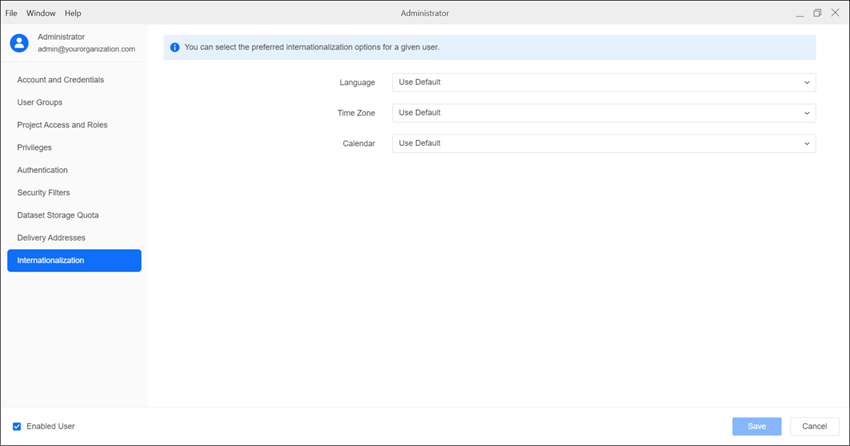
 Internationalization
Define the internationalization options for each user including language, measurement units, time zone, and calendar.
Expand the drop-down list next to each internationalization field and choose an option.
-
Click Save.
-
Starting in Strategy One (July 2025), optionally type a description in User Comments and click OK.
Users receive an email containing their credentials and an invitation to join the environment via Web or a mobile device.
Create a New User Group
- Open the Workstation window with the Navigation pane in smart mode.
- In the Navigation pane, click Users
- Select an Environment from the upper-left drop-down list.
- Next to User Groups, click Create a new User Group .
-
Click User Groups.
- In the upper right, click Add New User Group.
-
Enter group information in the New User Group window.
General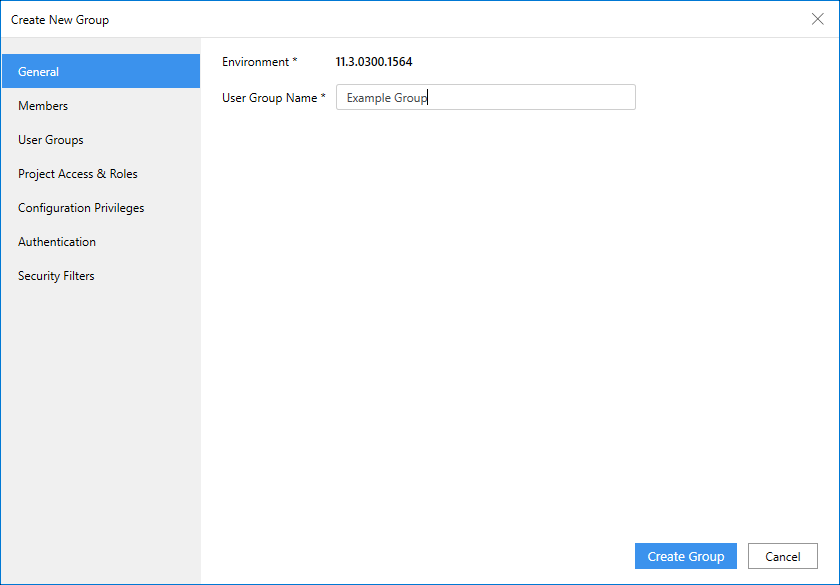
Type values in the following fields:
-
User Group Name: Type a name for the user group.
-
Description: Optionally type a description of the user group's use.
Users and Groups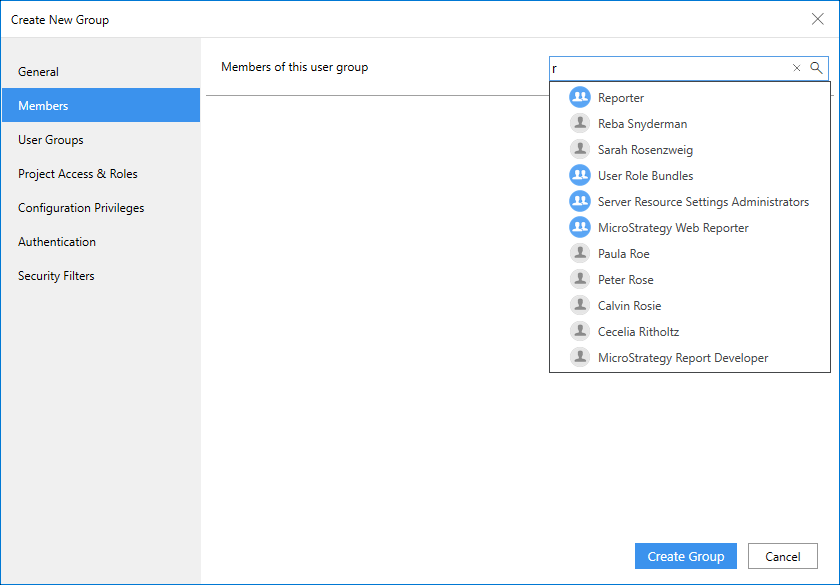
Add children and parent user groups:
-
Click the Children or Parent User Groups tab.
-
Click Edit Members or Edit Parent User Groups.
-
Find and select the check box next to the users or user groups you want to add.
-
Click Update.
Project Access and Roles
Manage user group project access and security roles:
-
Expand the drop-down list next a project name and choose an access option.
-
Select the check box next to the security roles you want to add.
For more information on creating security roles, see Create Security Roles.
Roles and Privileges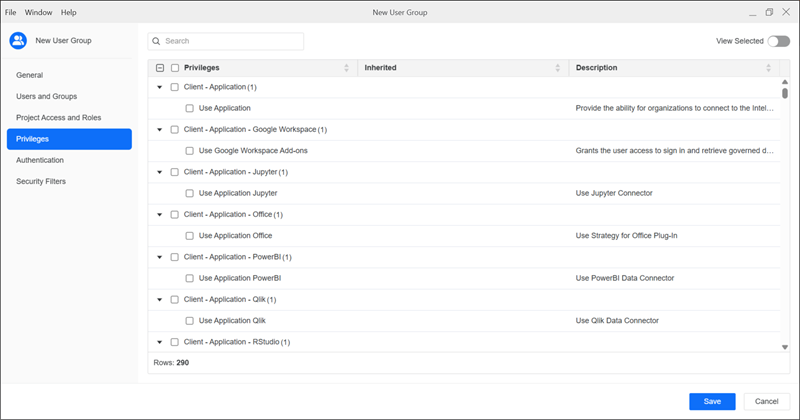
Select the check box next to the additional privileges to grant to the user group.
Authentication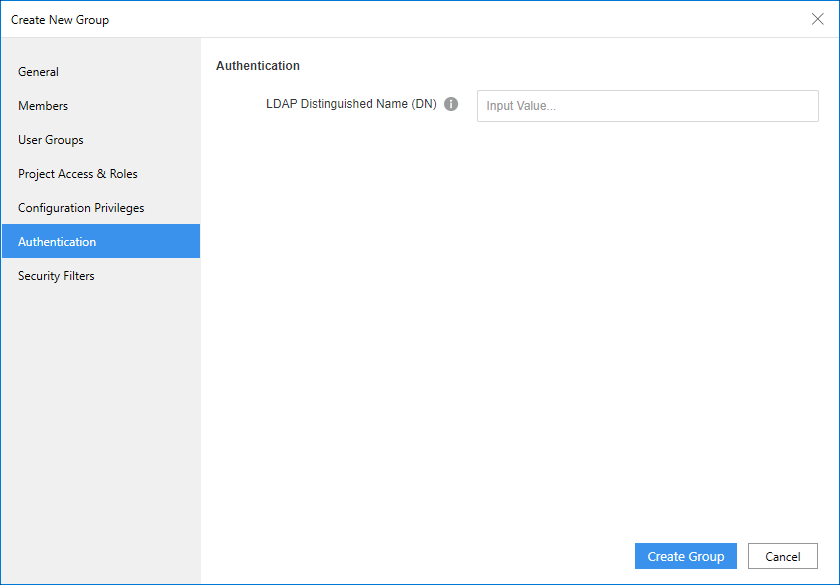
See Configure Group Authentication for more information.
Security Filters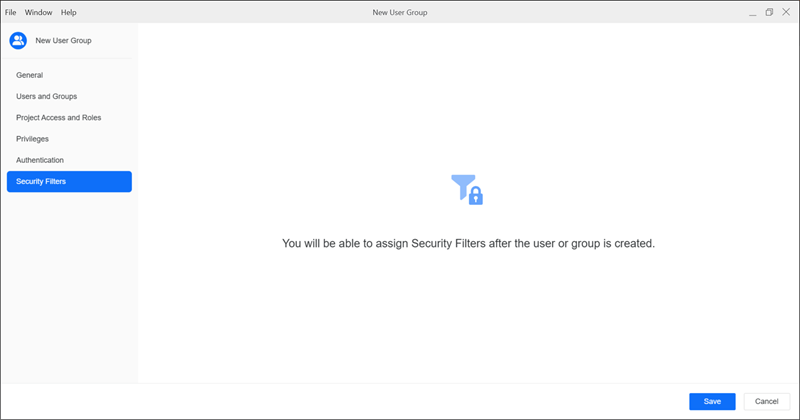
You must finish creating the user group before you can assign security filters.
-
- Click Save.
-
Starting in Strategy One (July 2025), optionally type a description in User Comments and click OK.