Strategy ONE
Integrate Snowflake OAuth Authentication Through AD FS
Learn how to integrate MicroStrategy with Snowflake for OAuth authentication through SAML support with Active Directory Federation Service (AD FS).
To troubleshoot an expired refresh token, see KB485176.
Configure the AD FS Server Application
-
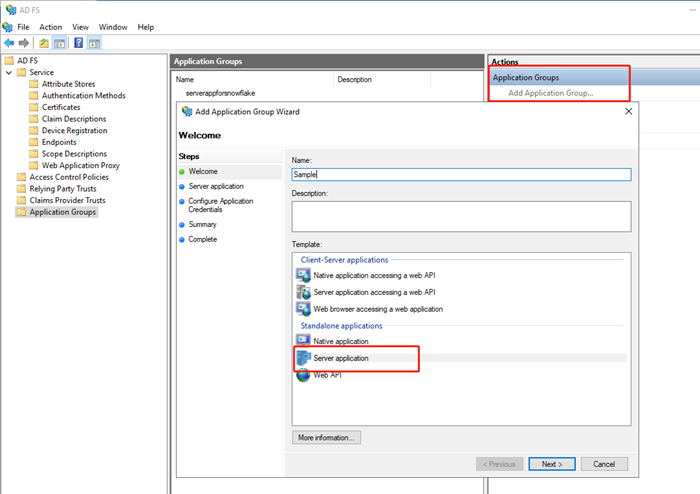
In AD FS Management Console, add an application group.
-
Enter a name and select the Server application template.
-
Click Next.
-
Copy Client Identifier as Client ID.
-
Enter a redirect URI and click Add. For example,
http://localhost.The redirect URI does not accept query parameters. In this case, ?env=3172 is removed in the AD FS setting. However, you must enter the full URL when adding an OAuth redirect URI, which is automatically regenerated by MicroStrategy. Some identity providers (IdP), like Twitter, prevent using such URI, but still accept the request.
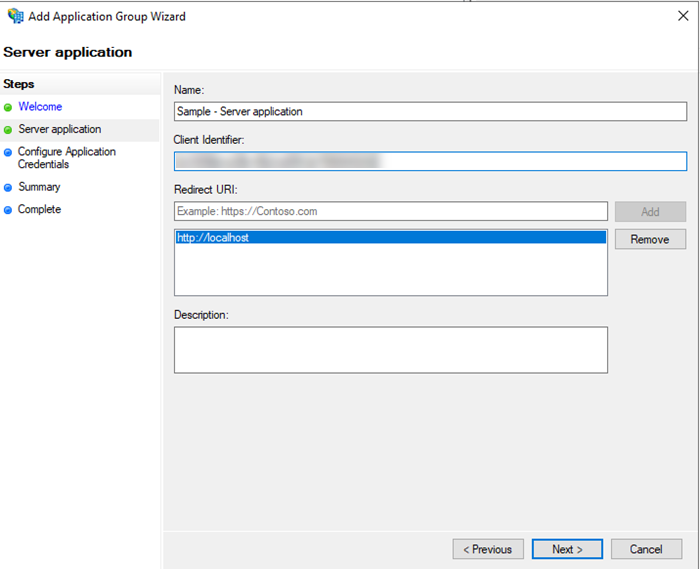
- Click Next.
- Configure the application credential. In this example, the shared secret is used as the client secret.
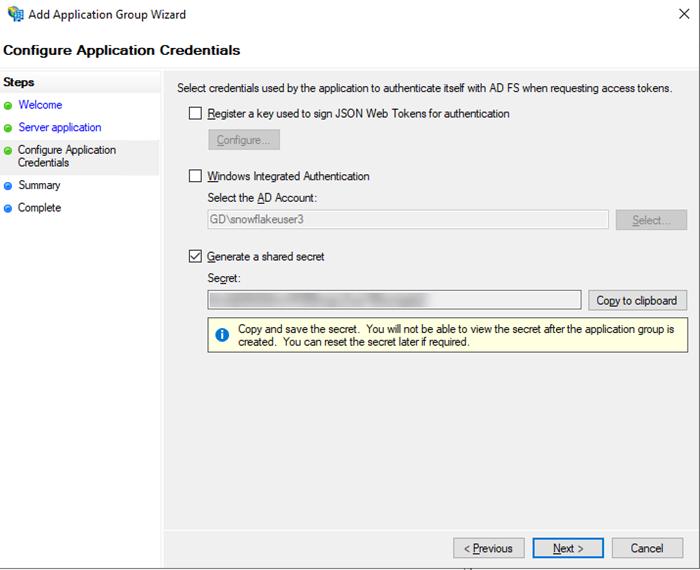
- Review your configuration and click Finish to save your application.
- Right-click the application > Properties to add Web API.
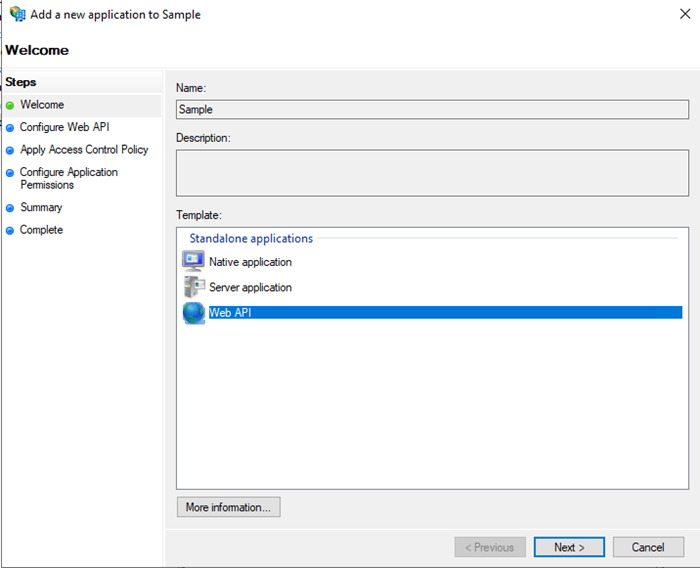
- Click Next.
- Add Snowflake account identifiers.
The URL is in the format of
https://<account_identifier>.snowflakecomputing.com/fed/login. For more information, see Account Identifiers - Snowflake Documentation.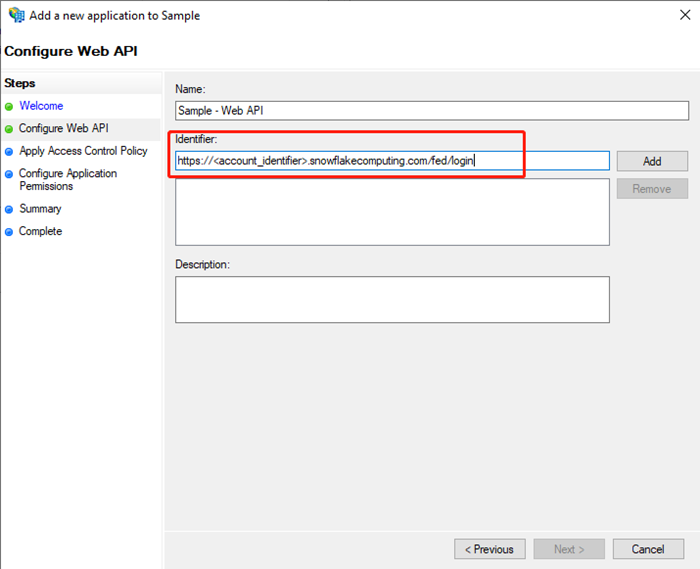
- Assign the appropriate privilege and configure the application permission.
- In Permitted scopes, select email, openid, profile, and user_impersonation.
- Add the session:role-any customized scope.
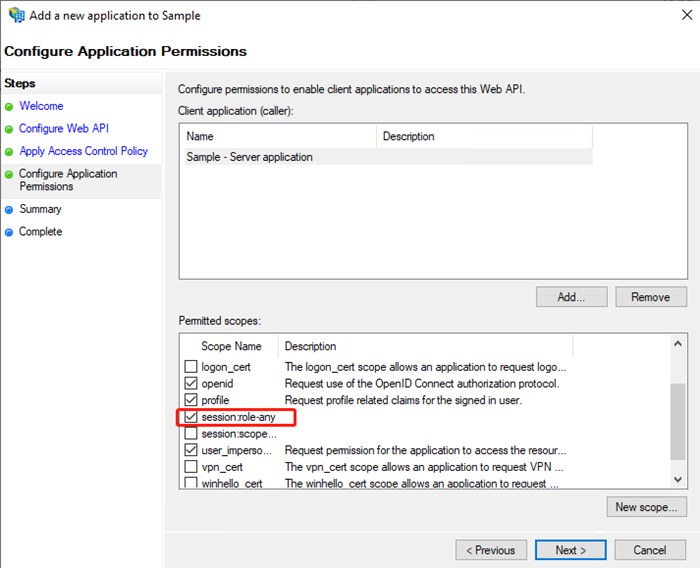
- Review and click Finish.
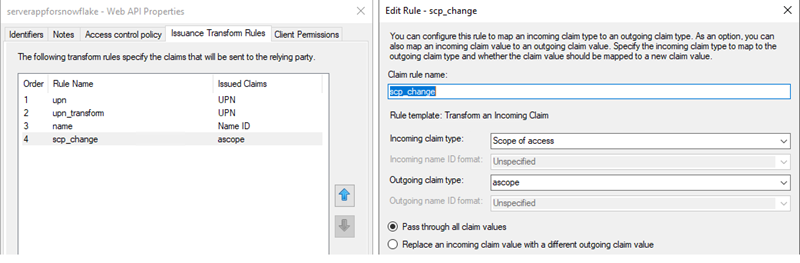
- Issue Transform Rules for Web API applications as shown in the following screenshots.
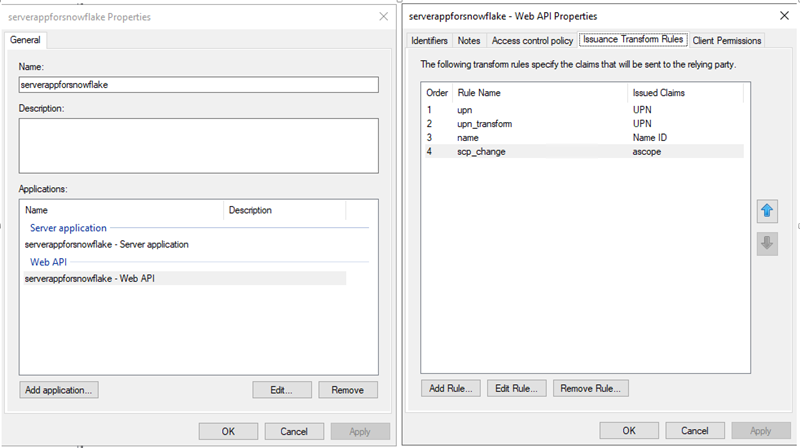
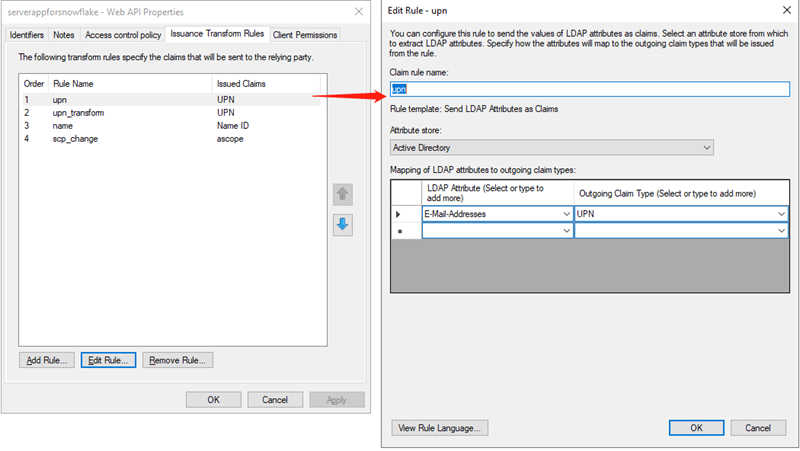
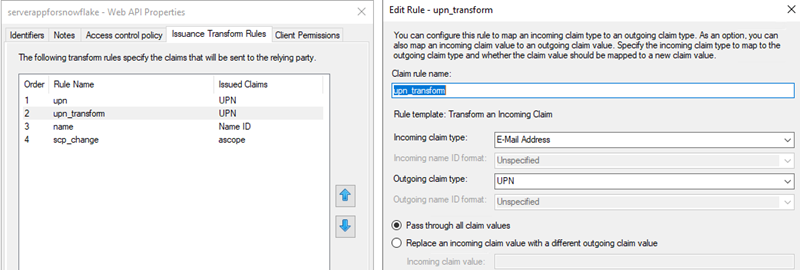
Add an extra transform rule to transform scope of access to ascope. See Configure Custom Clients for External OAuth — Snowflake Documentation for more information on the ascope rule.
Upon completing the steps in this section, you should have generated all OAuth parameters for Snowflake connectivity:
- Client ID: Generated in step 2
- Secret: Generated in step 3
- OAuth URL:
https://<ADFS Server base URL>/adfs/oauth2/authorize - Token URL:
https://<ADFS Server base URL>/adfs/oauth2/token - Resource:
https://<account_identifier>.snowflakecomputing.com/fed/login - Scope: openid session:role-an
Create Snowflake Database Instances
You can create Snowflake database instances with or without the project schema.
See Integrate MicroStrategy With Snowflake for Single Sign-On With SAML Using Microsoft Entra ID (Formerly Azure AD) to create a Snowflake Database Instance.
For a database instance created via MicroStrategy Developer, you must specify OAuth keywords in the Additional connection string parameters field. Enter the 'AUTHENTICATOR=oauth; TOKEN=?MSTR_OAUTH_TOKEN;' parameter as a placeholder that will be replaced by a real token when the user uses the Snowflake database instance.
Sample connection string:
DRIVER={SnowflakeDSIIDriver ODBC};SERVER=sample.snowflakecomputing.com;DATABASE=SNOWFLAKE_SAMPLE;SCHEMA=SAMPLE_SCHEMA;WAREHOUSE=SAMPLE_WH;AUTHENTICATOR=oauth;TOKEN=?MSTR_OAUTH_TOKEN;
JDBC;DRIVER={net.snowflake.client.jdbc.SnowflakeDriver};URL={jdbc:snowflake://sample.snowflakecomputing.com/?authenticator=oauth&db=SNOWFLAKE_SAMPLE&warehouse=SAMPLE_WH&schema=public&token=?MSTR_OAUTH_TOKEN};
With the Project Schema
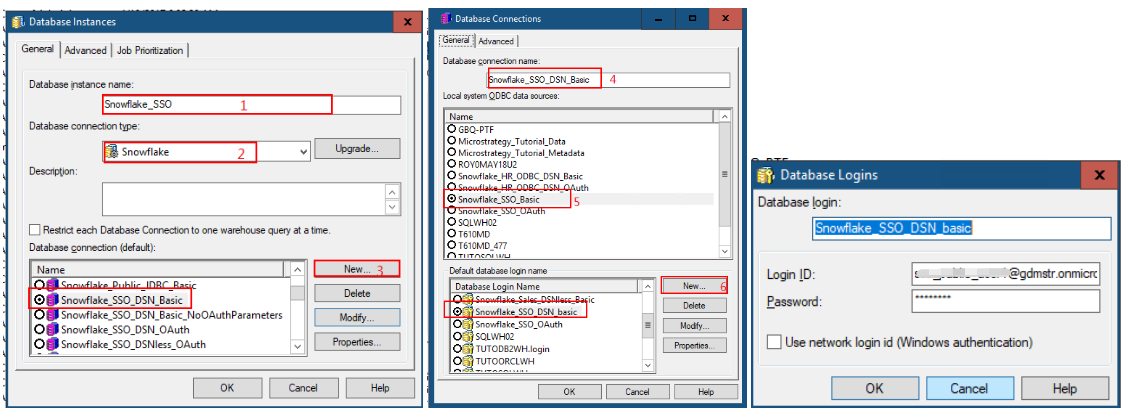
To use the project schema, you must have a basic authentication connection:
-
In MicroStrategy Developer:
- In the Database instance name field, type in a name.
- From the Database connection type drop-down, select Snowflake.
- Click New to create a new database connection.
- In the Database connection name field, type in a name.
- Select the DSN.
-
Create a database login and saved your settings.
-
In MicroStrategy Web:
Database instances created via MicroStrategy can be used for the project schema, but cannot be used for connection mapping.
-
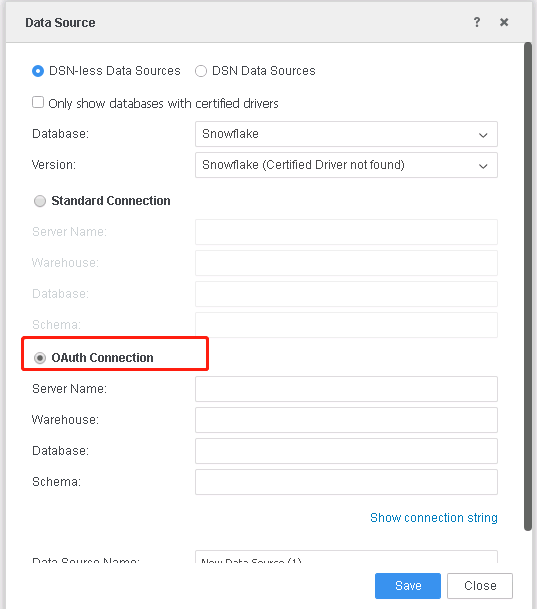
In the Data Source dialog, select the Standard Connection option.

-
Without the Project Schema
To use the database instance without the project schema, you must either have basic or OAuth authentication.
-
Create an OAuth authentication database connection:
-
In MicroStrategy Developer:
- Click New to create a new database connection.
- In the Database connection name field, type in a name.
- Select the DSN.
- Go to the Advanced tab.
-
In the Additional connection string parameters field, enter TOKEN=?MSTR_OAUTH_TOKEN;.
This will act as a placeholder that will be replaced by a real token when the user uses the Snowflake database instance.
- Click OK.
- In the Database login, enter a name.
-
Select the Use network login id (Windows authentication) checkbox. For JDBC connection, you must specify Login ID as the Snowflake login namea associated with the access token. For example,
domain\snowflakeuser.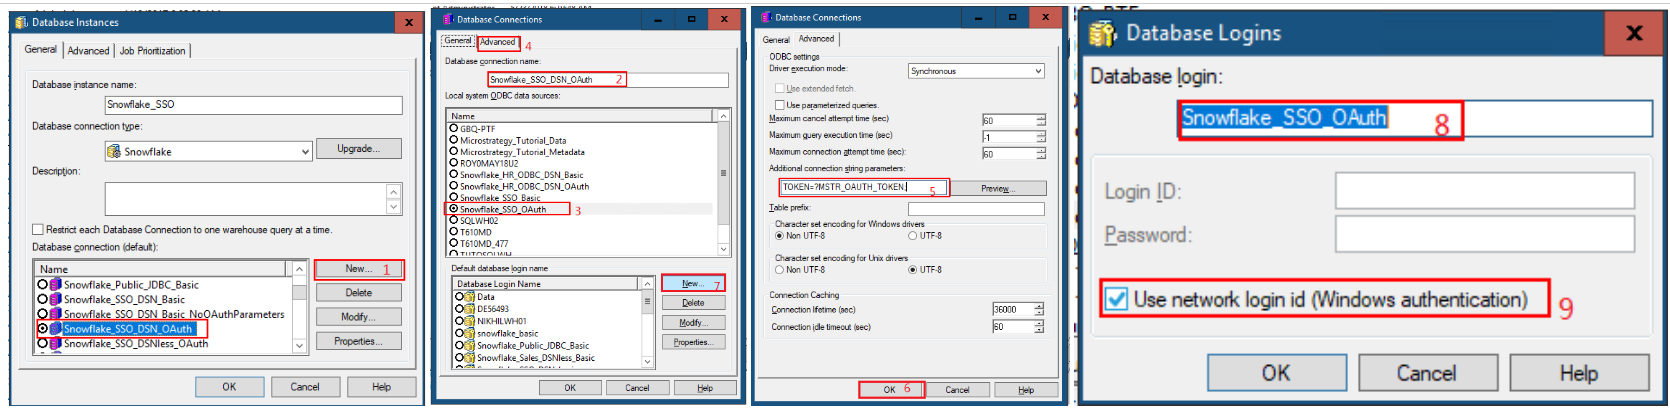
-
In MicroStrategy Web:
In the Data Source dialog, select the OAuth Connection option.
-
-
Set OAuth Parameters.
Users must have the Set OAuth parameters for Cloud App sources privilege under Client-Web.
If you want to use the DB role in MicroStrategy Workstation, OAuth parameters must be set from Workstation. Oauth parameters in Web and Workstation are different set values.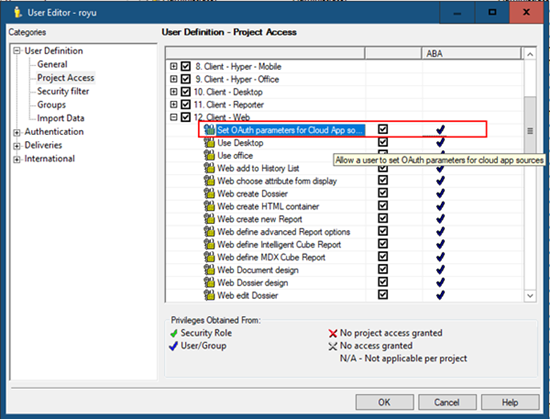
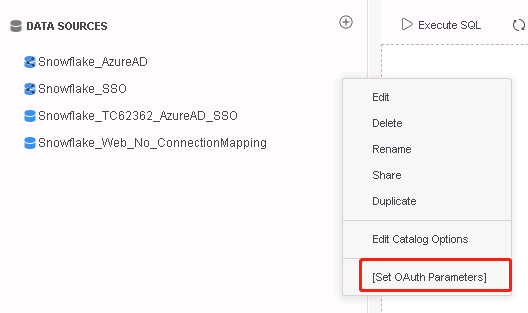
After the database instance is created, you can set the OAuth parameters in MicroStrategy Web.
-
In the Database Instance menu, select Set OAuth Parameters.
-
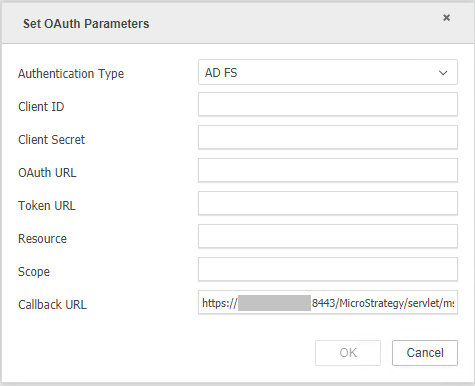
In the Authentication Type drop-down, select AD FS.
-
Fill out the required fields.
The required information can be referenced when creating the AD FS server application in the previous steps.
-
For Client ID, click on Application Groups > Overview > Properties > Server application> Edit, and locate the ID.
- For Client Secret, use the secret generated the first time you created the server application.
- For OAuth URL, use
https://<ADFS Server base URL>/adfs/oauth2/authorize. - For Token URL, use
https://<ADFS Server base URL>/adfs/oauth2/token. - For Resource, use
https://<account_identifier>.snowflakecomputing.com/fed/login. For more information, see Account Identifiers. - For Scope, use openid session:role-any.
-
The Callback URL is generated by default.
For Web:
https://[MicroStrategy Web Hostname]/MicroStrategy/servlet/mstrWeb?evt=3172For Workstation:
http://localhostThe callback URL must be added to the Snowflake server client application.
-
-
Create Seamless Login
See Enable Seamless Login Between Web, Library, and Workstation for more information.
Limitations
-
An end-to-end single sign-on (SSO) workflow is not supported.
-
To use the database role in MicroStrategy Workstation, OAuth parameters must be set from Workstation. OAuth parameters in MicroStrategy Web and Workstation are of different set values.
-
You must re-authenticate if the access token is expired. The default expiration time is 8 hours and can be configure in the AD FS server
Appendix
AD FS Configuration for SAML Authentication
See Integrating SAML Support with AD FS to integrate AD FS with MicroStrategy.
Snowflake Configuration
SAML Configuration
The following is a sample workflow for configuring OAuth for Snowflake.
-
Log in using the Snowflake Web Console.
-
Run the following query to create a Snowflake account.
Copycreate user "snowflakeuser@demo.com" password = 'PASSWORD' DEFAULT_ROLE = PUBLIC;
grant role SYSADMIN to user "snowflakeuser@demo.com" ;
grant role PUBLIC to user "snowflakeuser@demo.com" ;
GRANT MODIFY , MONITOR , USAGE , OPERATE ON WAREHOUSE "DEMO_WH" to role PUBLIC; - Specify the IdP information for Snowflake.Copy
use role accountadmin;
alter account set saml_identity_provider = '{
  "certificate": "<Certificate Content>",
  "issuer": "http://<ADFS Server base URL>/adfs/services/trust",
  "ssoUrl": "https://<ADFS Server base URL>/adfs/ls",
  "type"  : "ADFS",
  "label" : "ADFSSingleSignOn"
  }';
See Configuring an Identity Provider (IdP) for Snowflake — Snowflake Documentation to obtain the certificate and replace
<Certificate Content>with your certificate. - Enable Snowflake-initiated SSO. Copy
use role accountadmin;

alter account set sso_login_page = true;
OAuth Configuration
See Configure Custom Clients for External OAuth - Snowflake Documentation to configure OAuth for Snowflake.
-
Create an OAuth authorization server in Snowflake.
external_oauth_rsa_public_key is retrieved against the certificate which is obtained in the previous step.
Copycreate or replace security integration adfs_oauth_mstr
type = external_oauth
enabled = true
external_oauth_type = custom
external_oauth_any_role_mode = 'ENABLE'
external_oauth_issuer = 'https://<ADFS Server base URL>/adfs/services/trust'
external_oauth_rsa_public_key = '<public key retieved from certificate>'
external_oauth_audience_list=('https://<account_identifier>.snowflakecomputing.com/fed/login')
external_oauth_scope_mapping_attribute = 'ascope'
external_oauth_token_user_mapping_claim='sub'
external_oauth_snowflake_user_mapping_attribute='login_name'; -
Modify your external OAuth security integration.
Copyalter security integration adfs_oauth_mstr set
external_oauth_scope_mapping_attribute = 'scope';