Strategy ONE
Integrating SAML Support with Okta
This procedure provides instructions about integrating Strategy Web with Okta. For more information, see the Okta documentation.
Create an Application
- Log in as an Okta administrator and go to the Admin page.
- Go to Applications and click Add Application.
- Select SAML 2.0.
- Click Create.
Configure the Application
- Enter your app name.
- Click Next.
-
Complete SAML Settings.
-
Single Sign on URL: Also referred to as "Assertion Consumer Service URL", it is the Strategy application address that sends and receives SAML messages. If SAML setup is already finished on Strategy side, it is the URL within the md:AssertionConsumerService tag at the bottom of the SPMetadata.xml file.
The URL usually takes the below form:
Copyhttp(s)://<host server>/<MSTR application name>/saml/SSO - Audience URI (SP Entity ID): It corresponds to the entityID value at the top of the SPMetatada.xml file, which is also the first input field on the MicroStrategy SAML configuration page. It is a unique identifier of the Strategy application.
-
ATTRIBUTE STATEMENTS (OPTIONAL): This is to configure what SAML attributes will be sent to Strategy. If the default attribute names were used at Strategy SAML configuration, the names are: EMail, DistinguishedName, and DisplayName. The Strategy-side attribute names can be found in the MstrSamlConfig.xml file. For example:
Copy<dnAttributeName>DistinguishedName</dnAttributeName>
<displayNameAttributeName>DisplayName</displayNameAttributeName>
<emailAttributeName>EMail</emailAttributeName>It is not required to configure all three attributes.
-
GROUP ATTRIBUTE STATEMENTS (OPTIONAL): This is used to grant access to the Strategy Web or Mobile Administrator page and manage user privilege inheritance. If the default attribute name was used at Strategy SAML configuration, the name is "Groups". The Strategy-side attribute name can be found in the MstrSamlConfig.xml file. For example:
Copy<groupAttributeName>Groups</groupAttributeName>Use the filter to select the groups that are sent over. To send over all the groups, select Regex and enter .* into the field.

You can leave the other fields as default or configure them as needed.
-
Finish SAML Setup
- On the Okta admin page, go to Applications and open the application.
- Go to Assignments.
- Click Assign to assign the application to users or groups.
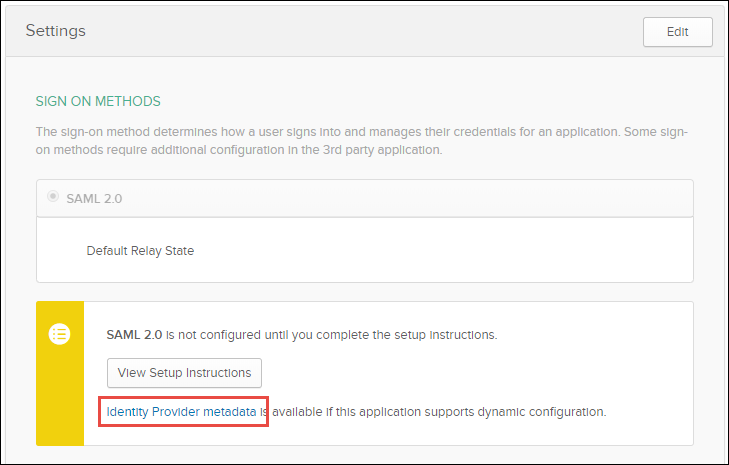
- Go to Sign On.
-
Click Identity Provider metadata.
- Save the XML file as IDPMetadata.xml, and place it in the MicroStrategy\WEB-INF\classes\resources\SAML folder.