Strategy One
Use the Jira Connector
Starting in Strategy One (July 2025), users can create multiple Jira data sources and import data from Jira Cloud using the Cloud Object Connector service.
Create an OAuth 2.0 App in Jira
-
Sign in to Atlassian Developer Console at
https://developer.atlassian.com/console/myapps/. -
Create an OAuth 2.0 integration APP.
-
Enter an application name.
-
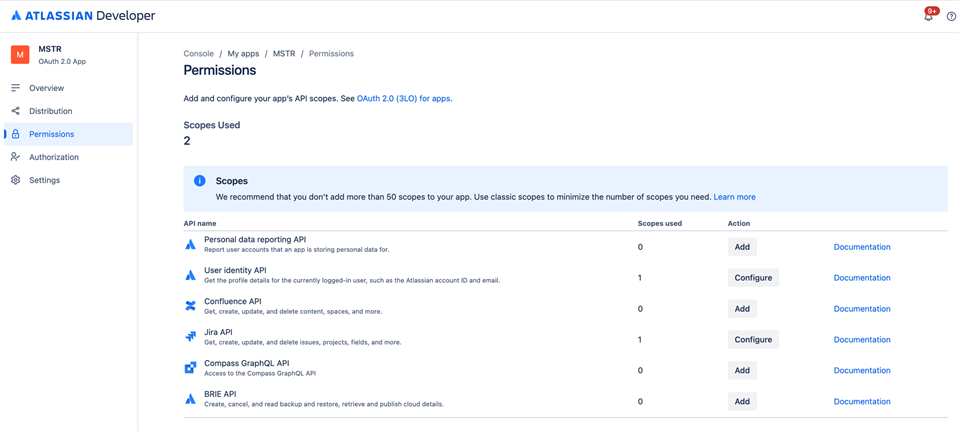
Under Permissions, add and configure scopes:
-
User identity API: read:me
-
Jira API: read:jira-work
-
Under Authorization, add the Callback URL for Strategy Library or Workstation:
-
Library redirect URI:
https://<servername>/MicroStrategyLibrary/auth/DIOAuthRedirect.jsp -
Workstation redirect URI:
http://127.0.0.1
-
-
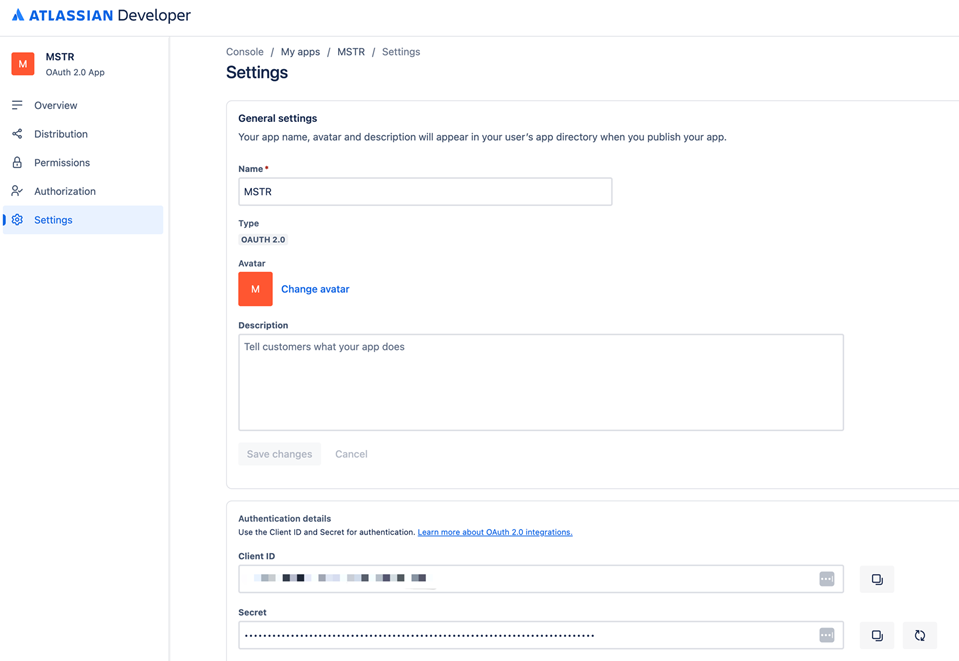
Under Settings, copy the Client ID and Secret for Strategy Jira Data Source creation.
Create a Jira Cloud Data Source
-
Open StrategyWorkstation.
-
In the navigation pane on the left, click + next to Data Sources to add a new data source.
-
In Available Data Source Types, click Jira Cloud.

-
Type the Name of the database role being created and, if necessary, a Description. Ensure that Cloud Gateway Jira is selected as the Database Version.

-
In Default Database Connection, choose an existing database connection or add a new one.
-
To create a new database connection, choose an existing authentication service or add a new one.
-
To create a new authentication service, follow the steps below:
-
Type a Display Name.
-
In the Select an Identity Provider drop-down list, ensure that Atlassian is selected.
-
Type the Client ID and Client Secret. The Library Web, Authoring Web, and Workstation URIs are automatically populated.
-

See Manage OAuth Enterprise Security with Identity and Access Management (IAM) Objects for more information on creating an IAM object.
-
-
Click Save. The Test button is disabled for OAuth authentication.

-
If you need to modify the connectivity information, click
 to edit it.
 -
Select the Projects to associate this database role with.
-
Click Save. The Test button is disabled for OAuth authentication.

Once you've successfully created the required database role, you can start importing data. For steps to use Workstation, see Import Data from Jira in the Use the Jira Connector topic. For steps to use Library, see Import Data from Jira in the Use the Jira Connector topic.