Strategy ONE
Library Administration Control Panel
You can access the Library Admin control panel by navigating to <FQDN>:<port>/MicroStrategyLibrary/admin. The control panel allows you to examine and configure settings for Library server and Collaboration server. Additionally you can view the settings related to communication with the Intelligence server and configurations in Strategy Library such as the Intelligence server cluster it is connected to.
You can also View and Edit Library Administration Settings in Workstation.
Starting in MicroStrategy 2021 Update 8, you can Select an Authentication Mode at the Application Level in Workstation.
Overview Tab
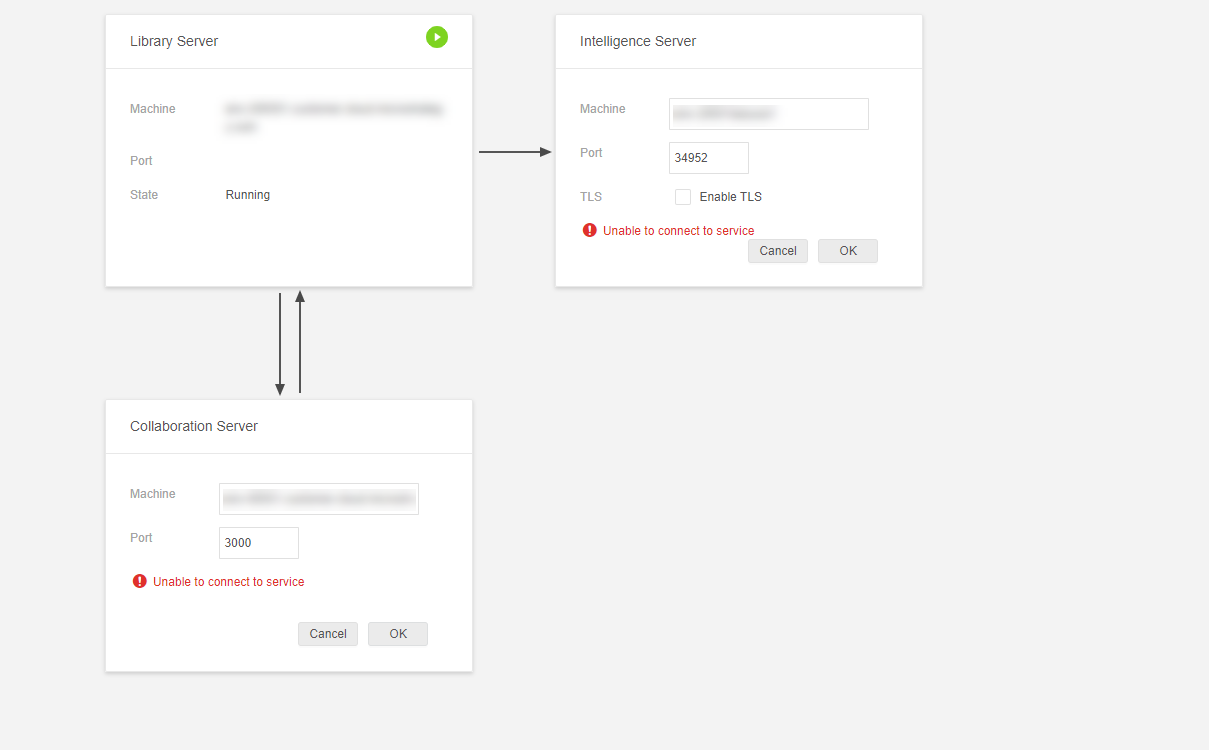
The Library Admin Overview tab provides the ability to examine the machine name, port, state, and Intelligence and Collaboration servers. The top right corner of each component displays its current status. Click Edit to change settings for Intelligence and Collaboration servers. You can also choose to expose or hide the Collaboration service feature to users.

Configure Collaboration Server
To add a Collaboration server, only the machine name (hostname) and port are required.
The Collaboration server uses 3000 as the default port. If the administrator uses 0 as the port number when configuring the Collaboration server, it will be replaced with 3000.
Configure Intelligence Server
To add an Intelligence server, the administrator needs to specify the machine name (hostname), port, and TLS status.
The Intelligence server uses 34952 as the default port. If the administrator uses 0 as the port number, the Library server tries to connect to an Intelligence server under port 34952.
Ensure the input is the DNS of an Intelligence Server and not other intermediate components. Load balancers are not supported between the Strategy Library and Intelligence Server layers, as load balancing is handled within these layers by Strategy Library.
Error / Warning Messages / Troubleshooting
Existing configuration issues appear with an error or warning icon on the Overview page:
- Error icons in red: The system is not running as expected. Click to view a more detailed message.
- Warning icons in yellow: There are some minor issues that should be addressed.
When you click an error or warning icon, a pop up window displays a detailed error message. It provides actions and links regarding why the issue occurred and how to resolve it.
Timeout Settings
If you receive a Timeout Error in the Library Admin control panel, modify the timeout settings in the Library server configuration file configOverride.properties to a larger value. For example:
http.connectTimeout=5000
http.requestTimeout=10000
Library Server Tab
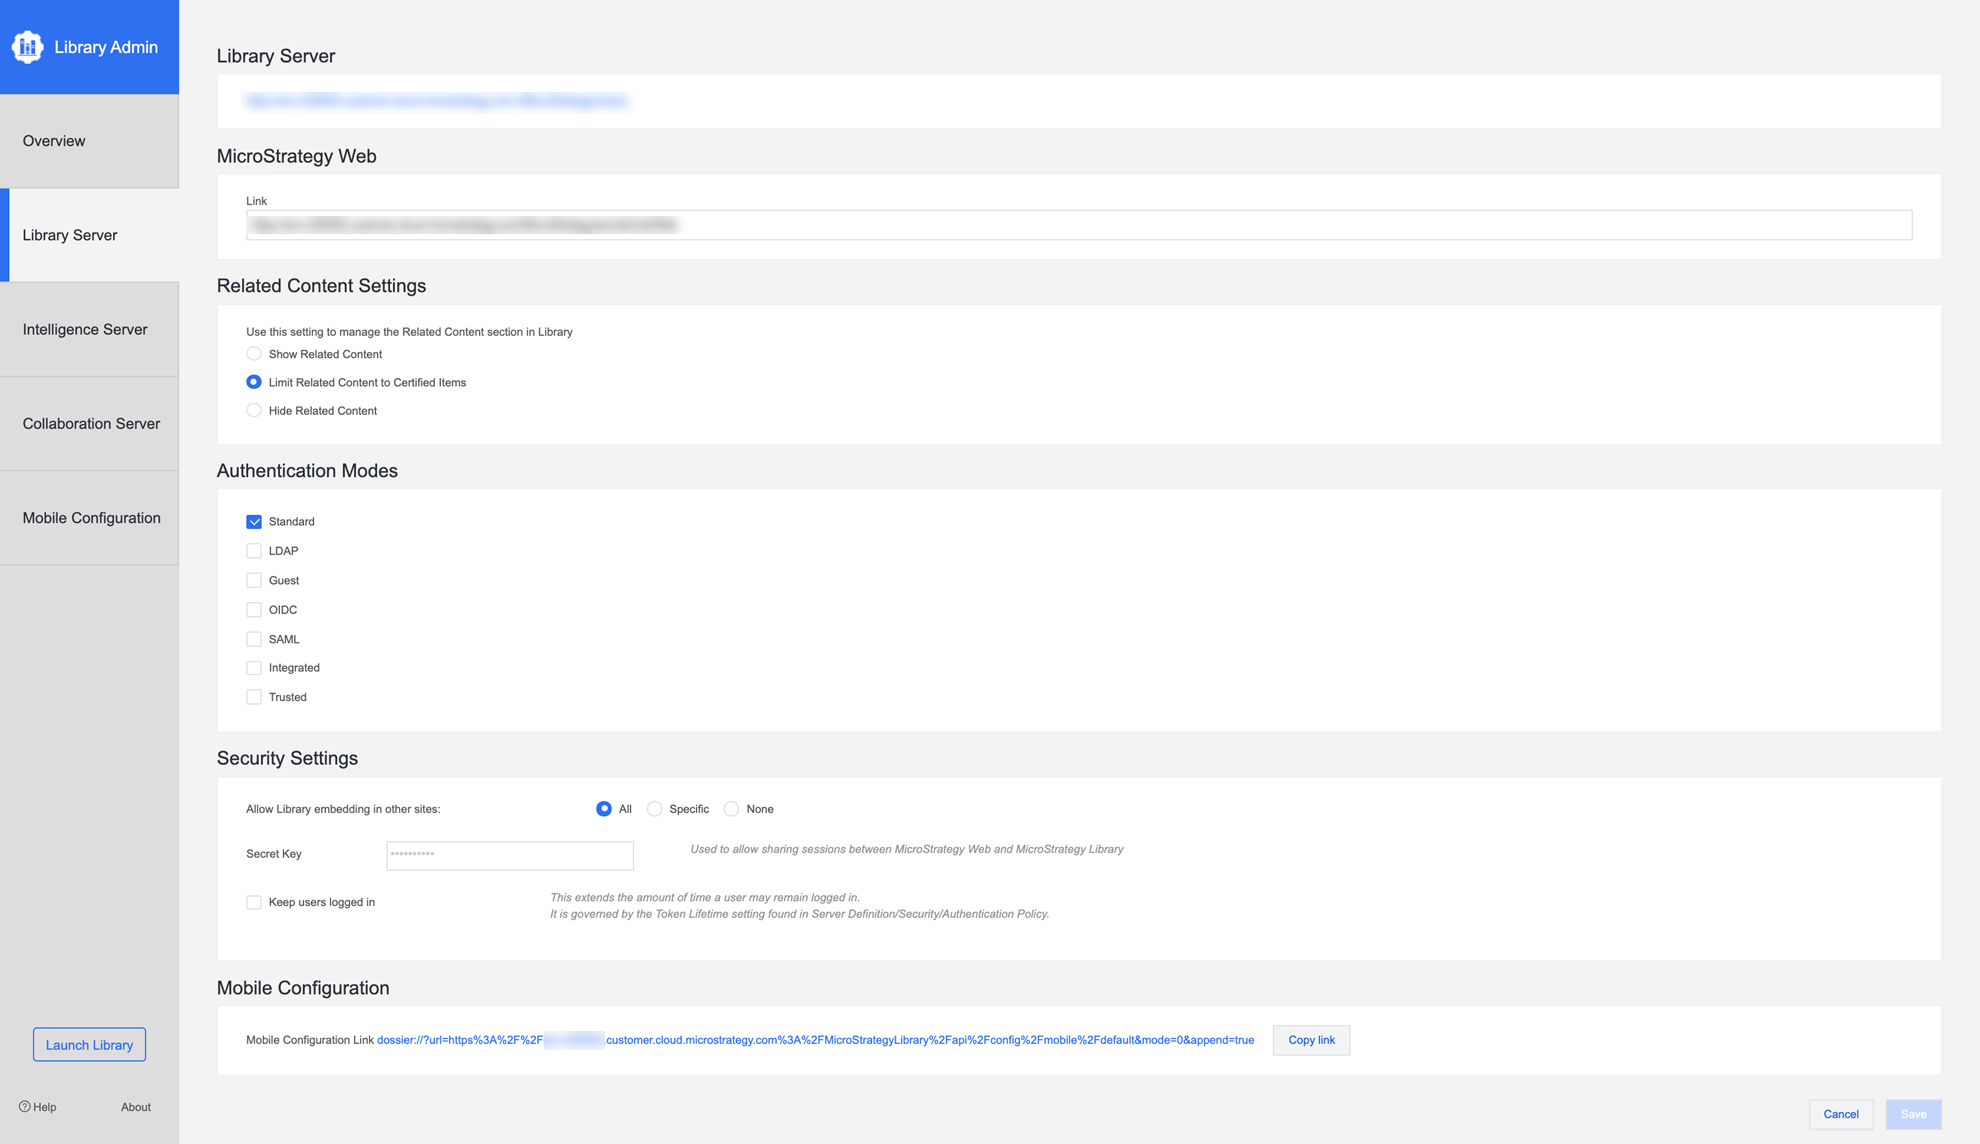
The Library Server tab allows an administrator to view their deployment's Library URL, Web Server URL, configure authentication modes, security settings, extend user sessions, access the Mobile configuration link, and configure connectivity settings to the Modeling service.
Library Server
The connection URL for Strategy Library.
Strategy Web
This provides a connection URL to Strategy Web, which enables the Web options in Library.
Related Content Settings
This section allows you to manage the content displayed in the Related Content section of your dashboard. You can choose to show all related content, restrict recommendations to only certified items, or disable the setting completely.
Authentication Modes
The Authentication Modes section gives an administrator to dictate which authentication modes they want to allow. When the authentication mode is updated and saved, the server typically requires a restart.
Trusted authentication mode cannot be used in combination with any other log in mode.
Starting in MicroStrategy 2021 Update 8, you can Select an Authentication Mode at the Application Level in Workstation.
Security Settings
Chrome Web Browser version 80 and above introduces new changes which may impact embedding. For more information, see KB484005: Chrome v80 Cookie Behavior and the Impact on Strategy Deployments.
As with any web application, extending a user session may increase security risk and exposure. The extended session is governed by the Intelligence server Authentication Policy/Token Lifetime. By default, a Library http session times out after 30 minutes. Enabling the Keep users logged in feature will extend the user session beyond 30 minutes and up to Token Lifetime. It is strongly recommended that you do not modify the Token Lifetime beyond the default value of 24 hours.
The first security settings section allows administrators to allow Library embedding in other sites. In other words, this section enables Cross-Origin Resource Sharing (CORS) settings. You must enable your CORS settings to use Strategy One products like HyperIntelligence or Strategy for Office or to embed a dashboard in a website.
To enable CORS, select All. When this security setting is updated and saved, restart the Library application.
Additionally, the security settings section allows administrator to enter an optional secret key which is used to allow sharing sessions between Strategy Web and Strategy Library.
To extend a user session, select the Keep users logged in check box.
Mobile Configuration
The mobile configuration link provides with the mobile server link which can copied and can be accessed.
Global Search
Select Enable Global Search to allow users to search for content outside their personal library.
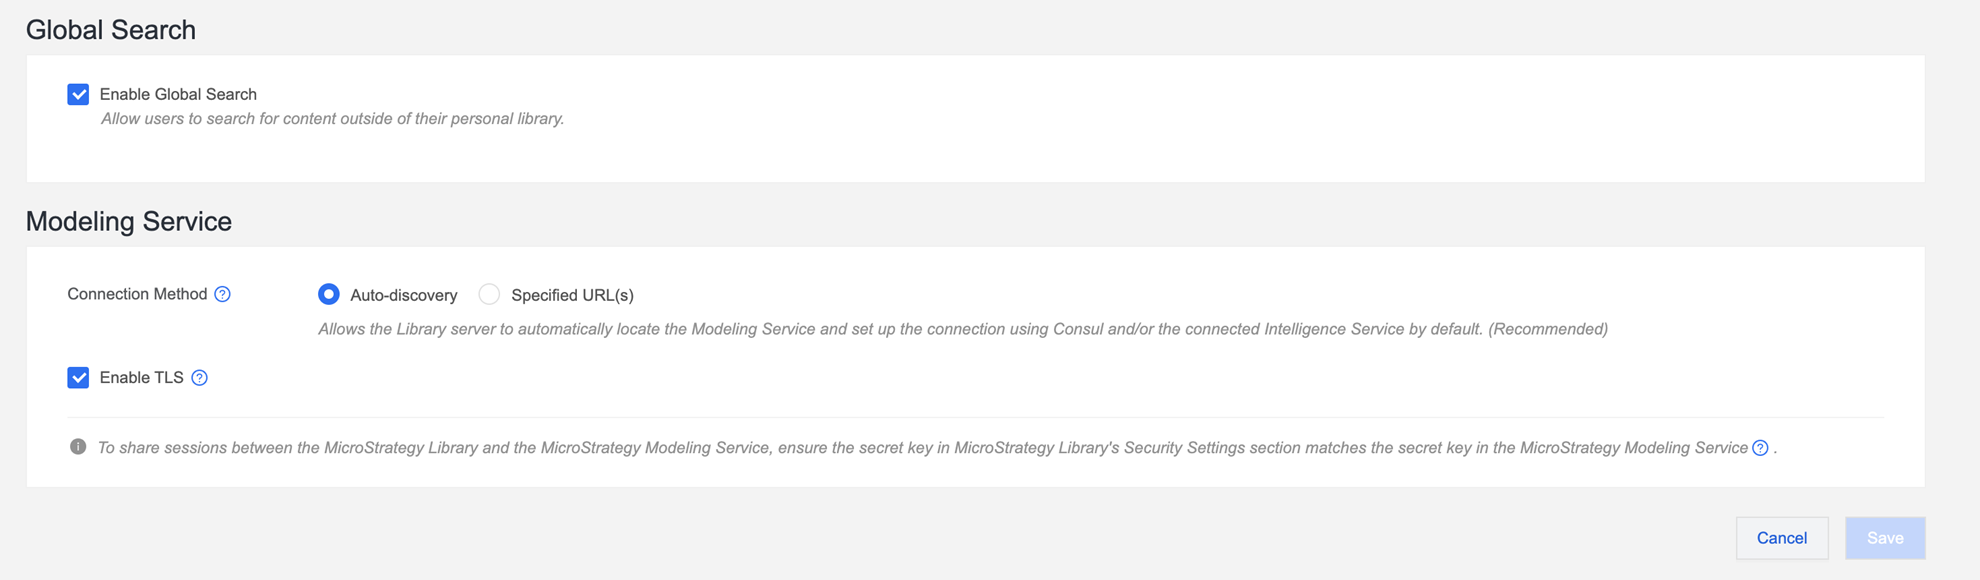
Modeling Service
To share sessions between Strategy Library and the Strategy Modeling service, ensure the secret key in Strategy Library's Security Settings section matches the secret key in the Strategy Modeling service.
For more information on how to configure the secret key in the Modeling service, see Modeling Service Configuration Properties.
Connection Method
This setting allows the administrator to manage the default approach of how the Library server locates the Modeling services.
- Auto-discovery: Allows the Library server to automatically locate the Modeling service and set up the connection using Consul and/or the connected Intelligence Service by default. (Recommended)
- Specified URLs: Allows the Library server to refer to the specified URL path to locate the Modeling service and set up the connection. If it fails, it falls back to Auto-discovery.
Any changes to this section only impact new user sessions. Existing user sessions must be logged out and then logged back in.
Enable TLS
Enable this option if the Modeling service is HTTPS enabled, but with a private Root CA certificate or self-signed certificate. In this case, a trustStore file and its password must be configured within configOverride.properties. For a Modeling service that is HTTPS enabled with a public Root CA certificate, disable this option.
For more information on how to set up the HTTPS connection between the Library server and the Modeling service, see Configure HTTPS Connection Between Library Server and Modeling Service.
Intelligence Server Tab
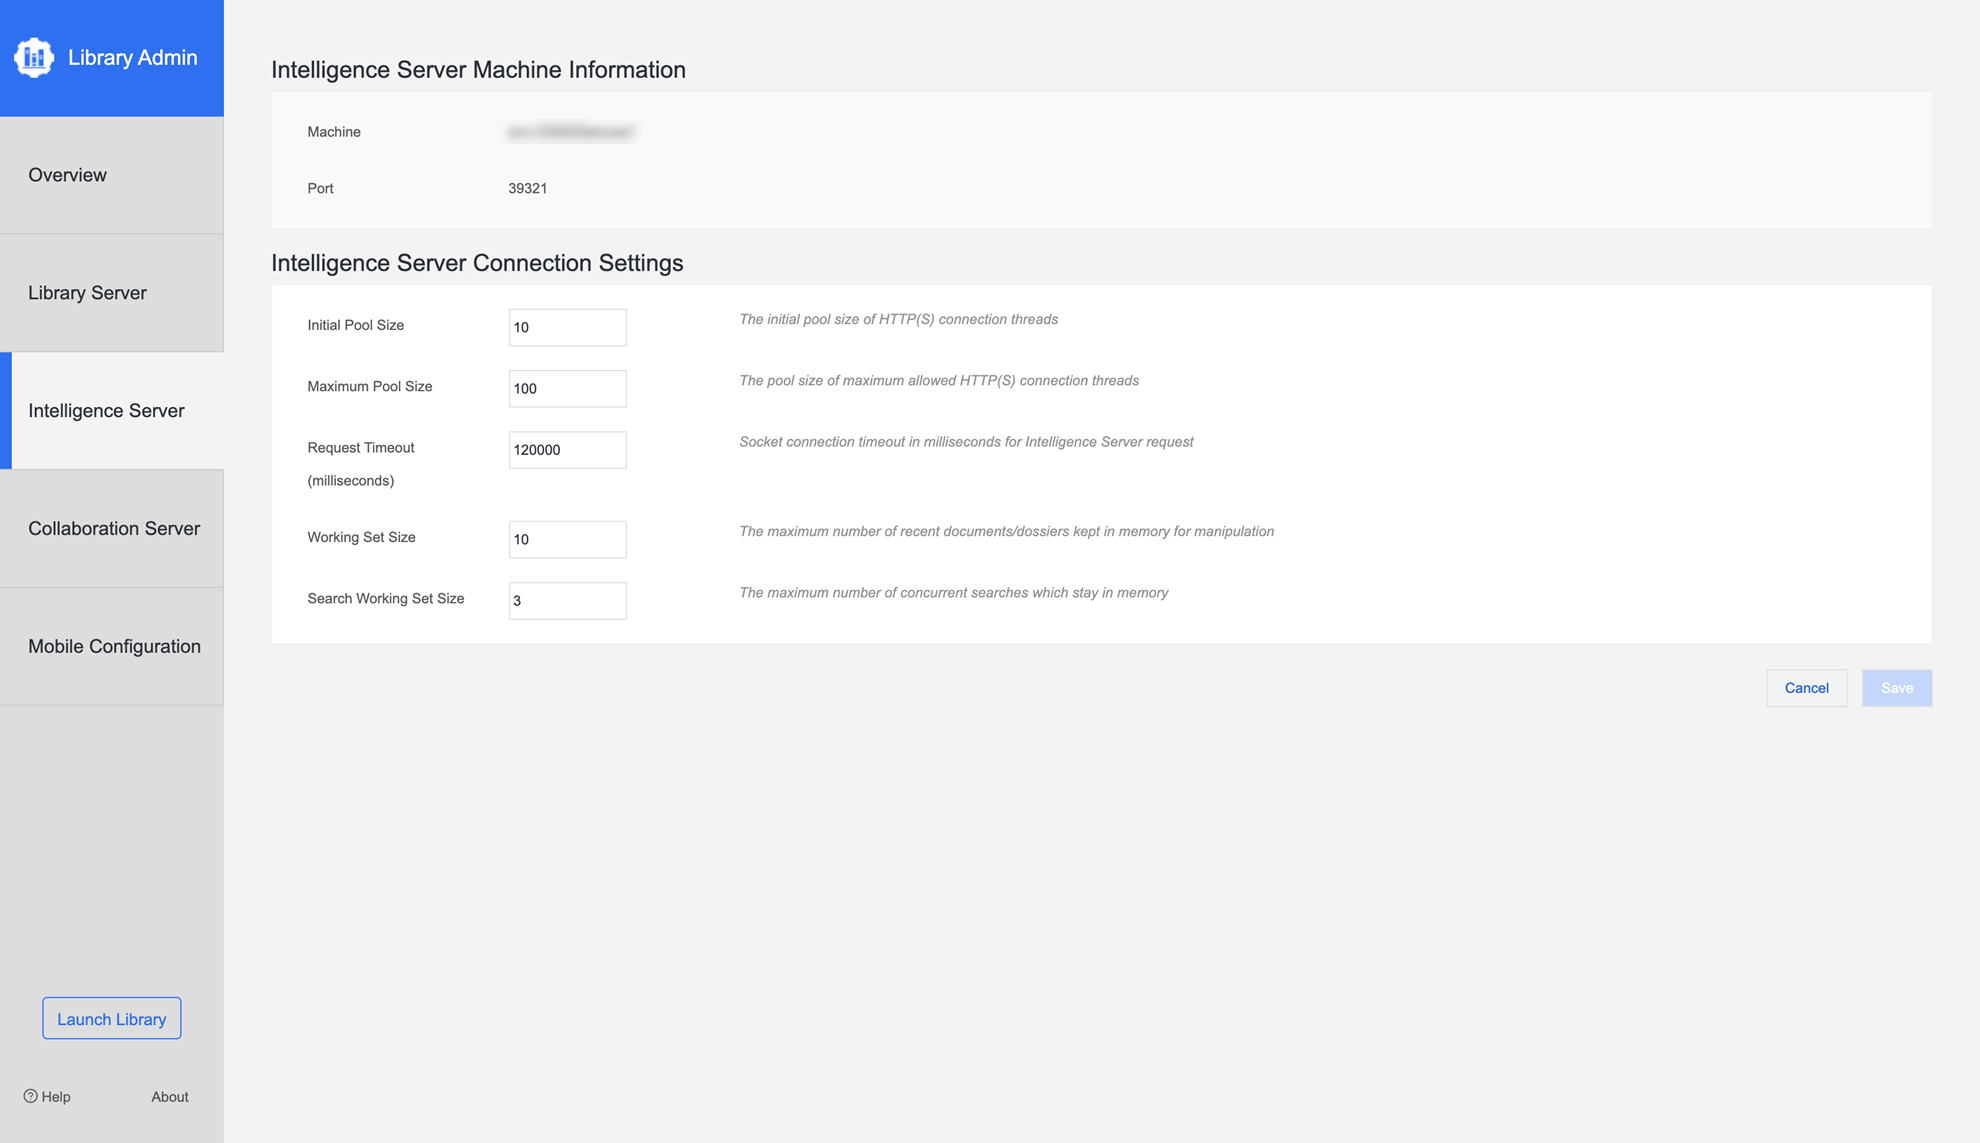
The Intelligence server tab allows the administrator to manage the Intelligence server Machine information.
It includes the following sections:
-
Intelligence Server Machine Information
This section allows for the input of Machine name and Port Number for the Intelligence server.
-
Intelligence Server Connection Settings
The Intelligence server Connection Settings tab allows the administrator to configure the following parameters:
- Initial Pool Size
- Maximum Pool Size
- Request Timeout (socket connection request timeout is in milliseconds for the Intelligence server)
- Working Set Size (indicates the number of recent reports or documents in memory for manipulation)
- Search Working Set Size (Indicates the maximum number of concurrent searches which stay in memory)
Collaboration Server Tab
This tab displays the server URL and that state of the Collaboration server machine. It also allows the administrator to update the following settings for the Collaboration server that is currently connected:
-
Enable Comments or Discussions
-
Enable TLS
- Enable Logging
-
Trusted Certificate Setting
To access this section, the communication between the Library server and the Collaboration server needs to be established first: no errors or warnings from the Library server to the Collaboration server on the overview page.
Manage Collaboration Panel Features
Manage how your users interact with Collaboration and messaging. This setting allows you to enable or disable the Comments or Discussions panel for end users.
You can choose to show Comments only, Discussions only, or hide the Collaboration panel entirely across the environment. To do this, you can use the checkboxes or the toggle to easily turn off functionality globally. Once making new selections in Library Admin, end users will see the changes immediately.
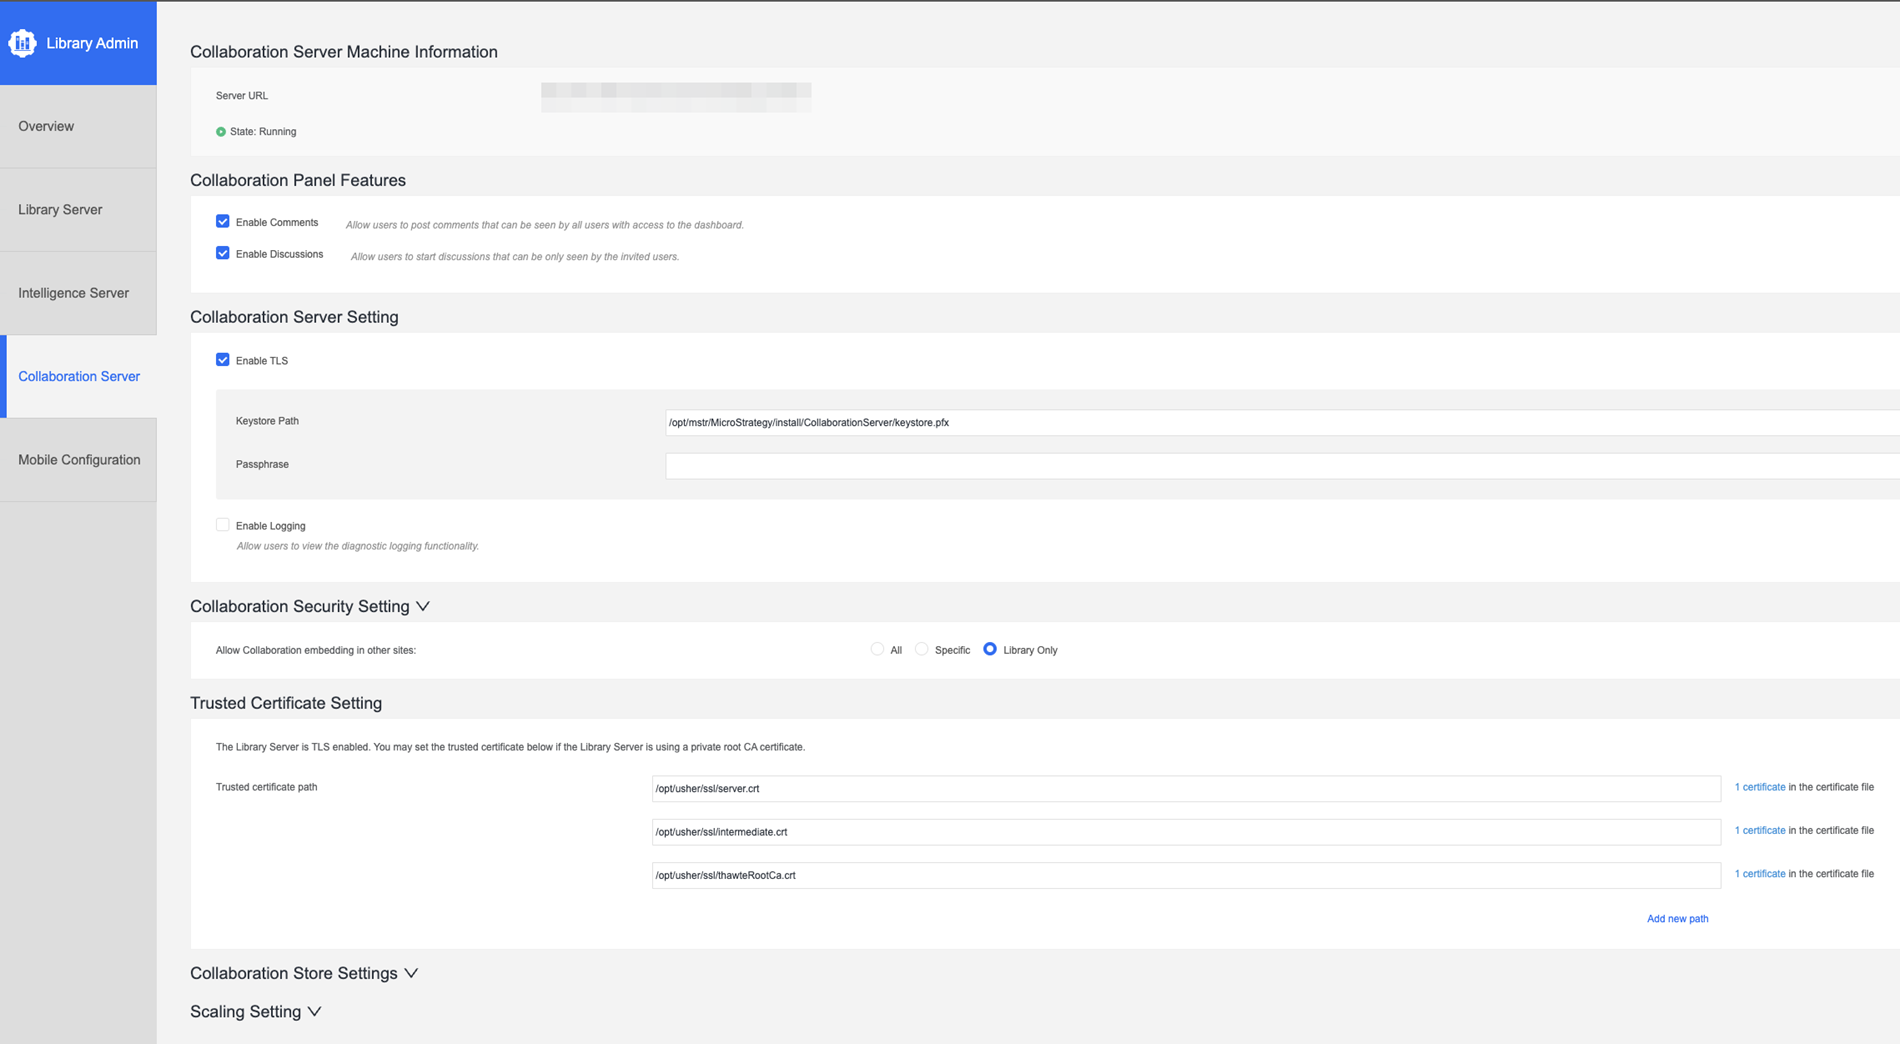
Collaboration Server Setting
Enable Logging
This setting can enable or disable diagnostic logging functionality in the Collaboration server.
Enable TLS
Selecting this setting requires a keystore path and a passphrase.
Any changes to this section require the administrator to restart the Collaboration server manually. Related warnings appear on this page until the restart is complete.
Collaboration Security Setting
Allow Collaboration embedding in other sites
This setting can enable or disable embedding Strategy Collaboration into other sites.
Trusted Certificate Setting
This section is only visible when the Collaboration server targets a TLS enabled Library server.
Mobile Configuration Tab
The Mobile Configuration tab provides the ability to configure a dashboard or document as the home screen in Library Mobile. This allows the organization to enhance and personalize the overall Library workflow for their end users.
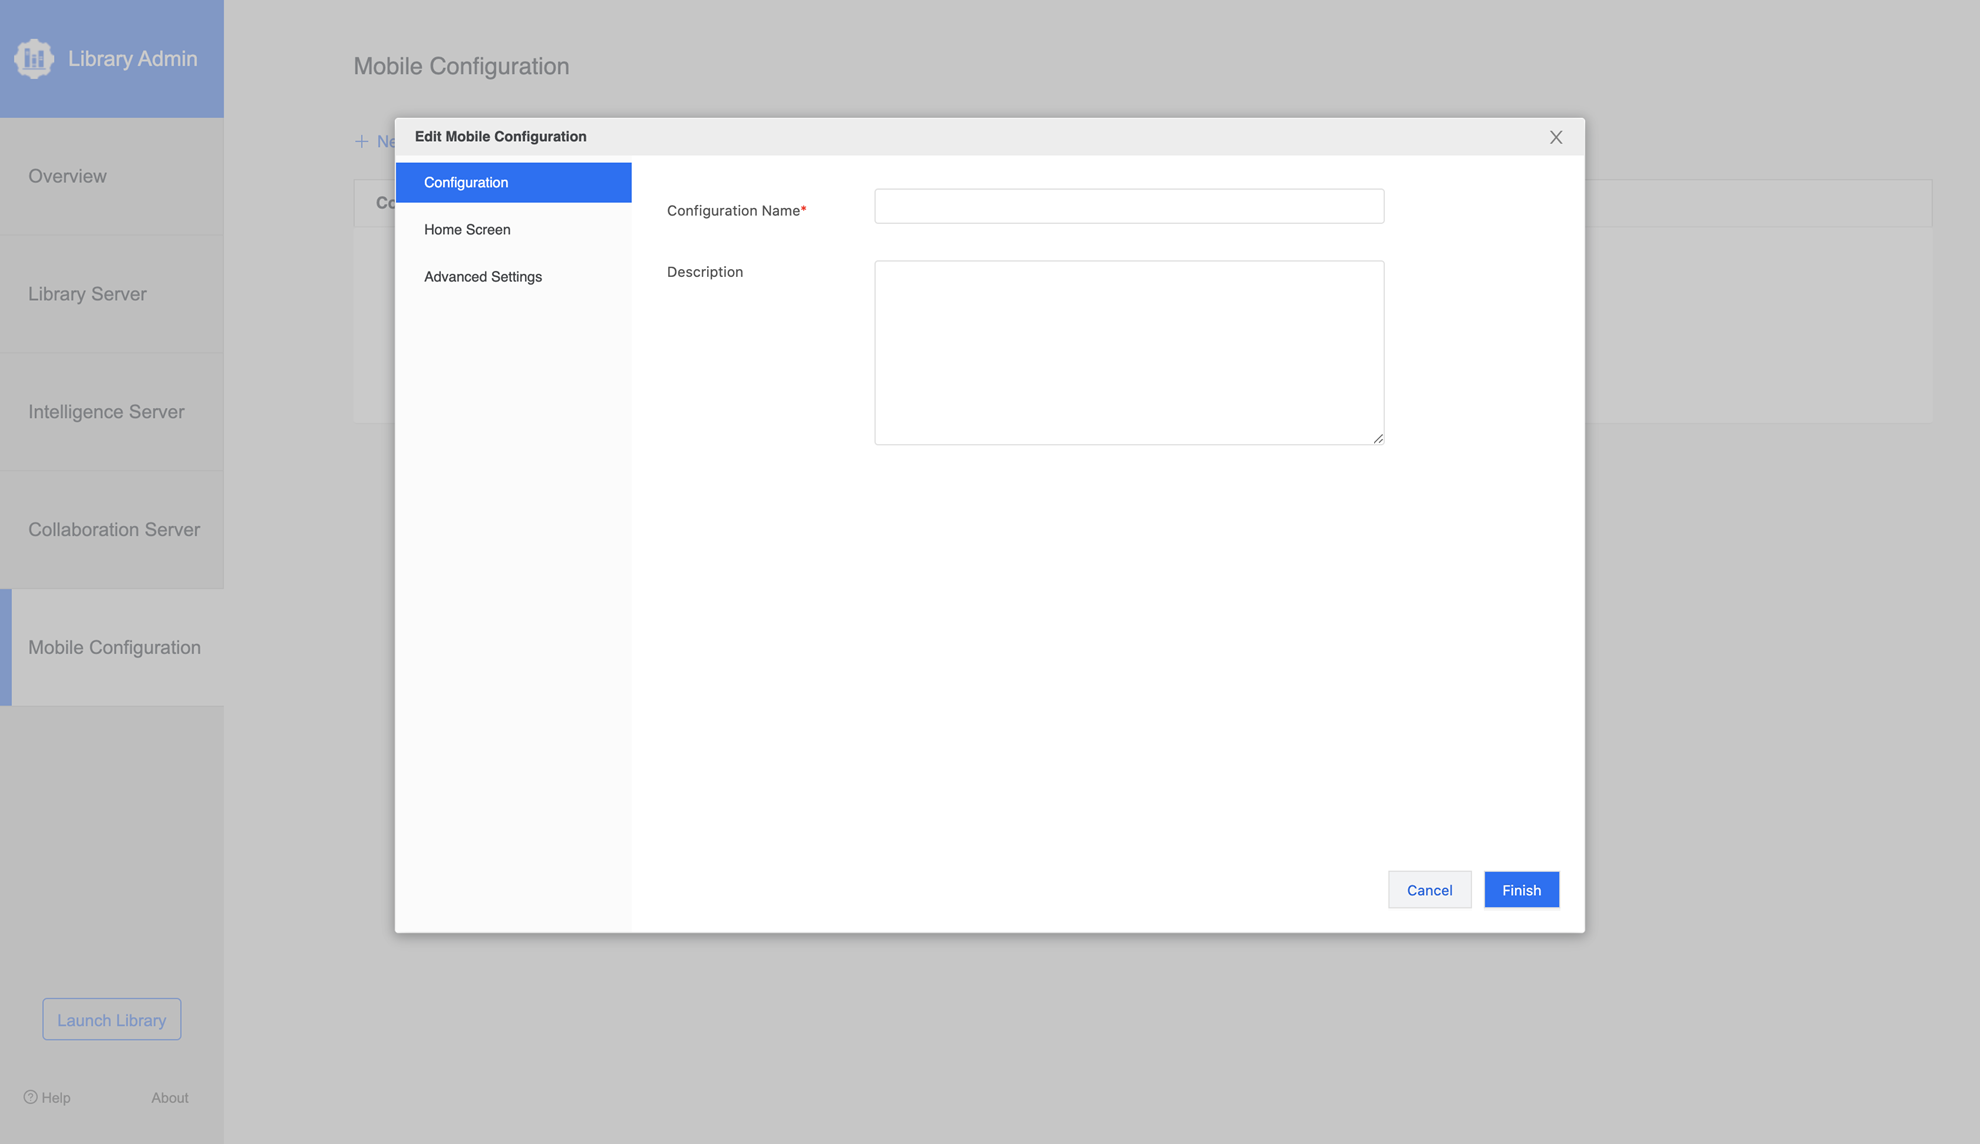
The panel includes the option to create a new configuration.
When creating a new mobile configuration, administrators can customize the following:
- Create a name and description for the new configuration
- Select a dashboard or document to set as the home screen of Library
- Configure Advanced Settings
- Access: Enable access preferences, advanced settings, or set automatic configuration updates
- Connectivity: Specify a time for network timeout
- Logging: Select the maximum log size and logging level
- Cache: Choose to clear caches on logout