Strategy One
Create Tables
Starting in Strategy One (October 2025), optionally enter a description of your change when saving a table.
You can create tables from data sources to a project using the Schema Editor. Using these tables as schema objects, you can create attributes and facts within the same project.
Before you begin using the Schema Editor, you need to be familiar with your schema, so you know how the information in your data sources should be brought into Strategy.
Check out the video below to learn more!
The Schema Editor used in this procedure uses the Modeling service infrastructure. Make sure the service is properly configured and running before creating tables.
- Open the Workstation window with the Navigation pane in smart mode.
- In the Navigation pane, click Schemas.
- Select an Environment from the upper-left drop-down list.
- Right-click a schema and select Edit Schema. The schema is locked while being edited.
- Select an environment and project.
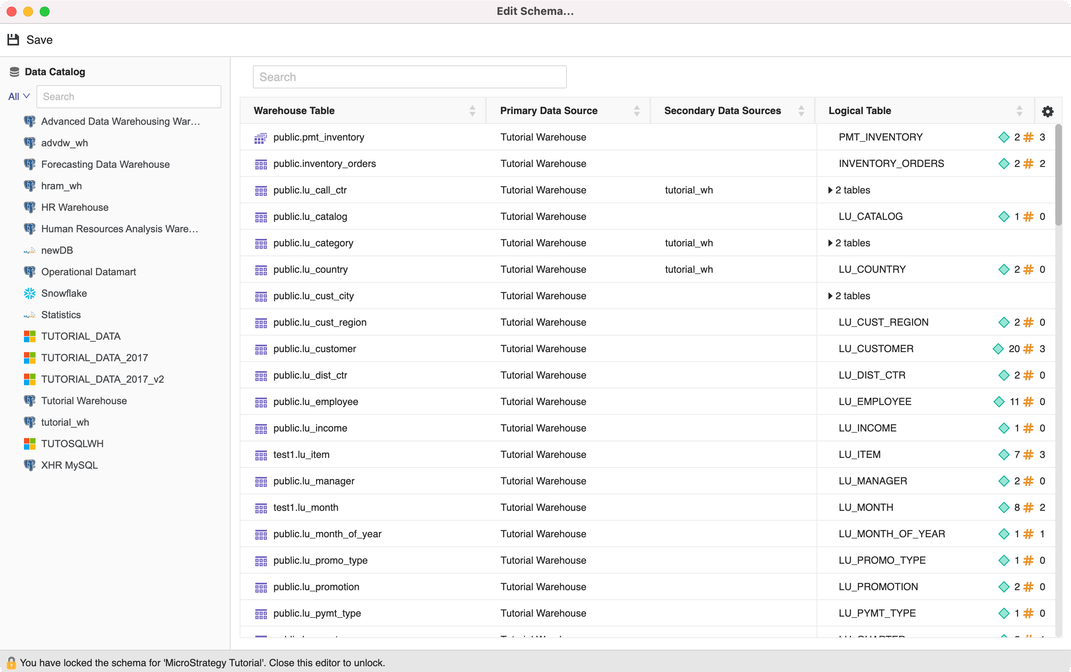
- In the Schema Editor, use the Data Catalog on the left to connect to data sources and retrieve warehouse tables. Add tables to the right to create tables for the project.
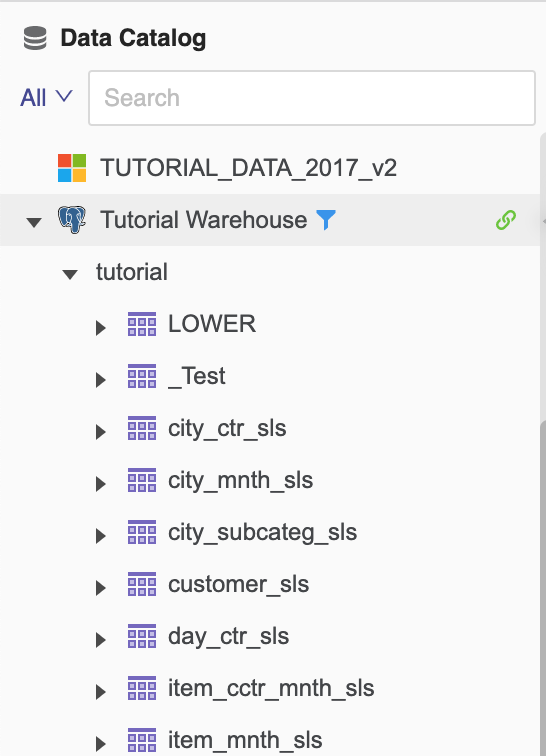
- In the Data Catalog, click on a data source name to connect to it. Choose one namespace and click Connect. Expand the namespace to locate warehouse tables or use the search
- Hover over the connected data source to filter other namespaces by clicking filter icon or disconnect the data source by clicking the disconnect icon.
-
Double-click the tables to add. For each selection, a logical table based on its warehouse table is created.
-
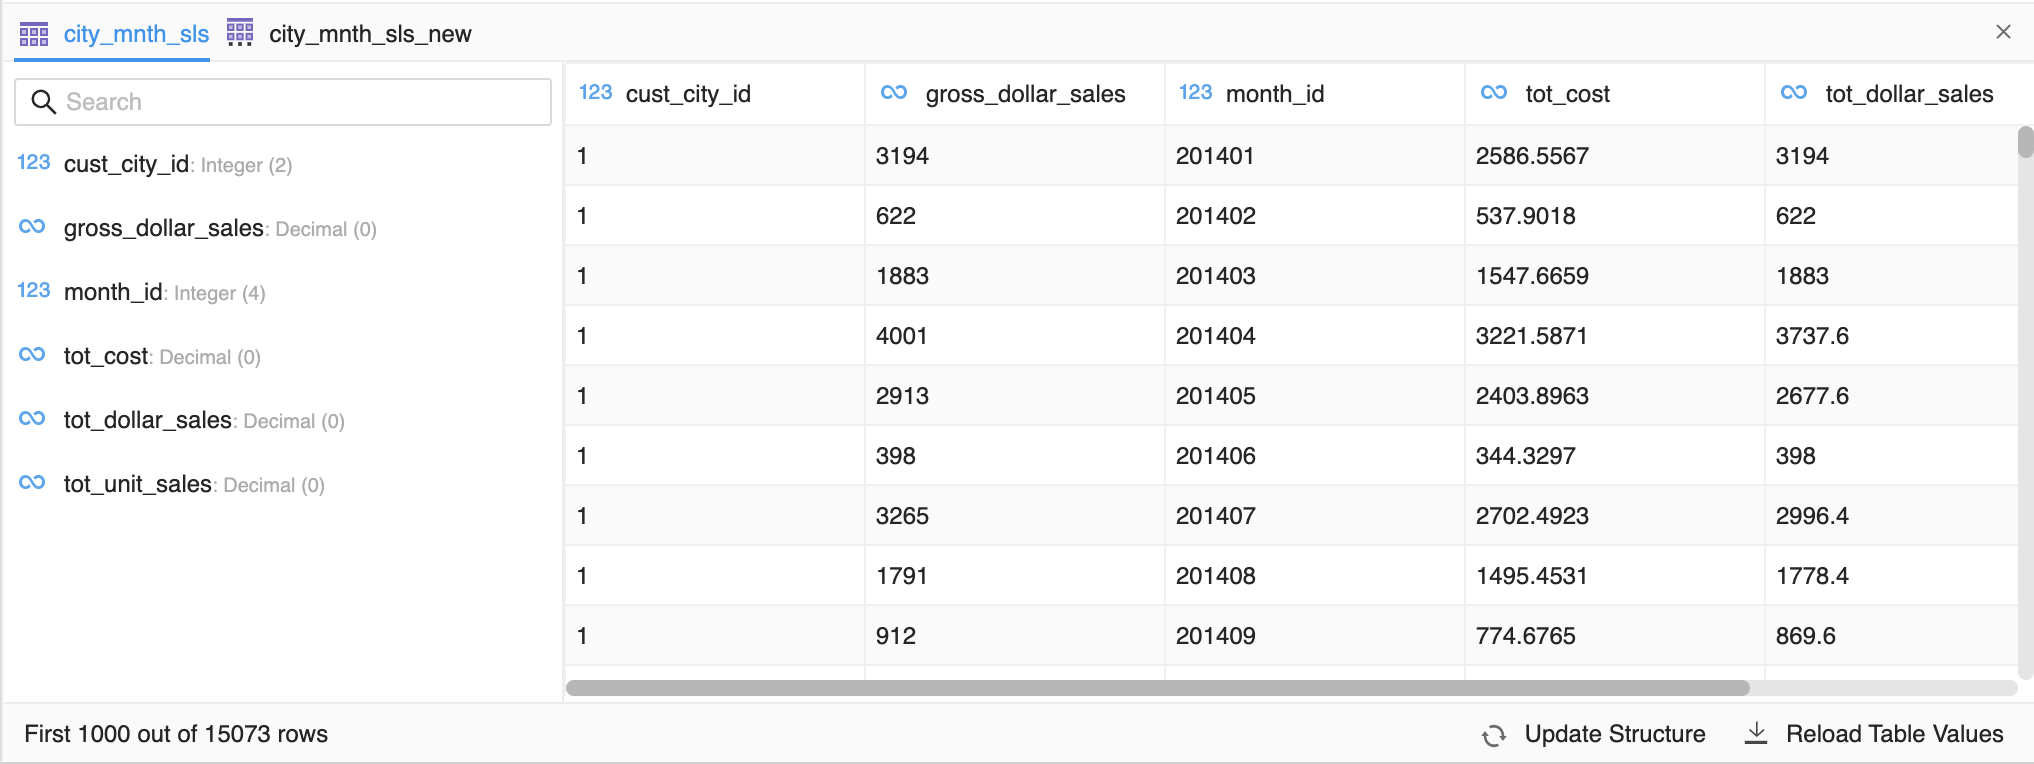
On the right, click the warehouse or logical table to preview the warehouse data or table definition. For newly created tables, the table preview displays recommendations to create facts. Click Map to map the column to an existing fact.

-
To rename a warehouse table, right-click it and choose Rename. You can also change the name prefix, primary data source, or secondary data source.
-
To create another logical table alias based on the same warehouse table, right-click the logical table and choose Create new. After creating multiple logical tables, the total number of logical tables based on this warehouse table appears. To delete a logical table, right-click it and choose Delete.
-
To delete a warehouse table, right-click it and choose Delete. All logical tables are deleted when the base warehouse table is deleted.
-
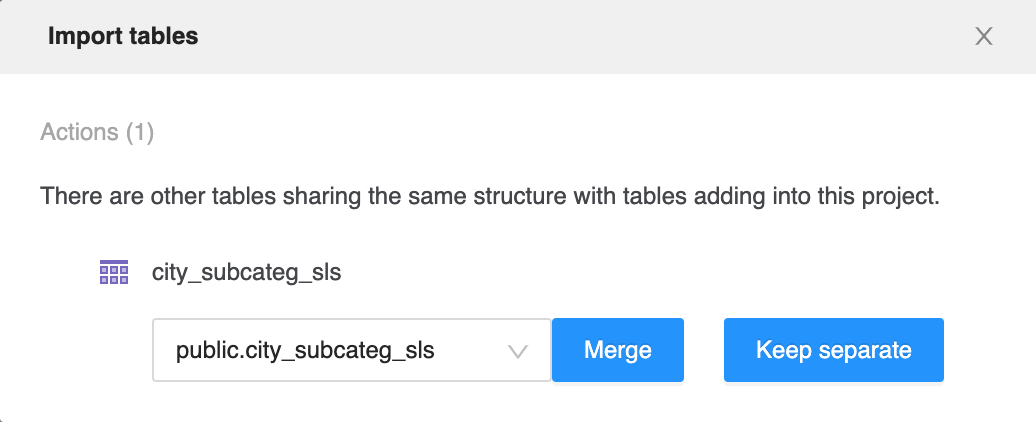
If you add a table with the same namespace and table structure as one existing table in the schema, but it has a different data source, click Merge to add secondary data source for the existing table or Keep separate to create a new table.
- Click Save.
-