Strategy One
Schedule a Report or Document to be Emailed
You can have a report or document automatically sent in an email on a specific schedule, as follows:
- You can have a report or document delivered in a single email
- You can break, or "burst", a report or document into multiple emails, with each email containing a portion of data based on the attributes used to group data in the report or document. This includes documents that contain multiple layouts, provided that each layout contains the attributes selected for bursting.
- You can ensure that you or other users are notified when a report meets specific threshold conditions. For example, you can have an email sent to you when the units sold data in a report falls under 500 units. You automatically receive an email when this threshold is met. You can also have emailed reports delivered to you automatically based on an alert condition that appears in a different report. For example, if your company-wide Monthly Revenue report is run on a schedule and displays revenue in the Northeast region below $1,000,000, the Sales Report for the Northeast Region can be automatically emailed to you based on the $1,000,000 threshold that is part of the company-wide Monthly Revenue report. For steps to email a report or document when threshold conditions are met, see the Formatting a Report chapter in the Basic Reporting Help.
To do so, you must subscribe to the report or document, as described in the steps below.
You can customize your subscription by typing macros in the File
Name, Subject, Message,
or Zip File Name fields. These
macros are automatically replaced with the appropriate text when the report
or document is delivered. For example, you create a subscription to a
document. If you type {&Project} in the
Subject field, the name of the
project in which the document is saved is displayed in the subject of
the email when the document is delivered.
For a list of the macros available, see the Scheduling Jobs and Administrative Tasks chapter in the System Administration Help.
You must have the Web Subscribe to History List privilege to send a report or document to the History List.
You must have the Use Link to History List in Email privilege to send a link to the location of a report or document in the History List via email.
You must have the Use Send Preview Now privilege to deliver an email with a preview of the report or document once the subscription is created.
Bursting a report or document into multiple emails requires at least one attribute to be placed on the Page-by panel (for reports) or Grouping panel (for documents). The report or document dataset must also include an attribute with a form that contains the email addresses to deliver the files to.
To email a report or document on a schedule
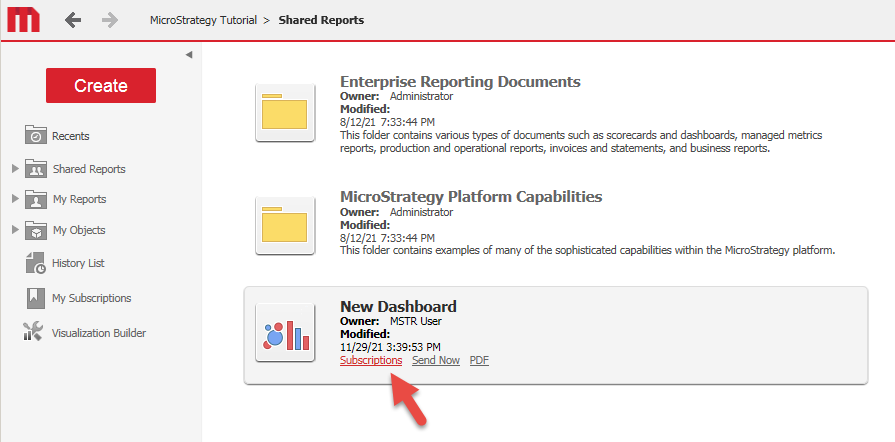
-
In Strategy Web, on a folder page, hover the mouse cursor over the object and click Subscription.
- On the My Subscriptions page, under the Email section, click Add email subscription.
- Type a name for the subscription in the Name field.
- From the Schedule drop-down, select a schedule or event on which to deliver the report or document. You can create new schedules in the MicroStrategy Developer Schedule Manager. For steps, see the Scheduling Jobs and Administrative Tasks chapter in the System Administration Help.
-
Define the recipients of the report or document by doing one of the following:
-
To email the report or document in a single email, perform the following steps:
-
Select To. The Recipients Browser Dialog Box opens. Select an email address, contact, contact group, or a dynamic address list to send the report or document to by clicking the Add to Selections arrow
 to move one
or more recipients from the Available
list on the left to the To
list on the right.
to move one
or more recipients from the Available
list on the left to the To
list on the right.If you do not see the correct email address to use, type a name to use to refer to the email address in the Address Name field and type the email address in the Physical Address field. From the Device drop-down, select the email client type of the specified email address. Click Add To Recipients to add the new email address.
- Click OK.
-
From the Send drop-down, specify how the report or document is included in the email, by choosing one of the following:
The options available may vary depending on the privileges you are assigned. For more information on the required privileges, see the prerequisites.
- To display the report or document in the email, select Data in email.
- To display the report or document in the email and deliver it to the History List, select Data in email and to history list.
- To display the report or document in the email, along with a link to the History List location of the report or document, select Data and link to history list in email.
- To send a link to the History List location of the report or document in the email, select Link to history list in email.
-
-
To split, or burst, the contents of a report or document into multiple emails, perform the following steps:
- Click Burst. The Select Bursting Criteria options are displayed, with all attributes used to group data in the report or document listed in the Available Attributes list.
-
Select the attributes to use to split the data, then click the right arrow to move them to the Selected Attributes list. When the subscription is executed, a separate file is created for each element of each attribute selected for bursting.
If a "No bursting elements available" message is displayed, you must place at least one attribute on the Page-by panel (for reports) or Grouping panel (for documents).
- From the Address Form drop-down, select the attribute form that contains the email addresses to deliver the bursted files to.
- From the Device used drop-down, select the type of email to use to deliver the report or document, such as Webmail or Generic email.
-
-
From the Delivery Format drop-down, select the format in which to send the report or document.
When Excel or PDF is chosen, the report is included as an attachment in the email. To avoid large deliveries, choose a delivery format other than Excel. This option is available for:
- Reports scheduled to be delivered to an email address or a folder location.
- Documents scheduled to be delivered to the History List, an email address, or a folder location.
For dashboards, MSTR files can sent to users for offline interactive viewing in Strategy Workstation. The MSTR files open in Presentation mode. Note that .mstr files will not be sent under the following circumstances:
- The .mstr file is too large. The maximum file size of the .mstr file is set by the "MicroStrategy (.mstr) file size" field, and must not exceed 2047 MB. In MicroStrategy Developer, in the Project Configuration dialog box, choose Governing Rules > Default > Result sets.
- The cube associated with the .mstr file is too large. The maximum cube size is set by the "Maximum cube size allowed for download" field. In MicroStrategy Developer, in the Project Configuration dialog box, choose Intelligence Cubes > General.
- Users with security filters subscribing to a dashboard built on a cube
- Users with ACL restrictions on objects with dashboards built on a cube
- You can reduce the size of the report or document by including it in a zip file. Select the Compress contents checkbox. This option is only available if the Delivery Format option is set to a file format other than HTML.
-
If the report or document contains grouped objects, do one of the following:
- To print the data for all objects, select the Expand page-by fields checkbox.
- To print the data only for the objects currently selected in the Page-by panel (for reports) or the Grouping panel (for documents), clear the Expand page-by fields checkbox.
-
You can specify the delimiter character to use to separate values in a report, such as a comma or tab. This option is only available for reports sent as plain text. From the Delimiter drop-down, select one of the following:
- To choose a delimiter from the list, select the delimiter you want to use, such as Comma or Space.
- To specify your own delimiter, select Other, then type the character you want to use as the delimiter in the field.
-
Type a name for the emailed report or document in the File Name field.
You can use macros to ensure that each file will be given a unique name when the subscription is executed. For example, if you choose to burst your document using the Region and Category attributes, you can type
{[Region]@[DESC]},{[Category]@[DESC]}. When the subscription is executed, each file will be given a file name beginning with the names of the attribute elements used to generate the file, such asCentral, BooksorCentral, Electronics. Type the name you want to use in the File Name field. -
To replace all spaces in the file name with another character, in the Delimiter field, type the character to replace all spaces with. To see a list of characters that cannot be used as space delimiters, hover the cursor over the information icon
 .
.Spaces that are created by expanding macros, such as a space between the time and date in a timestamp, are not replaced by the space delimiter.
- Type a subject for the email in the Subject field.
- Type a message to display in the body of the email in the Message field.
- To deliver an email with a preview of the report or document once the subscription is created, select the Send a preview now checkbox.
- Expand the Advanced Options.
- For reports or documents included in a zip file, you can password protect the zip file for additional security. Select the Password protect zip file checkbox and type a password for the zip file. This option is available only when the Compress Contents checkbox is selected.
- If you chose to include the report or document in a zip file, you can specify a name for the zip file that contains the report or document. Type the name in the Zip File Name field. This option is available only when the Compress Contents checkbox is selected.
- To specify a date after which to stop delivering the report or document, select the Do not deliver after checkbox, then select the date from the calendar.
- By default, if you have selected a contact group as the recipient of the report or document, Strategy uses the security filter of the contact group as a whole when delivering the report or document. To use the separate security filters for each member of the subscribed contact group instead, select the Use contact security for each group member checkbox.
- If the report or document is prompted, click Personalization. All the prompts for the report or document is displayed. The selections you make for these prompts will be used whenever the report or document is delivered.
-
Click OK.
To verify that you are subscribed to the report or document, click the Strategy icon
 at the top of the page and select My Subscriptions.