Strategy One
Configure Fencing
Starting in the MicroStrategy 2021 Update 7 October Monthly Release, administrators can configure fencing. Fences allow an administrator to reserve specific nodes of a clustered environment, for use by certain users or certain workloads during normal operations.
There are two types of fences:
-
User Fence Processes requests from a list of specified users or user groups. User fences can be further limited by specifying applicable projects
-
Subscription Fence Runs subscriptions triggered by event or time-based schedules for specified projects. On-demand event subscriptions such as run immediately, preview, or personal view are not included.
A user fence can be configured for users who require more processing power or high availability. Conversely, a subscription fence, could be configured to limit the resources for lower priority subscriptions.
All configured fences are defined in a single list ordered by precedence. When a request is received, the ordered list of all fences and their configurations are assessed to determine if the request matches any fence configuration. A request is processed by the first fence found with an available node in the ordered list where the request matches the fence criteria.
When all nodes in the cluster are part of the fence list, the request is sent to a node in the last fence in the ordered list.
Check out the video below to learn more!
Use Fences with Symmetric Project Clustering
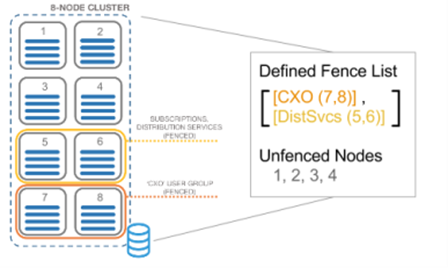
Consider the following example that shows a clustered implementation with eight nodes:

-
Nodes 7 and 8 are defined in the CXO user fence, meaning that these nodes are reserved for requests from users in the CXO group.
-
Nodes 5 and 6 are defined in the DistSvcs subscription fence, meaning that these nodes are reserved for processing subscriptions that are not on-demand events.
-
Nodes 1, 2, 3, and 4 are not defined in a fence, meaning that they are available to process requests that do not meet the criteria of either fence.
Use Fences with Asymmetric Project Clustering
When user fences are configured with a cluster that has projects that are only loaded on specific nodes, users are always sent to a node that supports the project. The first fence found in the priority list that includes a node where the requested project is loaded is used.
Configure Fences
-
Open the Workstation window.
-
In the Navigation pane, click Environments.
-
Right-click an environment and choose Properties.
-
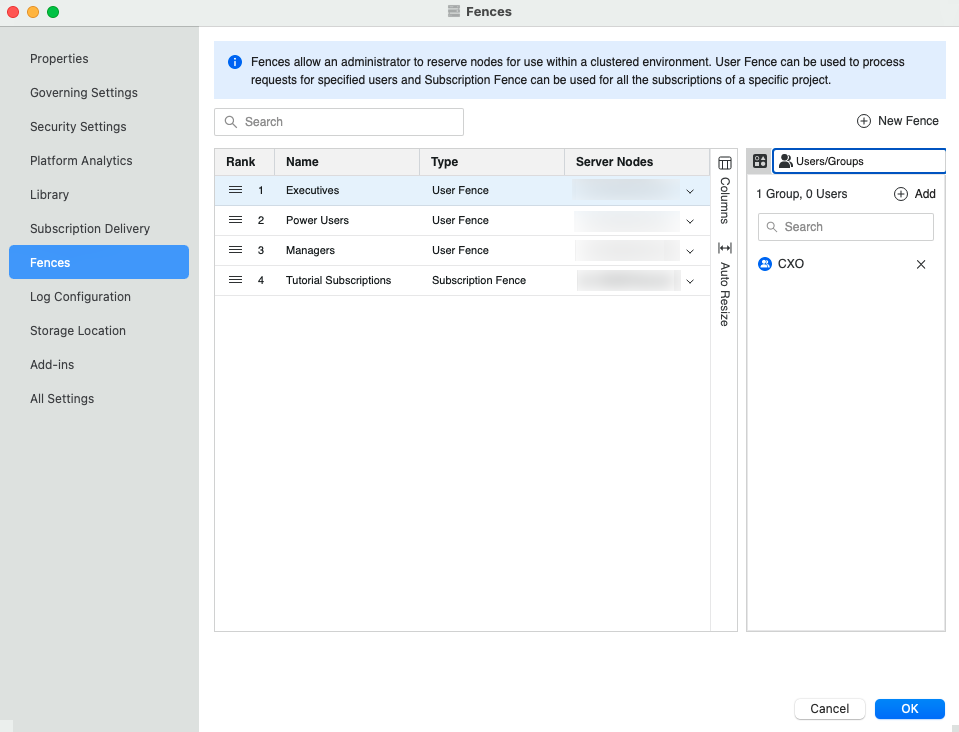
In the left pane, click Fences.

-
Click
 New Fence to add a new row for fence creation.
 -
Enter the fence Name.
-
Select the Type of fence. User fences are for users and groups. Subscription fences are for subscriptions.
-
Select the Server Nodes.
-
All projects are selected by default. Click Add to select individual projects.
-
Click
 and
and  Add to add users and groups.
Users or groups cannot be added to subscription fences. By default, all subscriptions are executed in the specified nodes.
-
If necessary, reorder the fences in the grid by dragging them to adjust their rank.
-
If you need to delete a fence, right-click it and choose Delete.
-
Click OK.
