Strategy One
Integrating SSO Support with SAP HANA
Starting in MicroStrategy 2021 Update 8, SSO is a supported authentication method for SAP HANA ODBC connections. Such database instances can be only created via the Data Sources area of Workstation, but the consumption is available in Workstation, Web, and Library. This topic provides the requirements and procedure for creating and using SSO SAP HANA data sources with Entra ID (formerly Azure AD).
An Entra ID app registration properly set up for OAuth. See Configure Entra ID (Formerly Azure AD) with SAP Hana OAuth for more information.
An up-and-running SAP HANA instance, with JWT authentication configured. This is the instance that you will connect to. See Setting Up an SAP HANA Instance with OAuth or SSO for more information.
OIDC is configured for Strategy with Entra ID. See Integrating OIDC Support with Entra ID for more information.
Connect to Your Environment Using OIDC
- Open the Workstation window.
- In the Navigation pane, click Environments.
- Click Add New Environment Connection.
- Enter your environment name, URL, and select the default OIDC authentication mode.
- Click Continue.
- Log into Entra ID account.
Add Your Environment’s URIs to Your Existing AD Entra ID App Registration
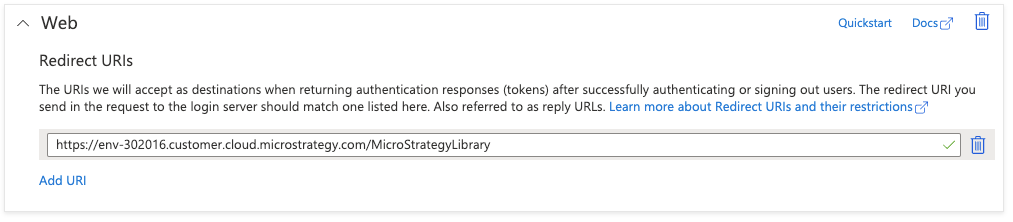
- Add your environment to the redirect URIs in Entra ID. This step is required for every environment that you want to use OAuth. Navigate to your App Registration in the Entra ID portal and click Add a Redirect URI.

- Choose Add a platform > Web and enter the URL of your environment in Redirect URIs. Click Configure to confirm. A list of redirect URIs appears that contains your URI.
- In Workstation, connect to an environment.
- In the Navigation pane, click
 , next to Enterprise Security.
 -
Choose an Environment, Display Name, and select Azure AD as the Identity Provider.
The Login Redirect URIs update based on your environment.
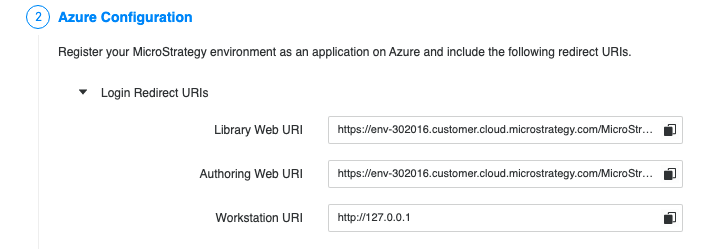
- Copy the Library Web URI.
- In Entra ID, click Add URI under Web > Redirect URIs.
- Paste the Library Web URI that you copied.
- Repeat steps 6 through 8 for the Authoring Web URI.
- In Entra ID, click Add URI under Web > Redirect URI and enter http://localhost.
- Click Add URI and enter https://127.0.0.1.
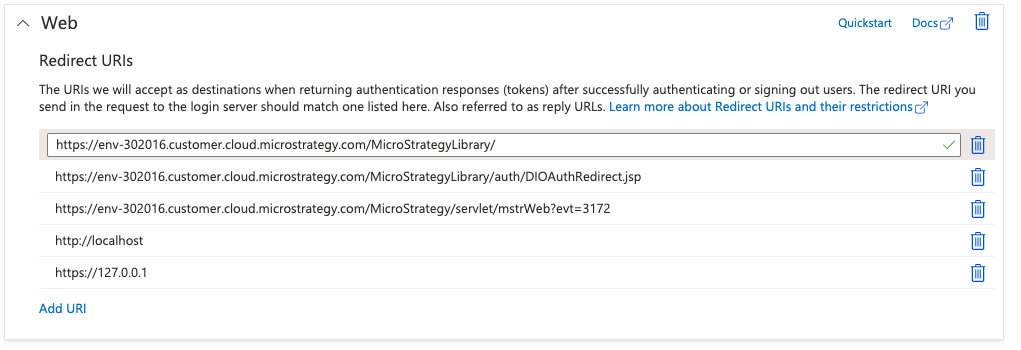
- Click Save.
Create a Data Source, Database Connection, and Authentication Service
- Open the Workstation window with the Navigation pane in smart mode.
- In the Navigation pane, click , next to Datasets.
- Select the environment and select SAP HANA under Available Data Source Types.
- Enter a name, description, and project.
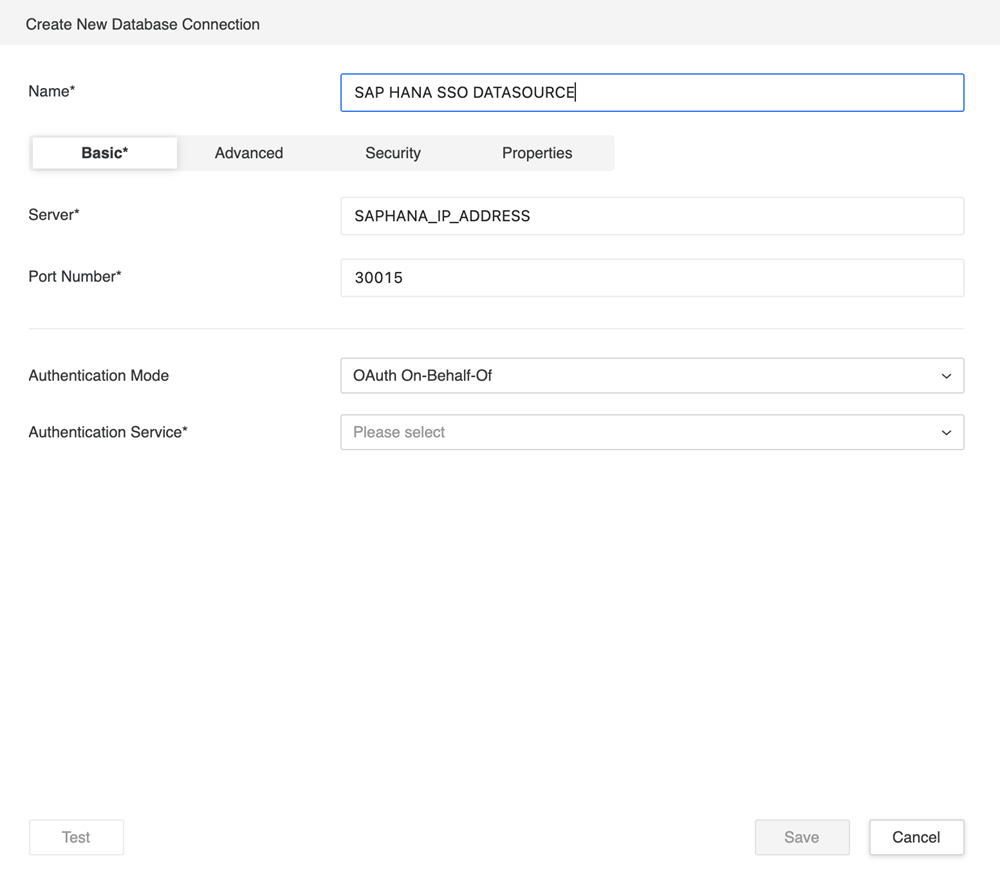
- Click Default Database Connection and choose Add New Database Connection.
- Enter a new name and the server and port number of your running SAP HANA instance.
- In Authentication Service, choose Add New Authentication.
- Enter a new name.
- Enter the client and directory ID from your Strategy OIDC app registration. You can find these values on the Overview page of your app registration.
- Enter the client secret.
- In Scope, enter openid offline_access <your scope>, where <your scope> is the value from the Expose an API page of your app registration.
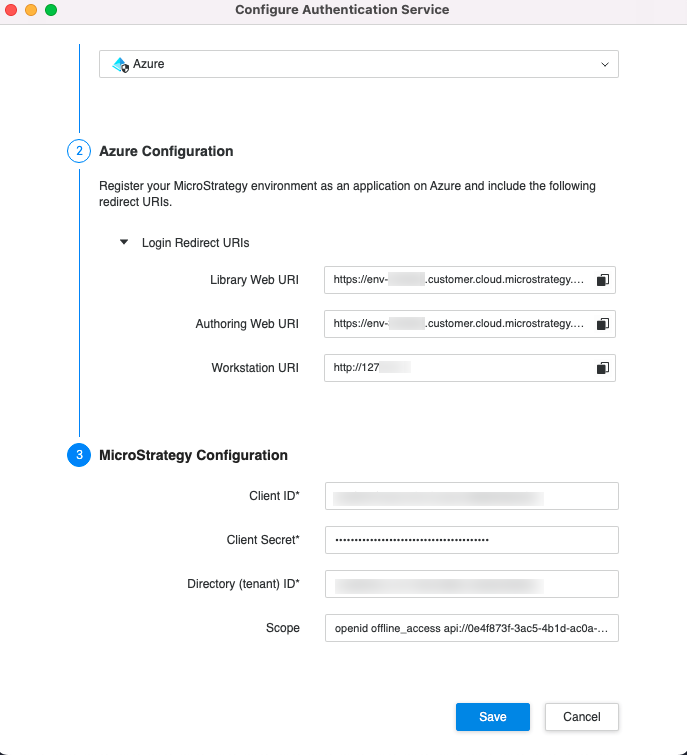
- Click Save in the next three windows.
Verify Your Data Source Connects
- Open the Workstation window with the Navigation pane in smart mode.
- Choose Help and check that New Data Import Experience is not selected.
- In the Navigation pane, click , next to Datasets.
- Choose your environment and project.
- Select Data Import Cube and click OK.
- Choose SAP HANA in the Data Sources window.
- Select Build a Query and click Next.
- Your new data source appears under Data Sources.
- Click your new data source and an Entra ID authentication browser window appears.
- Enter your Entra ID credentials.
- Once the data loads, drag and drop a table into the specified window.
- If data appears, your connection is established successfully.
Troubleshooting
When connecting to the data source, you may see error while parsing protocol. This error may occur in the following scenarios:
- If the connection to your SAP HANA instance was set up incorrectly. To ensure your set up is correct, see Configure Entra ID (Formerly Azure AD) with SAP HANA SSO.
- If the scope that you entered in Authentication Service is missing. To ensure the scope is entered correctly, see Create a Data Source, Database Connection, and Authentication Service.
When connecting to the data source, you may receive an Invalid client secret error. To ensure you entered the correct secret, see Create a Data Source, Database Connection, and Authentication Service.