Strategy One
Integrate OIDC Support with Microsoft Entra ID (formerly Azure AD)
This procedure provides instructions for integrating Strategy applications with Microsoft Entra ID (formerly Azure AD) using OIDC authentication.
- Create an Application
- Configure MicroStratgy Library in Workstation
- Enable OIDC Auth Mode for Strategy Library
- Configure and Enable OIDC Auth Mode for Strategy Web/Strategy Mobile
Create an Application
- Sign in to the Azure portal. If you have already launched Azure Active Directory, under Manage, select App registration.
- Click New registration.
- In Register an application, enter Strategy as the application name. Choose the account type that best fits your enterprise identity access management.
-
Under Redirect URI, select Public client/native (mobile and desktop). Enter the Library URL suffixed by
/auth/oidc/loginas shown below.https://env-xxxxxx.customer.cloud.microstrategy.com/MicroStrategyLibrary/auth/oidc/login - Click Register.
-
In the newly created app registration screen, locate Authentication in the navigation pane and add the following mobile and desktop application URIs. Replace the environment-specific URIs with your environment name.
http://127.0.0.1com.microstrategy.hypermobile://authcom.microstrategy.dossier.mobile://authcom.microstrategy.mobile://authhttps://env-xxxxxx.customer.cloud.microstrategy.com/MicroStrategyLibrary/static/oidc/success.htmlhttps://env-xxxxxx.customer.cloud.microstrategy.com:443/MicroStrategy/auth/oidc/loginhttps://env-xxxxxx.customer.cloud.microstrategy.com:443/MicroStrategyMobile/auth/oidc/login
- Click Save.
-
In the navigation pane, locate API permissions.
- Click Add a permission > Microsoft Graph > Delegated permissions.
-
Search for Directory.Read.All, expand Directory, select Directory.Read.All, and click Add permissions.
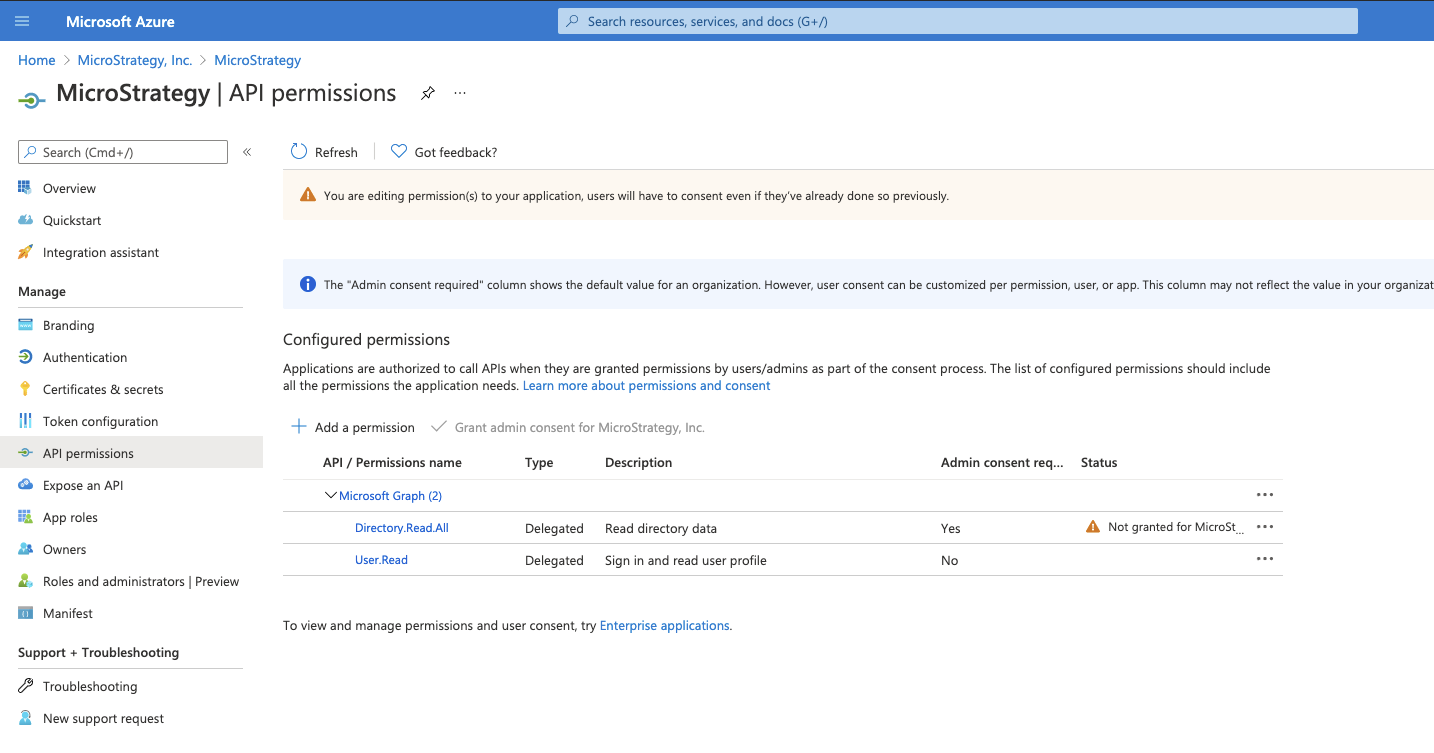
- Click Update permissions.
-
In the navigation pane, locate Manifest and download the manifest file.
- In the navigation pane, locate Overview and take note of the Client ID for later.
-
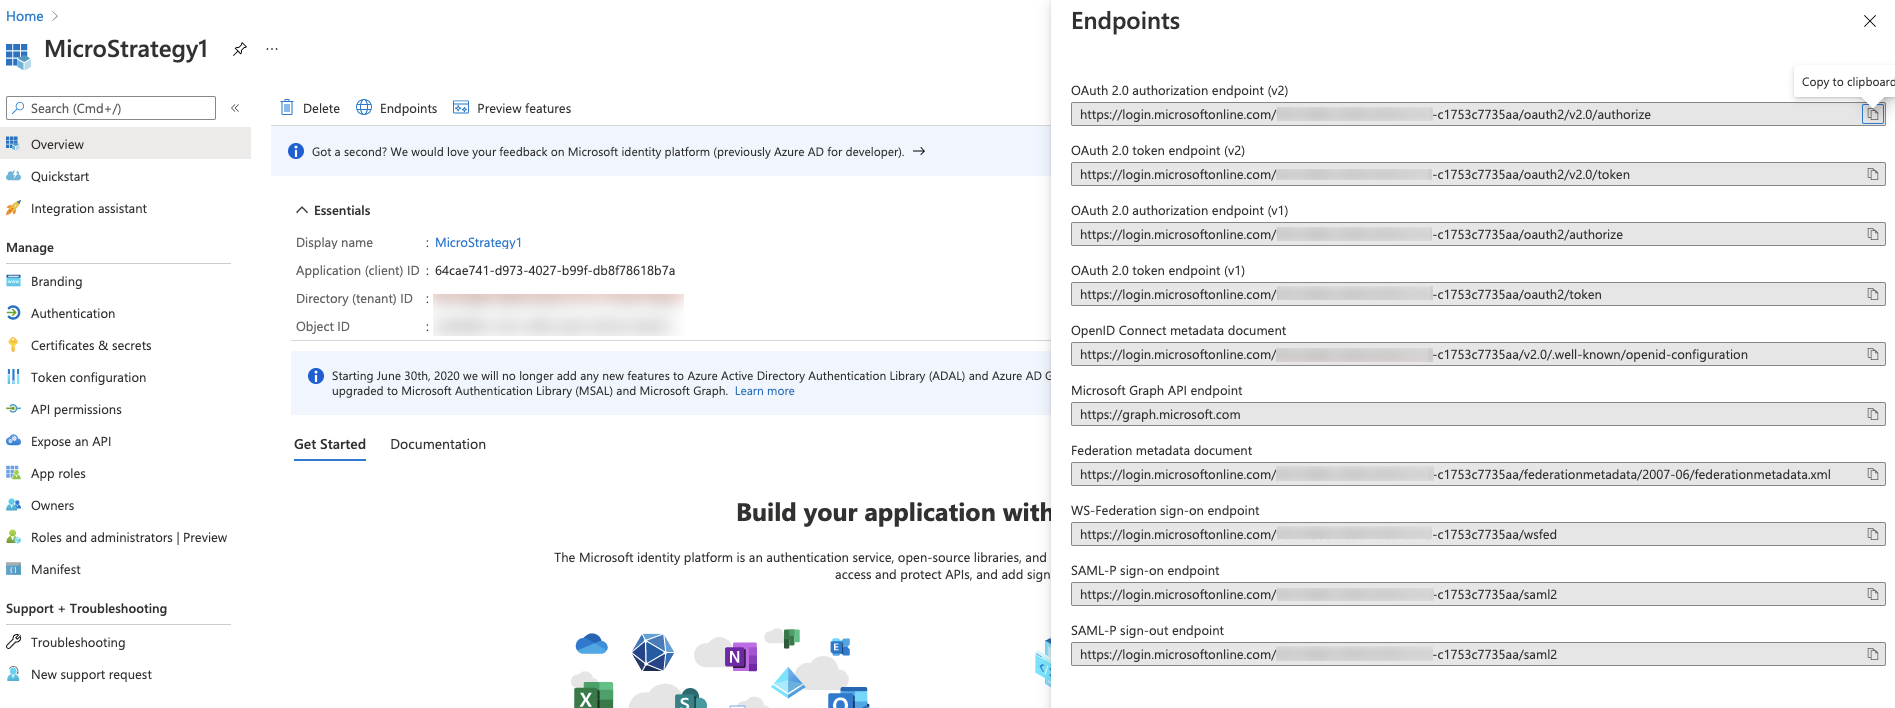
Click Endpoints and copy the OpenID Connect metadata document field.
-
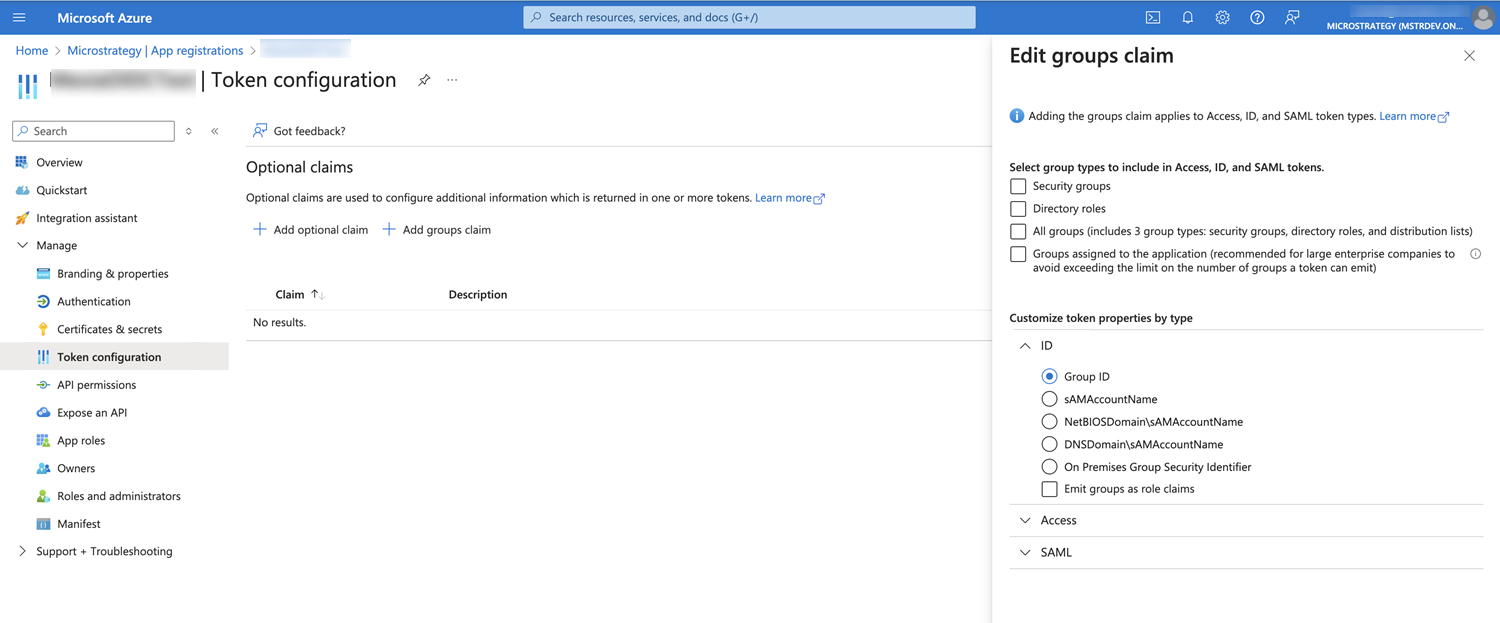
Add group claims by choosing Token configuration > Add group claims > ID and save the defined group claim.
-
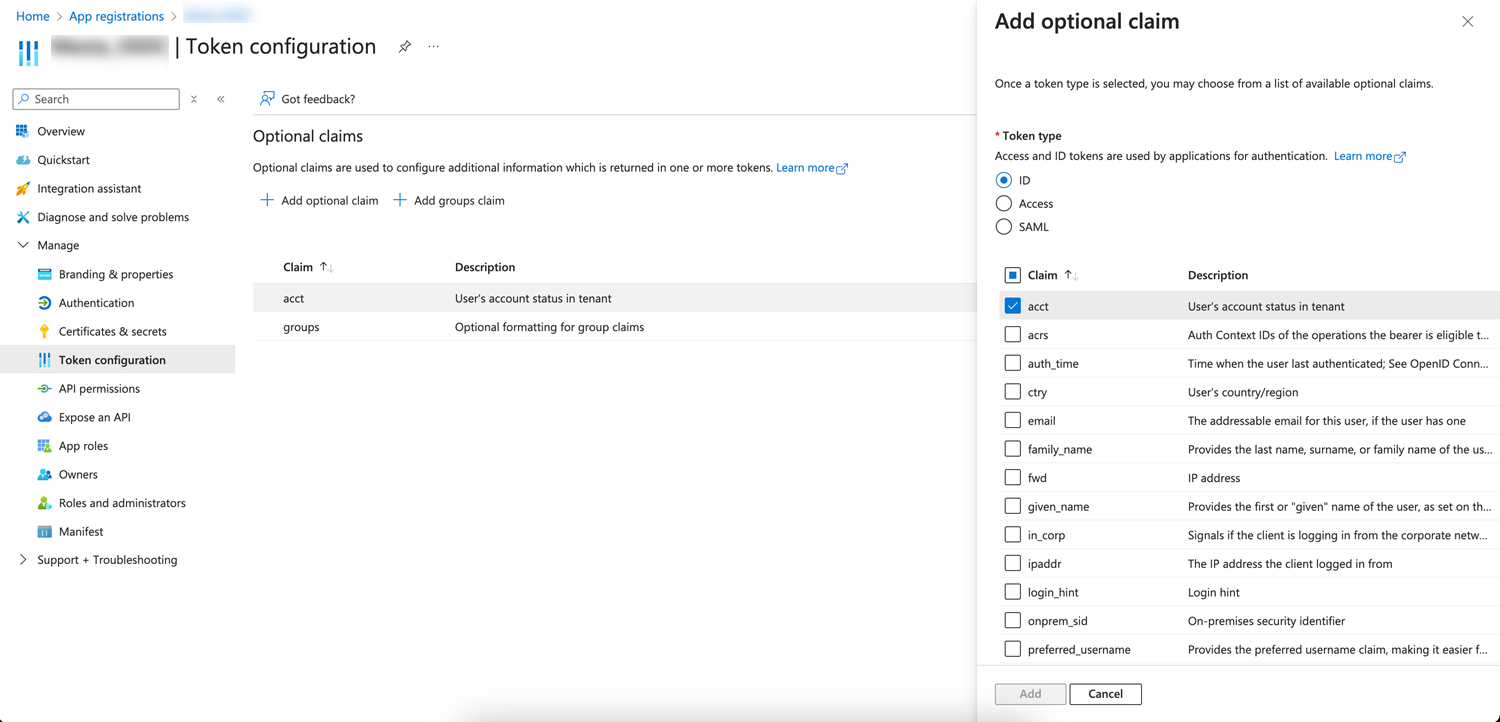
Add OIDC system prompt mapping claims by choosing Token configuration > Add optional claim > ID and save the defined group claim.
Configure MicroStratgy Library in Workstation
- Open Workstation and connect to the Library environment using standard authentication with an admin privilege user.
-
Right-click on the connected environment and choose Configure Enterprise Security.
- Under Strategy Configuration, upload the manifest file you downloaded earlier and provide the OpenID Connect metadata document details.
-
Click Save. For more information about enabling OpenID Connection (OIDC) authentication in Workstation, see Configure Enterprise Security.

Enable OIDC Auth Mode for Strategy Library
- Go to the Library Admin page to enable OIDC authentication as the default for Strategy Library.
- In the navigation pane, click Library Server.
- Under Authentication Modes, select OIDC, and click Create Trusted Relationship.
- Log in, deselect Standard, and click Save. For more information, see Enable OIDC Authentication for Strategy Library.
https://env-xxxxxx.customer.cloud.microstrategy.com/MicroStrategyLibrary/admin
Configure and Enable OIDC Auth Mode for Strategy Web/Strategy Mobile
The procedure below refers to Strategy Web. However, the same information applies to Strategy Mobile unless otherwise noted.
-
Go to the Strategy Web admin page.
https://env-xxxxxx.customer.cloud.microstrategy.com/MicroStrategy/servlet/mstrWebAdmin - Locate the connected Intelligence server and click Modify.
- Click Setup next to the trust relationship between the Web server and Strategy Intelligence server.
- Enter the user credentials with admin privileges and click Create Trust Relationship.
- In the navigation pane, click Default properties and enable OIDC Authentication.
-
Under OIDC Configuration, complete the remaining fields.
 Click here to view details about the OIDC Configuration section.
Client ID Enter the client ID of your Azure application.
Client Secret This field is only required when the Azure application is a Web app. If you deployed a Public client/native app in Create an Application, you can leave this field blank.
Issuer The OpenID Connect metadata document field in the Endpoints section is the provider's issuer URL suffixed with
/.well-known/openid-configuration. You must remove this suffix from the OpenID Connect metadata document to get the Issuer information.
Example: If OpenID Connect metadata document is
https://login.microsoftonline.com/901c038b-xxxx-4259-b115-c1753c7735aa/v2.0/.well-known/openid-configuration, the Issuer ishttps://login.microsoftonline.com/901c038b-xxxx-4259-b115-c1753c7735aa/v2.0.Native Client ID This is the same as the client ID, unless configured otherwise.
Redirect URI The default web redirect URI. This should not be changed unless configured otherwise.
Scope The scopes used by Strategy to authorize access to a user. This should not be changed unless configured otherwise.
Claim Map
- Full Name The user display name attribute. The default value for this field is name.
- User ID The user distinguished login attribute. The default value for this field is email.
- Email The user email address attribute. The default value for this field is email.
- Groups The user group attribute. The default value for this field is groups.
Admin Groups: Select admin groups whose members can access to the admin pages. You can have multiple admin groups.
Example: ["WebAdmin","SystemAdmin"]
Members belonging to WebAdmin and SystemAdmin can access the admin pages. - Click Save. For more information, see Enabling OIDC Authentication for JSP Web and Mobile