Strategy One
Integrate Strategy with Microsoft Entra ID OIDC Single Sign-On for Dremio
Starting in MicroStrategy ONE (December 2024), you can use the Dremio JDBC driver to implement OIDC Single Sign-On with Microsoft Entra ID.
Prerequisites
To use a JSON Web Token (JWT) issued by an OpenID Connect (OIDC)-conformant authorization server to establish JDBC connections to Dremio, a Dremio JDBC driver is required but is not shipped with Strategy. To utilize this functionality, download the latest version of the Dremio JDBC driver and add it under the %MicroStrategyInstallationPath%\install\JDBC folder.
Configure Your Application in Microsoft Entra ID
-
Configure a Microsoft Entra ID application for Dremio OAuth to add the additional permission for Dremio.
For more information, see Quickstart: Register an Application with the Microsoft Identity Platform.
-
In the left pane of your new application, click Authentication.
-
In the left pane, click Certificates & secrets under Manage.
-
In Client secrets, click New client secret.
-
Enter values in Description and Expires.
-
Click Add and note the client secret value. You will need this value in future steps.
-
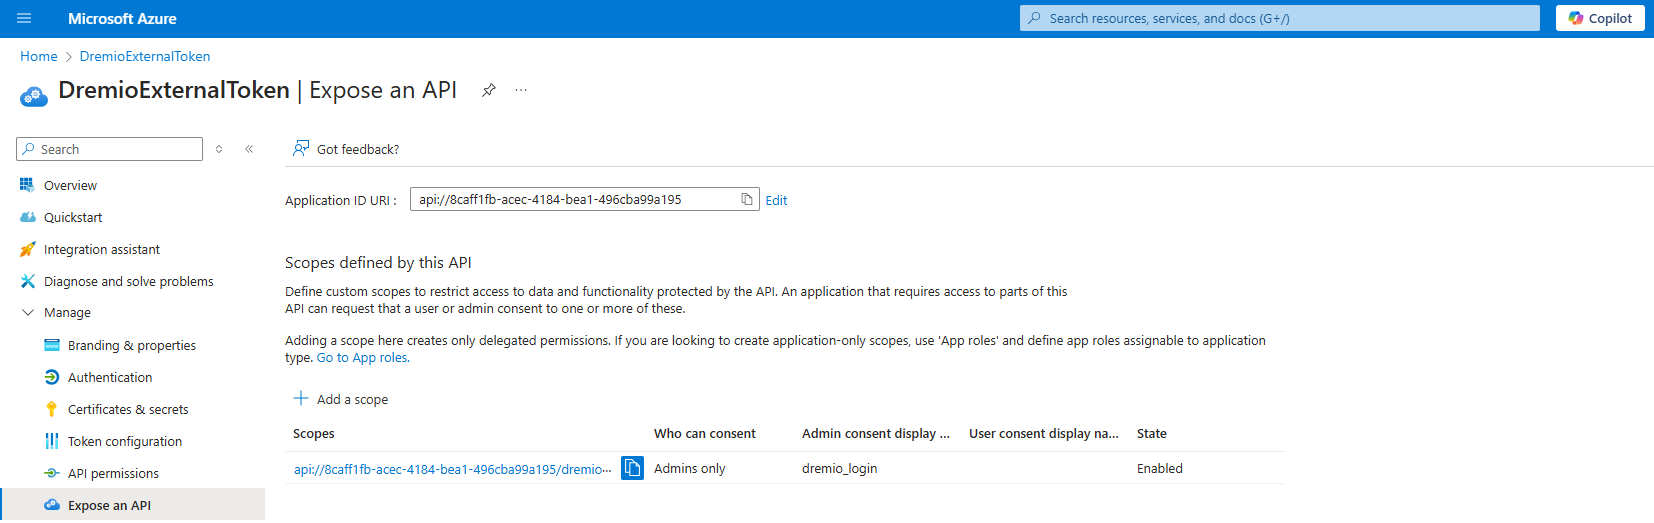
In the left pane, click Expose an API under Manage.
-
Click Add a scope.
-
Type a Scope name.
The scope name is used in the Dremio OAuth connection.
-
Type an Admin consent display name and Admin consent description.
-
Click Save.
-
In the left pane, click API permissions and click Add a permission.
-
Click the My APIs tab and select your application.
-
Select the checkbox next to your custom scope and click Add permissions.

-
In the left pane, click Authentication.
-
In Configure platforms, add the client app you use to redirect.
For example, add Web for Strategy Library and Mobile and desktop applications for Strategy Workstation. Add
http://localhostas the sample redirect URI for later use.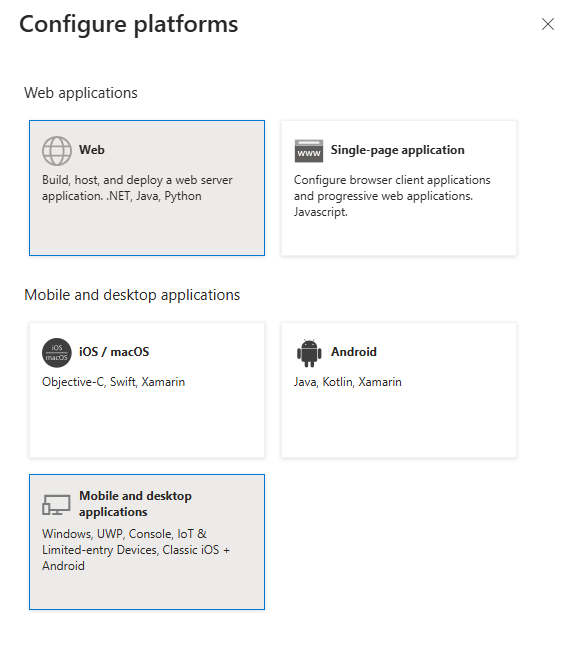
Integrate Dremio with Microsoft Entra ID
For more information on enabling OAuth in Dremio, see External Token Providers.
-
Log in to the Dremio cloud console and go to Organization Settings.
-
In the left pane, click External Token Providers.
-
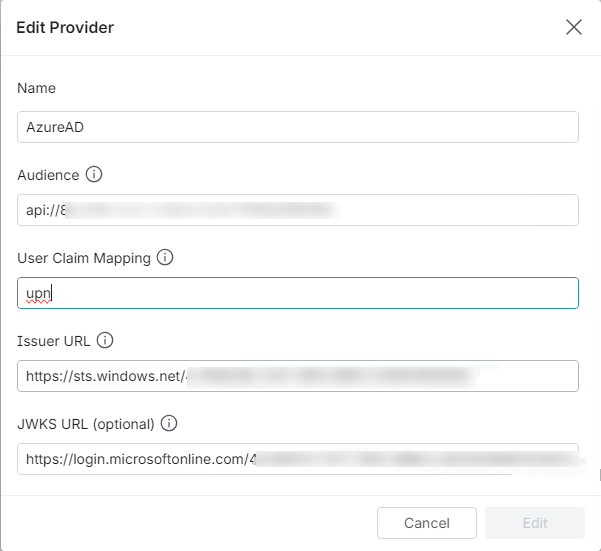
Click Add Provider and type the following IdP details:
-
Name: A unique name for the External Provider.
-
Audience: The claim that identifies the recipient of the JSON Web Token. To find this value:
-
In Microsoft Entra ID, go to your application.
-
Click Manage and Expose API.
-
Copy the value in Application ID URI.
-
-
User Claim Mapping: The claim that corresponds to the username in Dremio. You can use
upn. -
Issuer URL: The claim that identifies the principals issued to the JSON Web Token.
-
JWKS URL: Optional. The URL where the signing key set for the JSON Web Token is located.
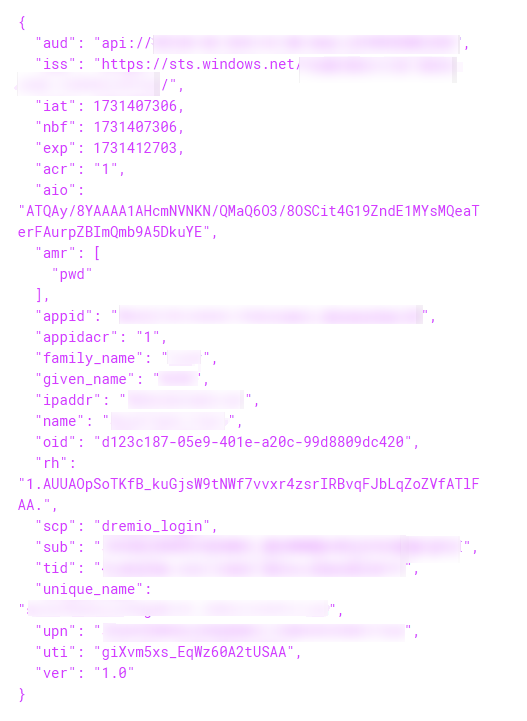
See the following example token generated by Microsoft Entra ID:
-
-
Create a Dremio user to map in Microsoft Entra ID.
Strategy Configuration
Create a Data Source Using OIDC Single Sign-On Authentication Mode
-
Open the Workstation window.
-
Connect to an environment.
-
Create an IAM object using Manage OAuth Enterprise Security with Identity and Access Management (IAM) Objects:
-
Use the Client ID and Client Secret from your Microsoft Entra ID application.
-
For Scope, use the following format:
api://<client id>/<scope name>. This value can be found in your Entra ID application under Expose an API.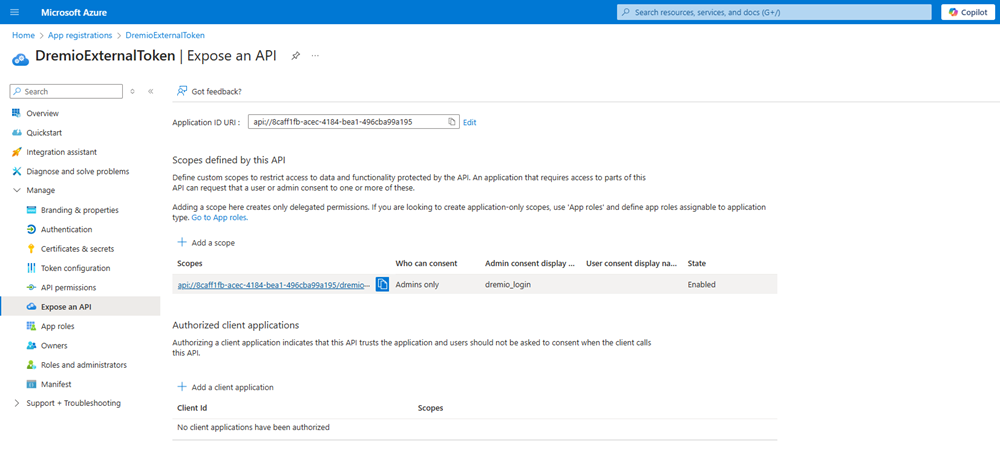
-
- In the Navigation pane, click
 , next to Data Sources.
 - Choose Dremio.
-
Expand the Default Database Connection drop-down list and click Add New Database Connection.
- Type a Name.
-
Expand the Driver drop-down list and choose the
com.dremio.jdbc.Driverdriver that you manually installed in Prerequisites.
- Type a HostName.
- Expand the Authentication Mode drop-down list in the Basic tab, choose OIDC Single Sign-On.
- Expand the Authentication Service drop-down list and choose the IAM objects you created above or to create a new IAM object, click Add New Authentication Service.
- Click Save.
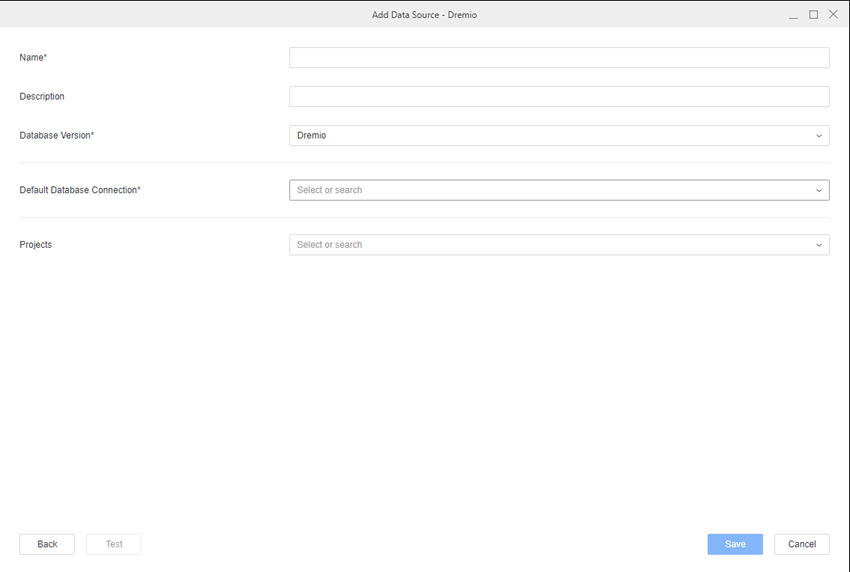
- In the Add Data Source dialog, type a Name and Database Version, and optionally choose Projects for further data manipulation.
- Click Save.
Create and Map Users to Entra ID
-
Open the Workstation window.
-
Connect to an environment.
-
In the Navigation pane, click Users and Groups.
-
Click
next to All Users. 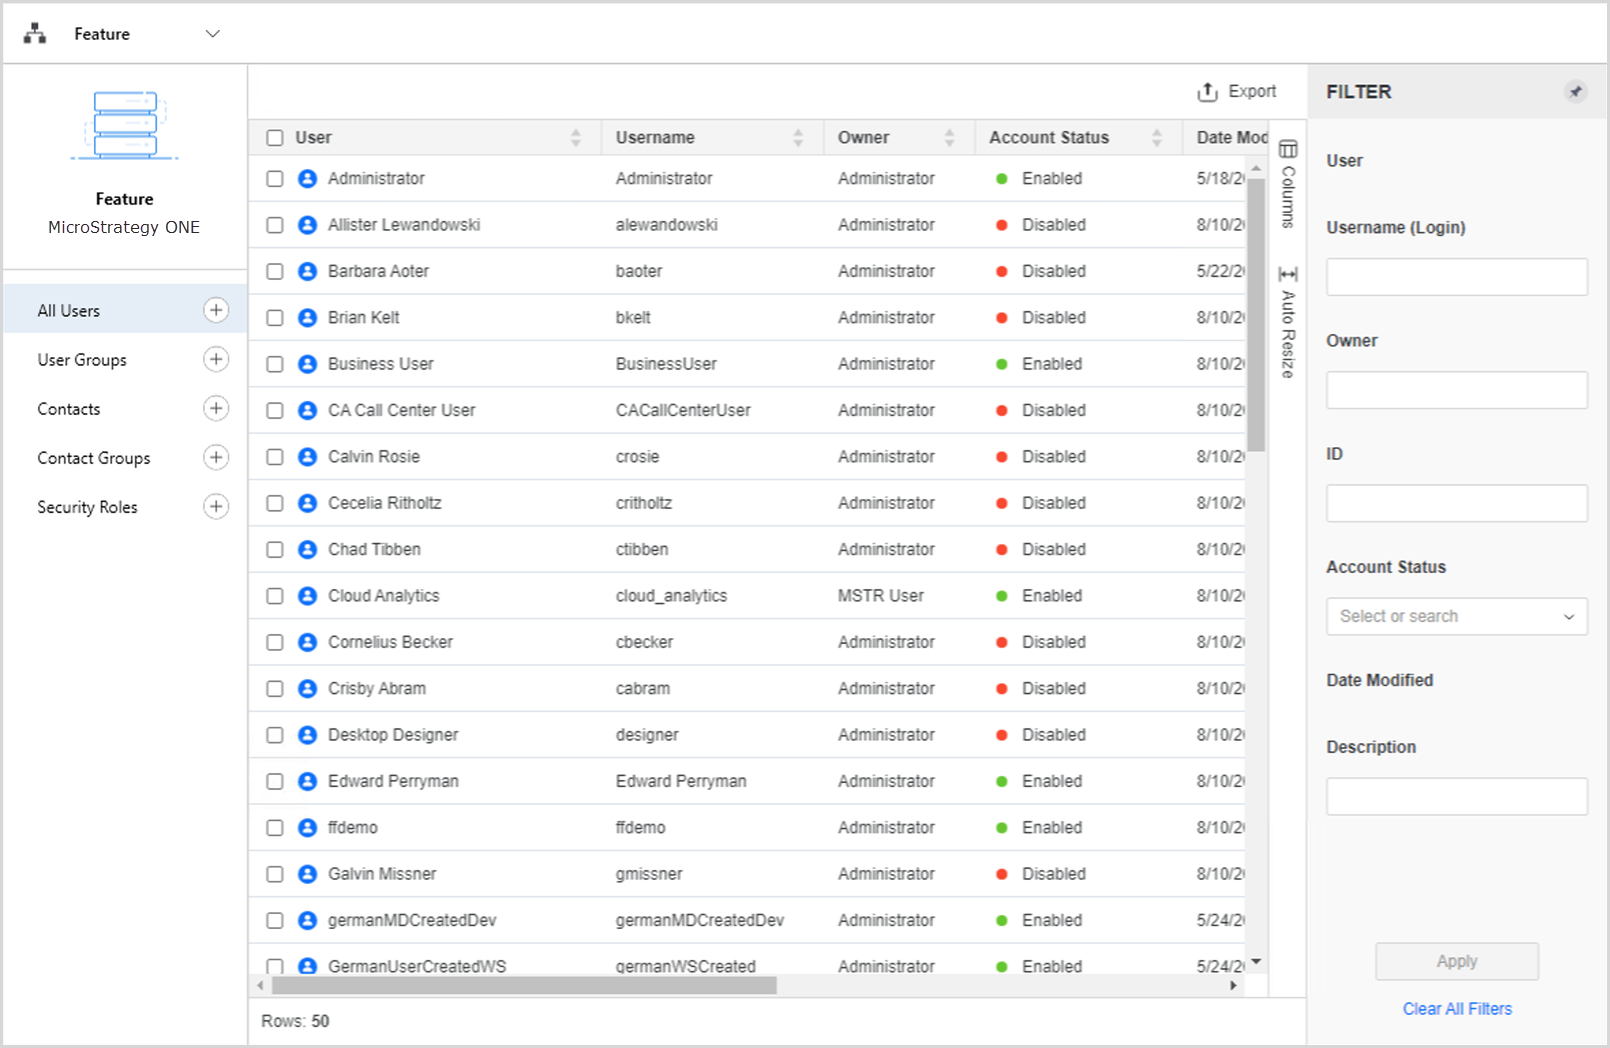
- Type a Full Name, Email Address, Username, and other optional fields.
- In the left pane, click Privileges and select the checkbox next to the following privileges:
- Access data from Databases, Google BigQuery, Big Data, OLAP, BI tools
- Create and edit database instances and connections
- Create and edit database logins
- Create configuration objects
- Create dataset in Workstation
- Configure project data source
- Monitor Database Connections
- Use Workstation
- In the left pane, click Authentication.
-
In Trusted Authentication Request User ID, type the Entra ID user's email address.

- Click Save.
Configure OIDC
For more information, see Enable OIDC Authentication for Strategy Library.
-
Open Workstation and connect to your environment using standard authentication and administrator credentials.
-
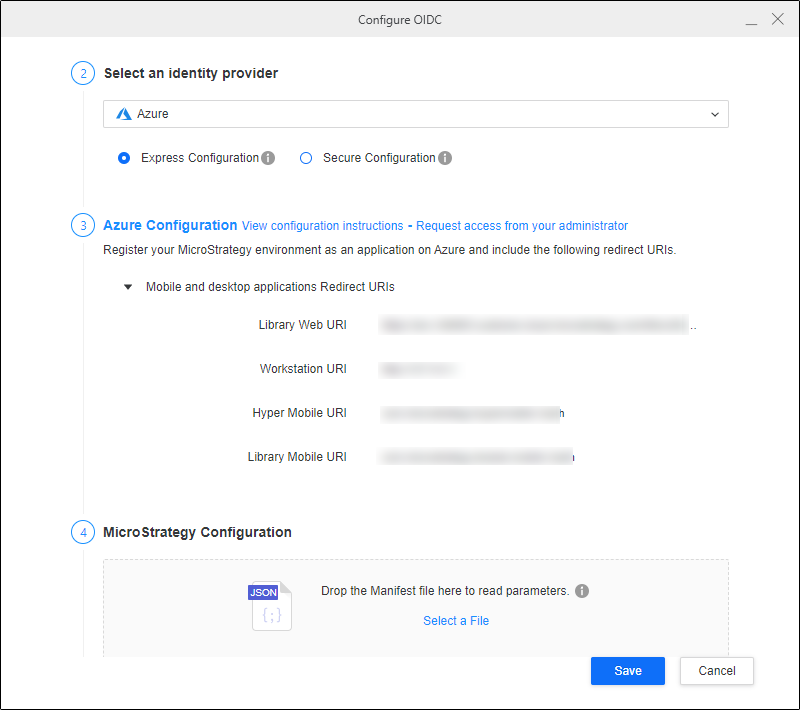
Right-click your connected environment and choose Configure OIDC under Configure Enterprise Security.
-
In Step 2: Select an identity provider, choose Azure from the drop-down list.
-
In Step 3: Azure Configuration, copy the Strategy Library URI and Workstation URI into the mobile and desktop application's sign-in redirect URIs in the Entra ID application you created in Configure Your Application in Microsoft Entra ID.
-
In Microsoft Entra ID, click Manifest under Manage in the left pane.
-
Click the Microsoft Graph App Manifest or AAD Graph App Manifest tab and click Download.
-
In Strategy Workstation, upload the manifest file in Step 4: Strategy Configuration.
-
Click Save.
-
Restart the web server.
Single Sign-On with OIDC
-
Open the Workstation window.
-
Connect to an environment.
-
Right-click the environment and choose Environment under Edit.
-
Select Default OIDC and click Continue.
-
A browser displays. Log in using your Microsoft Entra ID credentials.
-
Use a Strategy Administrator account to assign privileges to the new user.
You do not need to perform this step if you mapped a Strategy user to an Entra ID account and granted privileges.
-
In the Navigation pane, click
next to Datasets. -
Choose a Project and select Data Import Cube.
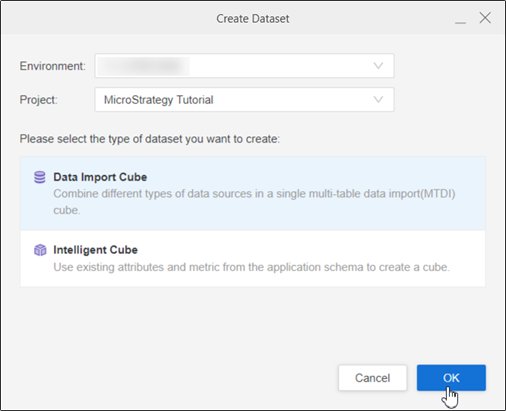
-
Click OK.
-
Choose the data source you created.
The namespaces and tables display.