Strategy One
MicroStrategy ONE Update 11 (September 2023) is the last release in which the MicroStrategy for QlikView and MicroStrategy for Qlik Sense connectors are available on the download site. Starting in MicroStrategy ONE Update 12 (December 2023), connectors deployed from prior versions no longer connect to the Intelligence Server. See KB486119 for more information.
MicroStrategy for QlikView
This connector allows you to retrieve datasets from cubes and reports in MicroStrategy and inject them into QlikView. You can import datasets with up to two million rows and 10+ columns.
All users attempting to the QlikView connector in MicroStrategy 2019 Update 2 must be assigned the Use Application Qlik privilege, directly or as part of a User Group or Security Role. This privilege can be found in the Client-Application-Qlik privilege group.
You must enable CORS (Cross-Origin Resource Sharing) settings on the Library server to use the connector.
Install the Connector
- Download and extract the connector zip file.
- From File Explorer, go to C: > Program Files > Common Files and create a new folder labeled QlikTech.
- Create a new folder labeled Custom Data inside the QlikTech folder from step 2.
- Place the extracted connector file inside the new Custom Data folder.
Use the Connector
- Open a new QlikView document and select File > Edit Script.
-
Open the Database drop-down and select QvMstrDatasetConnector.exe.
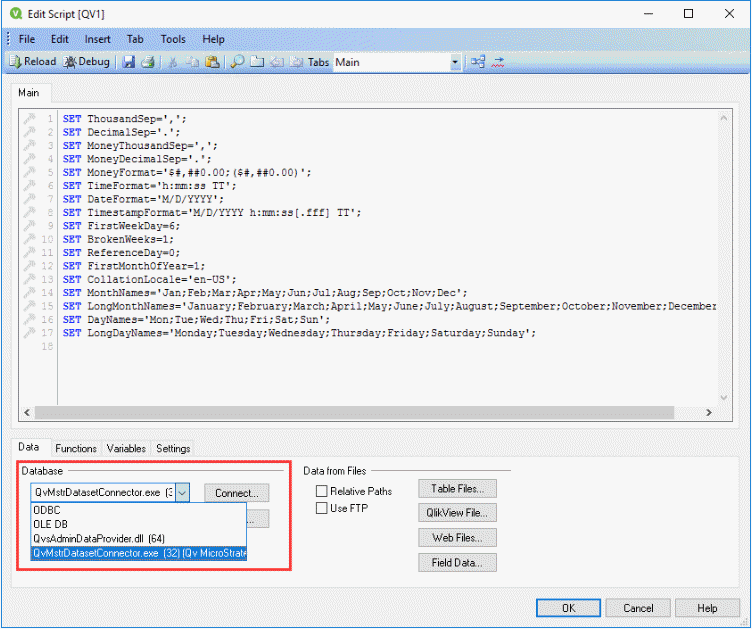
- Click Connect. The Connect to MicroStrategy Dataset window will appear.
- Enter your API Server URL and environment credentials.
Your REST API URL is your environment URL with /MicroStrategyLibrary/ added at the end.
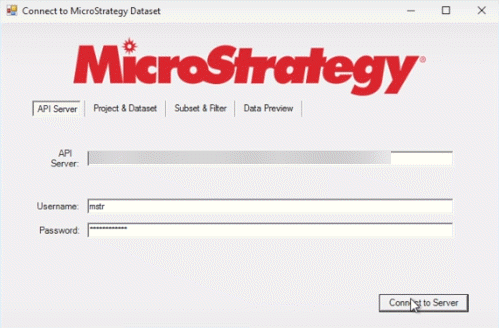
- Click Connect to Server.
- Select a project and dataset to import into Qlik.
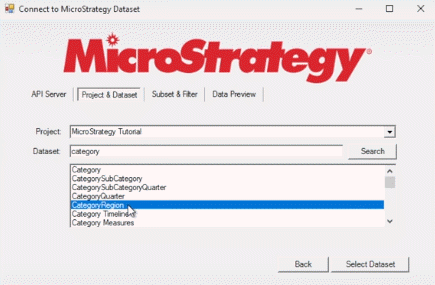
- Click Select Dataset.
- Select the objects and filters you want to import.
This feature is only available for cubes. If you choose to import a report, you will be asked to proceed to the Data Preview tab.
- Click Generate Preview. You will be shown the first 50 rows of data from your import.
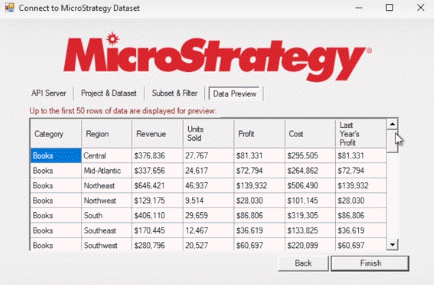
- Click Finish.
- Click Select from the Data tab to generate a select statement.
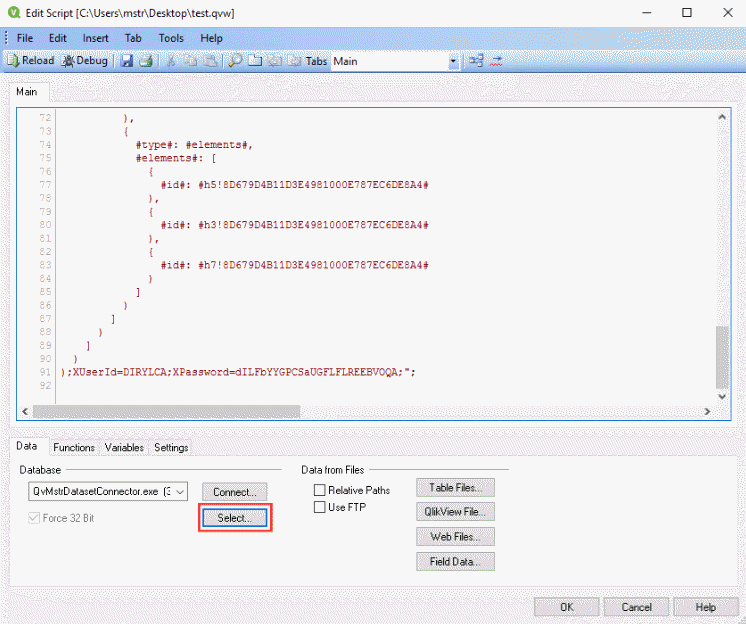
- Confirm the attributes you want to import from the Create Select Statement window and click OK.
- Click Reload.
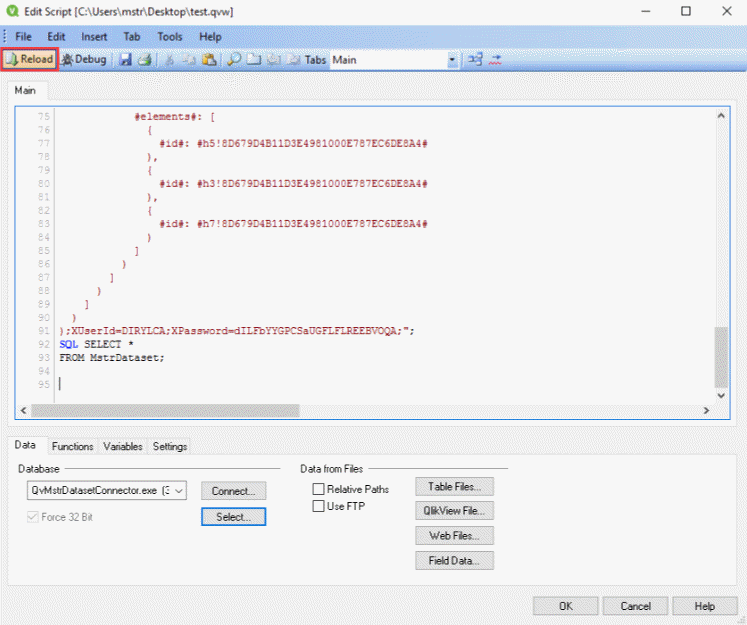
- Select the fields you want displayed the Listboxes from the Sheet Properties window and select OK to complete the import.
You can update the dataset at any time with the connector by going to File > Reload from your QlikView menu bar.
