MicroStrategy ONE
Create an Application
Starting in MicroStrategy ONE Update 10, content groups can view and create new application content.
With custom applications, organizations can design and create unique viewing experiences for different groups of users. In the Application dialog from MicroStrategy Workstation, you can easily update the following elements to brand
Once you've customized your application, you can edit and duplicate it.
Check out the video below to learn more!
-
Open the Workstation window in Navigation pane in smart mode.
-
Connect to an environment.
-
In the Navigation pane, click Applications.
You must have the Manage Library Applications privilege to create and edit applications in Workstation.
- Click + New Application. View the New Applications dialog.
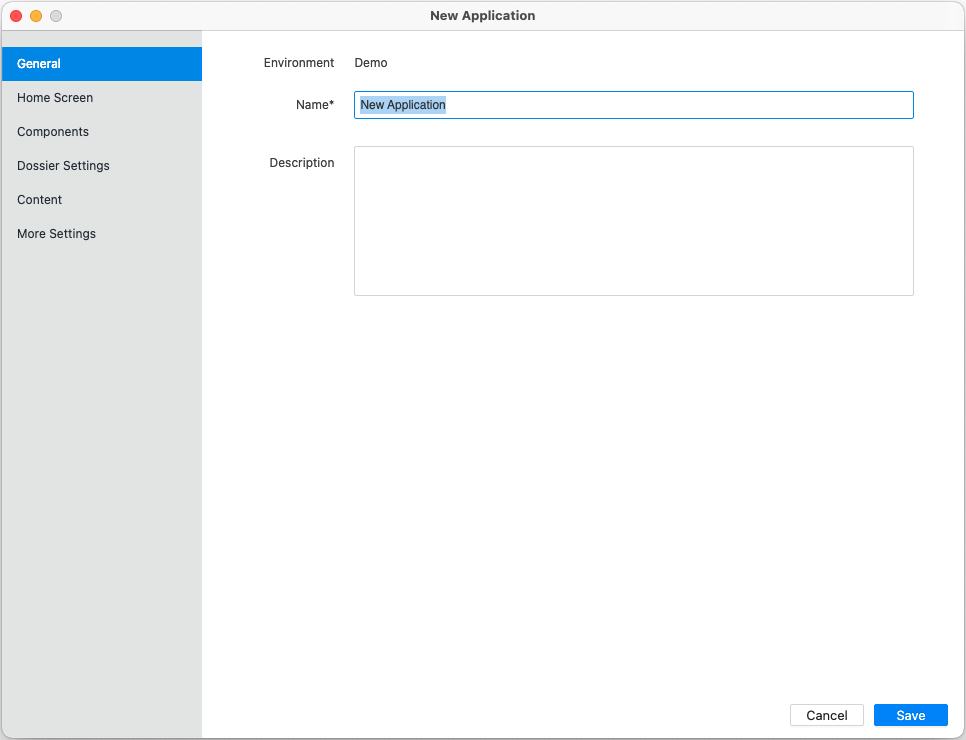
General: Name and Description
-
Add an application name. This name helps to keep track of applications created and which users should be given access.
-
Add an application description. This description is optional but helpful when returning to the Applications list in Workstation.
-
Continue to another element or click Save.
Application Home Screen
When determining the home screen of an application, you can select from two types of applications. You can use either the Library home screen or specific content as the application home screen.
Use the Default Library Home Screen
This application uses the Library interface, but allows you to customize components of the interface. You can also limit content by adding content groups in Content.
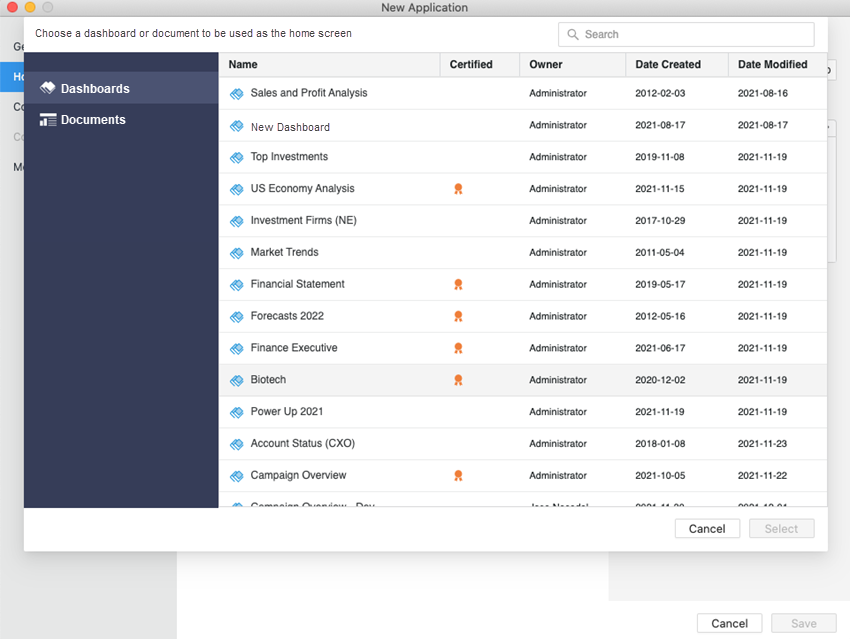
Use a Dashboard or Document in the Current Server as the Home Screen
This application uses a specific dashboard or document as the home screen. Application workflows have been integrated into the content with navigation concepts, contextual linking, and other designs.
-
Go to Choose a Dashboard
-
Select the content for the home screen.
-
Click Select to confirm the content.
-
Continue to another element or click Save.
Application Components
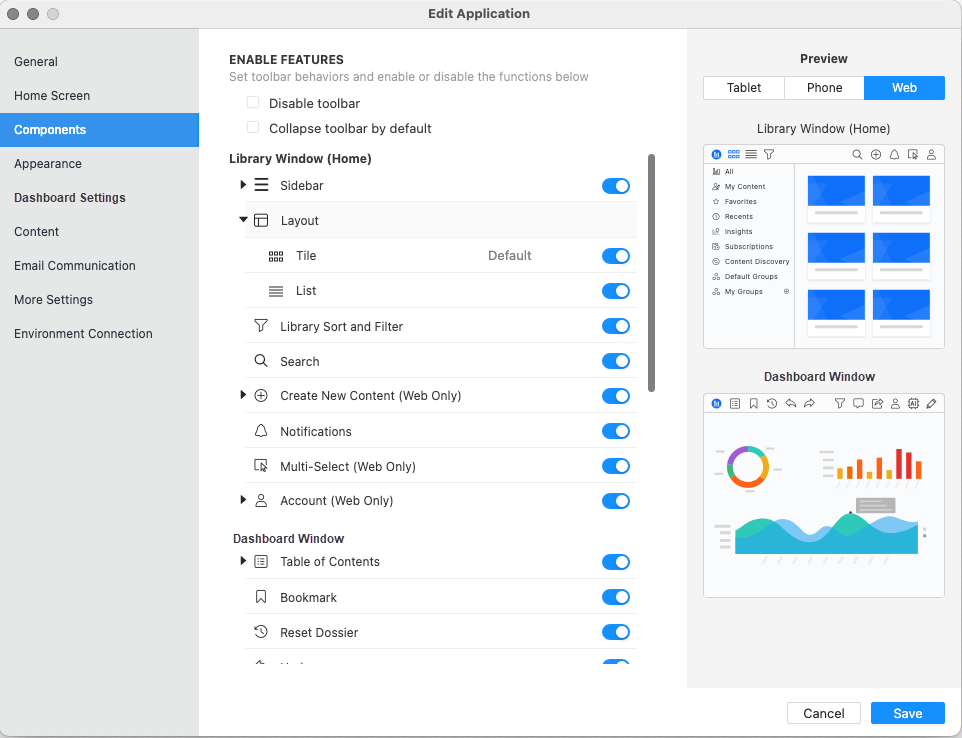
With Components, you can customize which components or features of the interface are enabled or disabled. Click the toggle to disable a component. As you hide components, use the Preview Feature on the right side of the screen to view updates.
-
Go to the Components.
-
Optionally, select whether to Disable toolbar or Collapse the toolbar by default.
You do not have to select either of the checkboxes. If you use a dashboard
-
Click toggles to enable or disable components depending on your requirements. View the platform specific components at the bottom of the list.
-
Continue to another element or click Save.
The locations for components that appear in multiple locations in the product are separated by a comma.
Sidebar
| Component | Locations |
|
My Content |
Library Sidebar |
|
Favorites |
Library Sidebar, Dashboard Information Window, Dashboard Context Menu, Table of Contents, Dashboard Card, Favorites in Library All tab |
|
Recents |
Library Sidebar |
|
Insights |
Library Sidebar |
|
Subscriptions |
Library Sidebar |
|
Content Discovery |
Library Sidebar |
| Downloads (Mobile) | Library Sidebar |
|
Default Groups |
Library Sidebar |
| My Groups |
Library Sidebar |
|
Account (Mobile) |
Account (Mobile) |
| User Name | Account (Mobile) |
|
Preferences |
Account (Mobile) |
| My Language | Account (Mobile) > Preferences |
|
My Time Zone |
Account (Mobile) > Preferences |
| Face ID Login | Account (Mobile) > Preferences |
|
Take A Tour |
Account (Mobile) > Preferences |
| Refresh View Automatically | Account (Mobile) > Preferences |
|
Smart Download |
Account (Mobile) > Preferences |
| Automatically add to library | Account (Mobile) > Preferences |
|
Advanced Settings |
Account (Mobile) |
| App Settings | Account (Mobile) > Advanced Settings |
|
Security Settings |
Account (Mobile) > Advanced Settings |
| Logging | Account (Mobile) > Advanced Settings |
|
Help and Legal |
Account (Mobile) |
| Help (help link) | Account (Mobile) > Help and Legal |
|
Legal |
Account (Mobile) > Help and Legal |
| Report a Problem | Account (Mobile) > Help and Legal |
|
Log Out |
Account (Mobile) |
| Add Library (Mobile) | Library Sidebar |
|
Switch Application (Mobile) |
Library Sidebar |
Library Sort and Filter
| Component | Location |
|
Library Sort and Filter |
Library Toolbar |
Search
| Component | Location |
|
Search |
Library Toolbar |
Create New Content (Web)
| Component | Location |
|
Create New Content (Web) |
Library Toolbar, Save as in Library |
|
New Dashboard |
Library Toolbar > Create New Content, Save as in Library |
| New Report | Library Toolbar > Create New Content, Save as in Library |
Notification
| Component | Location |
|
Notification |
Library Toolbar |
Multi-Select
| Component | Location |
|
Multi-Select |
Library Toolbar (Web), Dashboard Context Menu (Mobile), Check box in dashboard List View |
Account (Web)
| Component | Location |
|
Account (Web) |
Account (Web) |
|
User Name |
Account (Web) |
| My Applications | Account (Web) |
|
Manage Library |
Account (Web) |
| Preferences | Account (Web) |
|
My Language |
Account (Web) > Preferences |
| My Time Zone | Account (Web) > Preferences |
|
Persistent Notifications |
Account (Web) > Preferences |
|
Switch Workspace |
Account (Web) |
| Take a Tour | Account (Web) |
|
Help (help link) |
Account (Web) |
| Log Out | Account (Web) |
Table of Contents
| Component | Location |
|
Table of Contents |
Dashboard Table of Contents |
|
Header |
Dashboard Table of Contents |
| Content Info (Web) | Dashboard Table of Contents |
|
Chapter/Page Name |
Dashboard Table of Contents |
Bookmark
| Component | Location |
|
Bookmark |
Dashboard Toolbar, Dashboard Share Panel |
Refresh Dashboard
| Component | Location |
|
Resfresh Dashboard |
Dashboard Toolbar, Dashboard Info Window |
Undo and Redo
| Component | Location |
|
Undo and Redo |
Dashboard Toolbar |
Font Size in Grid (iOS)
| Component | Location |
|
Font Size in Grid (iOS) |
Dashboard Toolbar, Show Data Panel |
Filter
| Component | Location |
|
Filter |
Dashboard Toolbar, Edit in Filter Summary |
Filter Summary
| Component | Location |
|
Filter Summary |
Filter Summary Panel |
Comments
| Component | Location |
|
Comments |
Dashboard Toolbar, Dashboard Card |
Share
| Component | Location |
|
Share Menu |
Dashboard Toolbar, Dashboard Information Window, Visualization Context Menu, Visualization Show Data Panel, Export in Library Authoring, Toolbar icons in Multi-Select (Mobile) |
|
Share Option |
Dashboard Toolbar > Dashboard Share Menu, Dashboard Info Window |
|
Export to Excel |
Dashboard Toolbar > Dashboard Share Menu, Visualization Context Menu, Visualization Show Data Panel, Export in Library Authoring, Toolbar icons in Multi-Select (Mobile), Visualization Context Menu |
| Export to PDF | Dashboard Toolbar > Dashboard Share Menu, Visualization Context Menu, Visualization Show Data Panel, Export in Library Authoring, Toolbar icons in Multi-Select (Mobile) |
|
Download |
Dashboard Toolbar > Dashboard Share Menu, Download in Library Authoring, Toolbar icons in Multi-Select (Mobile) |
| Subscribe | Dashboard Toolbar > Dashboard Share Menu |
|
Annotate and Share (RSD) |
Dashboard Toolbar > RSD Toolbar Share Menu |
Auto Answers
| Component | Location |
|
Auto Generated Answers (Web Only) |
Dashboard Toolbar |
Edit Dashboard (Web)
| Component | Location |
|
Edit Dashboard (Web) |
Dashboard Toolbar |
Content Info
| Component | Location |
| Content Info | Content Information Window |
| Info Window | Content Information Window, Dashboard Card |
| Content Creator | Content Information Window, Dashboard Card, Dashboard Information Window, |
|
Timestamp |
Content Information Window, Dashboard Card, Dashboard Information Window, Filter options |
|
Project |
Content Information Window, List View |
| Description | Content Information Window, List View |
|
Object ID |
Content Information Window, List View |
| Path | Content Information Window, List View |
Application Content
When selecting to use the default Library home screen for the application, you also have the option to define content. In Content, you can add content groups to the application. This limits the content available in the application to these content groups only. You can also allow users to view and create new content. These two options can be controlled with a setting.
Add Content to an Application
-
Go to Content.
-
Name the section where the content groups will display.
-
Click Add Content.
-
Select from the content groups that you have created.
-
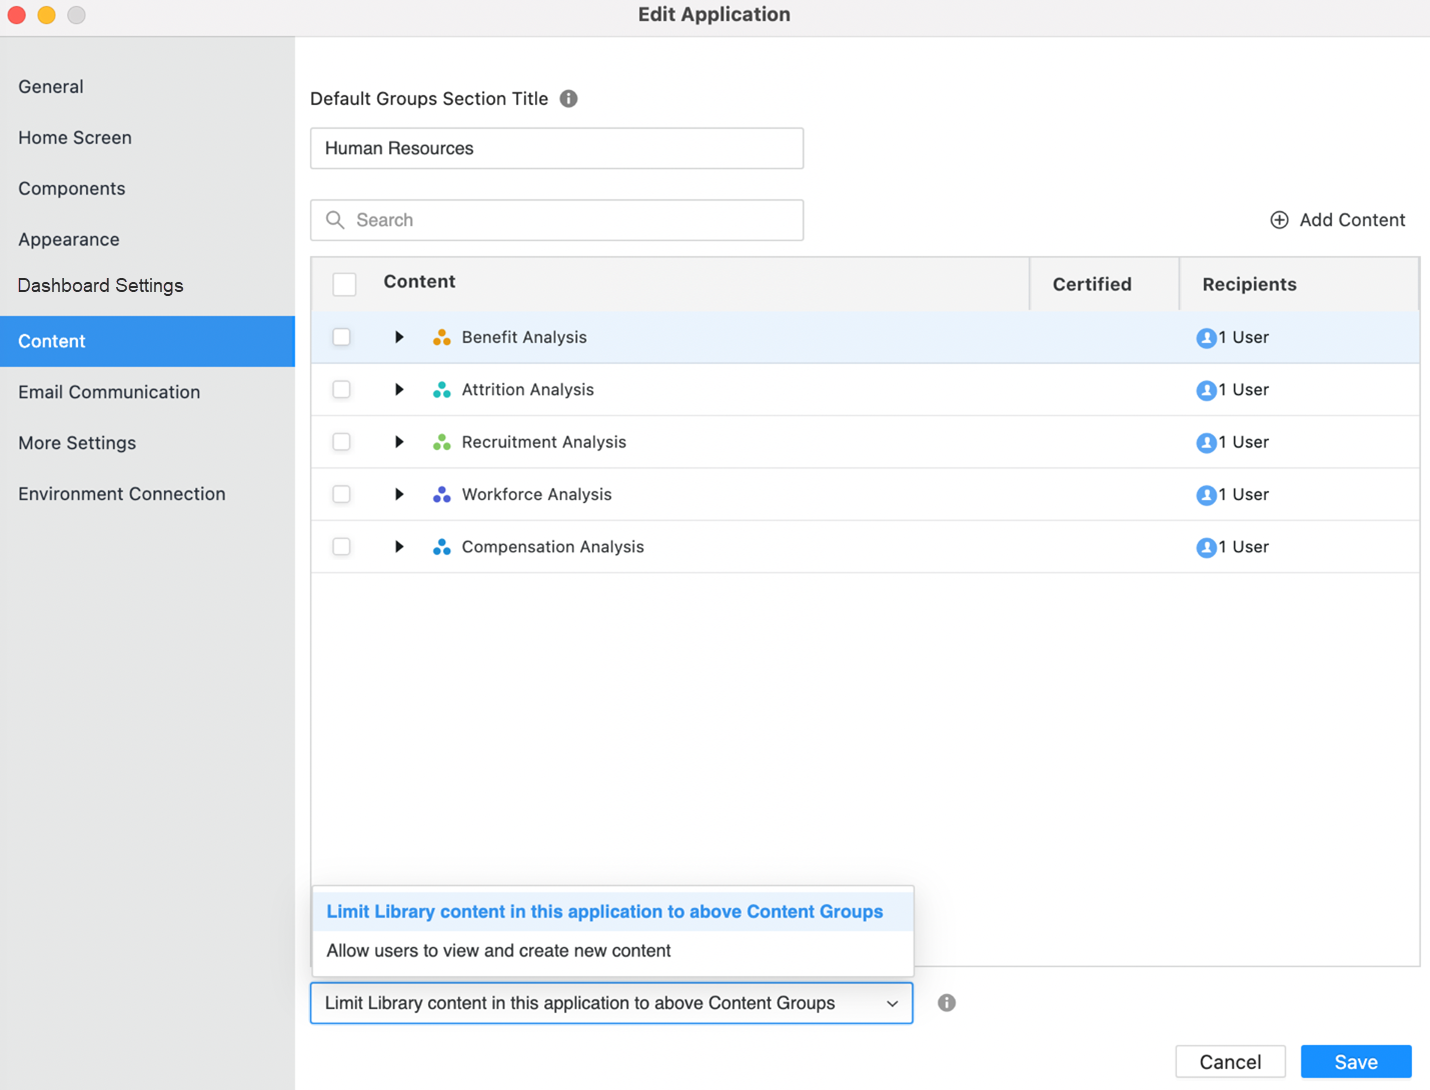
Click Select. View content groups in Content.
-
By default, Limit Library content in this application to above Content Groups is selected. This means your content groups are now locked into this application. Users of the application will not be able to remove or add content outside of these content groups.
-
To allow users to search for all content and add additional content to the application, click Allow users to view and create new content.
-
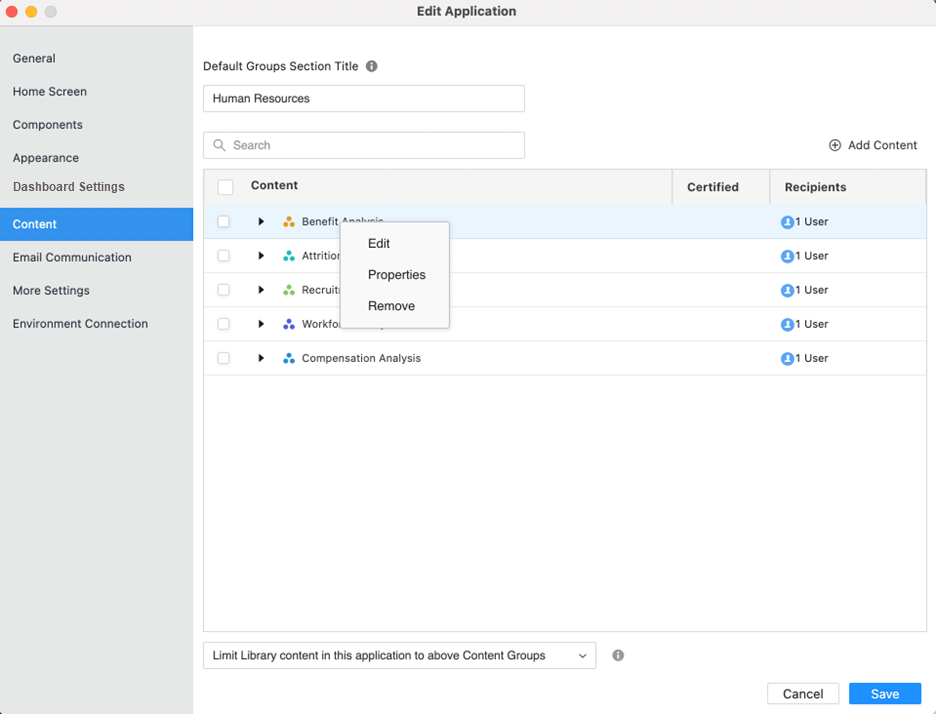
To edit a content group entry in Edit Application, right click on the content and click Edit.
-
Continue to another element or click Save.
More Settings
More Settings in the Application dialog allows you to update or modify additional settings related to Library Mobile.
-
Determine connectivity settings
-
Update or modify logging settings
-
Select whether to clear caches on logout
-
Email address for reporting a problem
-
Smart download
Save the Application
-
Finalize all customization and settings for your application.
-
Click Save. The new application automatically appears in the Applications list in Workstation.
-
Hover on the application name in the list.
-
View the Share icon and hover to see the Copy Link option.
-
Click Copy Link.
Users with the shared link can copy the link in the browser and in the MicroStrategy Application. For Library Mobile, once adding one application link, all applications that the user has access to will automatically added. Users can then switch between workspaces.

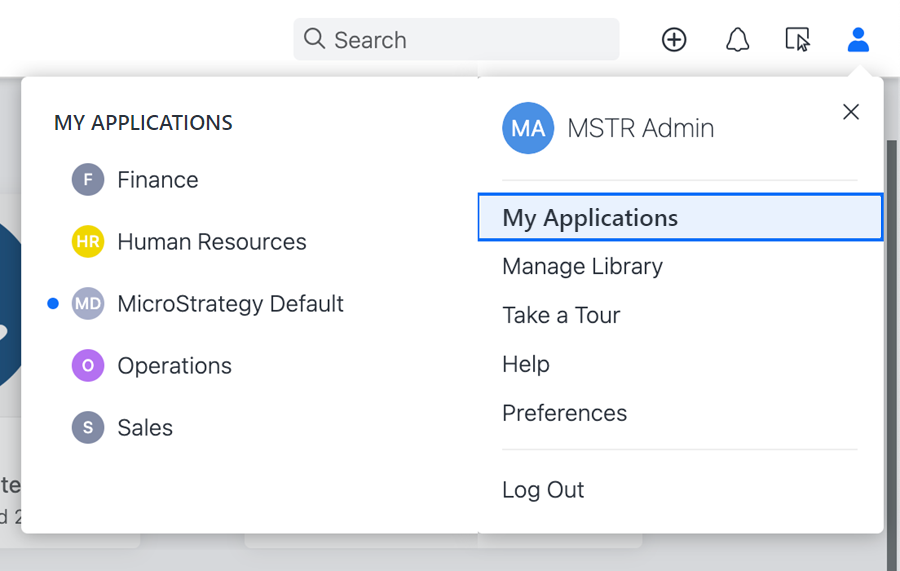
Similarly for Library Web, all applications that the user has access to will automatically be listed in the Account menu under the My Libraries option. This allows users to switch between workspaces.
Add Security
Applications are governed by access control lists (ACLs). In order for a user to log into the application, they must have the application link and View Access added. If access is not granted, the user will see an error when accessing the application.
Users may have access to more than one application.
Grant View Access for an Application
-
In Workstation, go to Applications.
-
Right-click an application and click Get Info.
-
Go to Security Access.
-
Click the + button to add users and user groups.
For Permissions, make sure user and user groups have the View permission. You can change the permissions later.
-
Click OK.
By default, all users (Everyone) have access to the MicroStrategy default application. You can change the access at any time.
Edit an Application
-
In Workstation, go to Applications.
-
Right-on an application and select Edit.
-
View the Application dialog and make necessary changes.
-
Click Save.
Duplicate an Application
-
In Workstation, go to Applications.
-
Right-click an application and click Duplicate. A copy of the selected application will be created with the copied configuration settings.
-
View the Application dialog and make necessary changes.
-
Click Save.
The duplicated application is not created until it is saved.