Strategy ONE
Snowflake OAuth Connectivity with Okta and Microsoft Entra ID (Formerly Azure AD)
Starting in Strategy One (March 2025), Snowflake supports Client Credential OAuth Grant Type out-of-the-box.
Starting in MicroStrategy 2020 Update 2, Strategy supports connection to Snowflake through OAuth authentication.
OAuth authentication is supported only in Strategy Web and Library with HTTPS enabled. OAuth authentication is not supported in Strategy Workstation or MicroStrategy Developer.
- Okta
- Entra ID
Learn to configure Snowflake OAuth connectivity with Okta.
Prerequisites
You must have a Snowflake account with an External OAuth integration to Okta. See Configure Okta for External OAuth for more information.
Get the Init OAuth URL and Refresh Token URL
-
Edit the Snowflake authorization server created in Okta.
- Navigate to the Okta Admin Console.
-
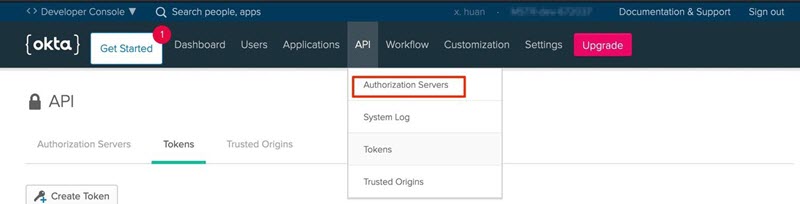
In the Security menu, go to API > Authorization Servers.
-
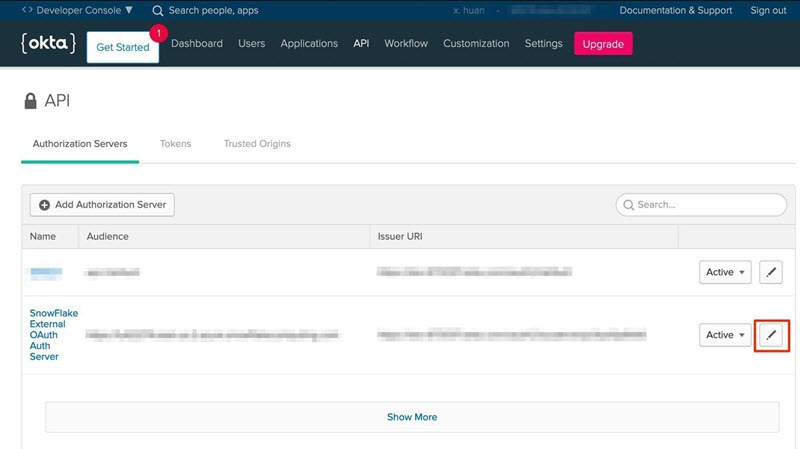
Edit Snowflake's related authorization server.
-
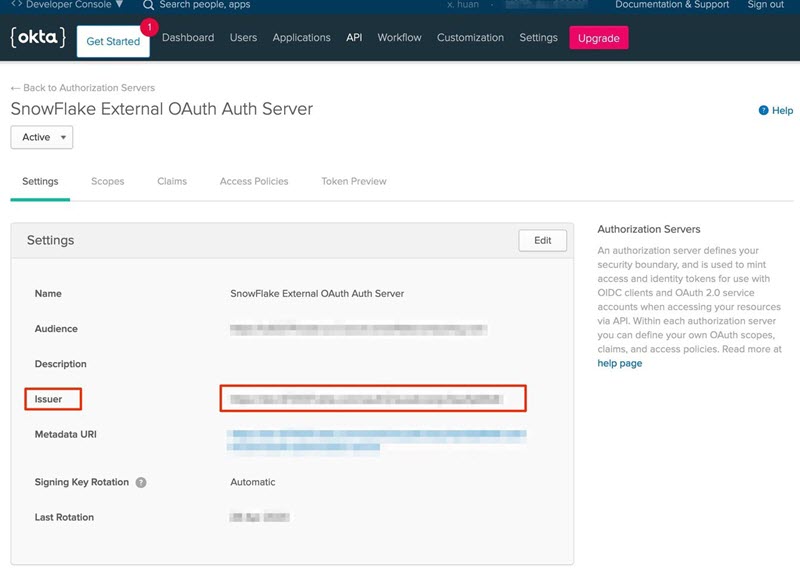
Copy the value for Issuer. The value is similar to https://dev-XXXXX.oktapreview.com/oauth2/YYYYY.
-
To obtain the Init OAuth URL and Refresh Token URL, add the follow values to the Issuer value:
Init OAuth URL: https://dev-XXXX.oktapreview.com/oauth2/YYYYY/v1/authorize
Refresh Token URL: https://dev-XXXXX.oktapreview.com/oauth2/YYYYY/v1/token
Get the Client ID and Client Secret
- Navigate to the Okta Admin Console.
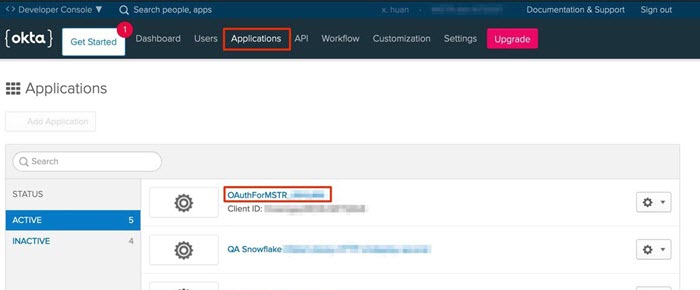
- From the menu, go to Applications.
-
Select the Snowflake's client application.
-
Go to the General tab and scroll down on the page.
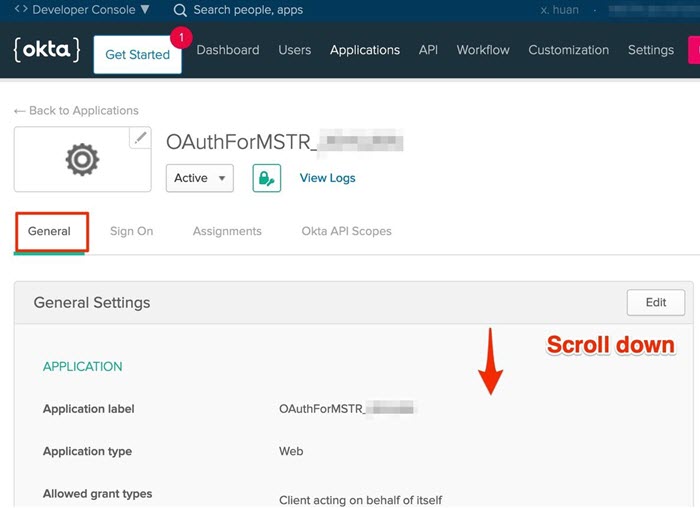
-
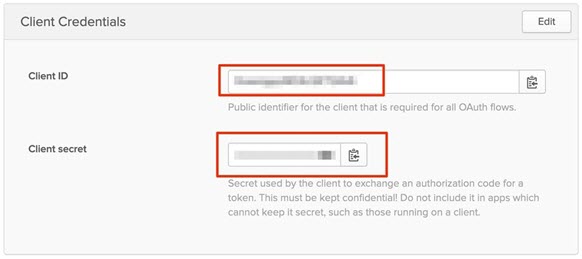
Locate the Client ID and Client Secret.
Create a Data Import Database Role with OAuth Authentication
Once the ClientID, ClientSecret, Authorization URL, and Token URL are collected, you can connect to Snowflake using OAuth.
Okta Authentication
- Open Strategy Web (https://<severname>/MicroStrategy/servlet/mstrWeb).
-
Click Create > Add External Data.
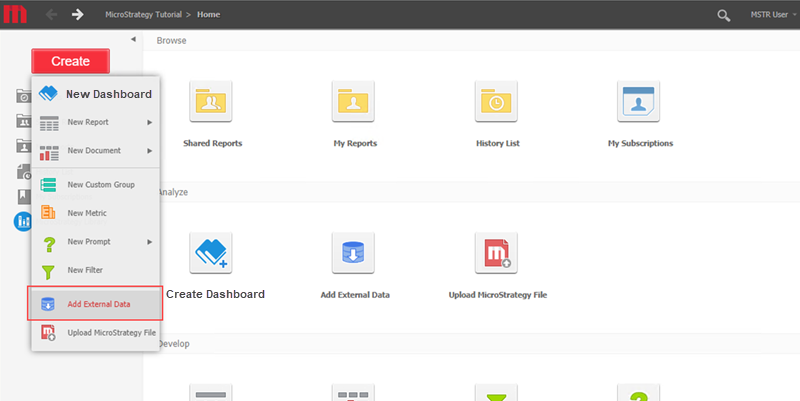
-
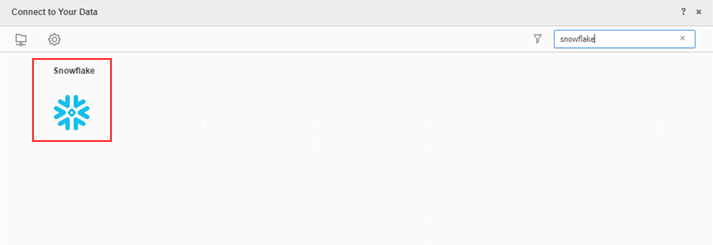
Choose Snowflake.
- In the Select Import Options dialog, select the Select Tables option.
- Click Next.
- Next to Data Sources, click New Data Source
 .
. - In the Data Source dialog, select Snowflake from the Database and Version drop-downs.
-
Select the OAuth Connection option and complete the required fields.
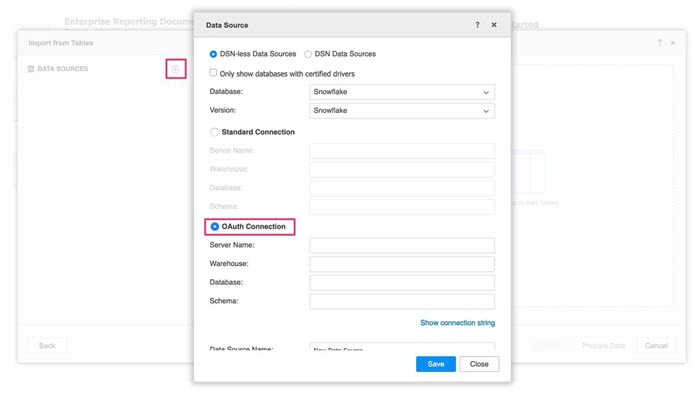
- Click Save.
- In the OAuth Properties dialog, choose OKTA from the Authentication Type drop-down and complete the required fields.
-
Copy the Callback URL, as it is needed to whitelist in the Okta authorization server.
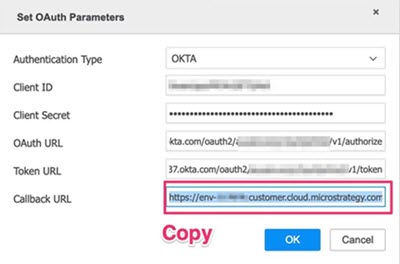
- Click OK to save the database connection.
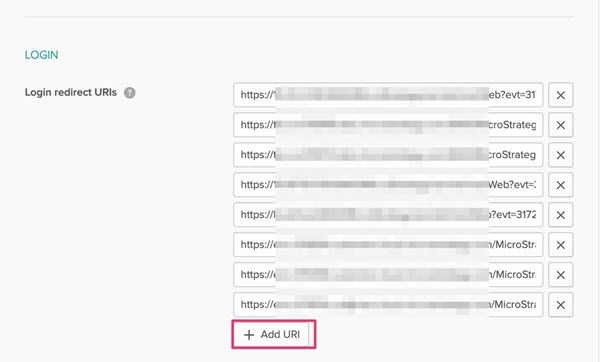
- In the Okta Admin Console, go to the application created in Step 1: Create an OAuth Compatible Client to Use with Snowflake.
- Go to the General tab > Edit.
-
Scroll down to the Login redirect URIs section and click Add URI to add the URL to the list.
- Go back to Strategy Web and click on the newly created database instance.
-
Enter the credentials for Okta IdP.
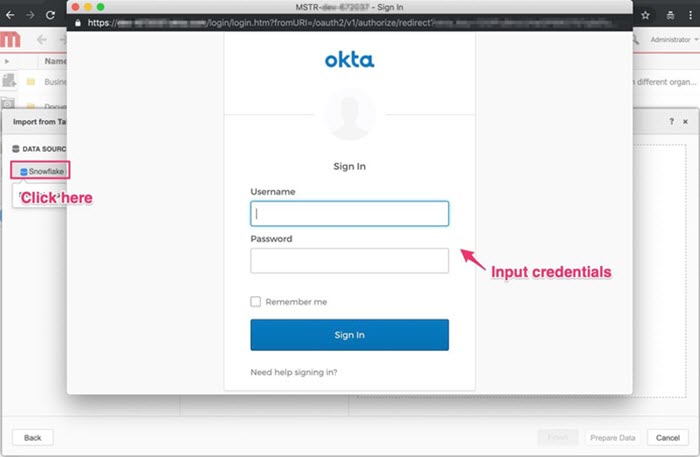
-
Click Sign In.
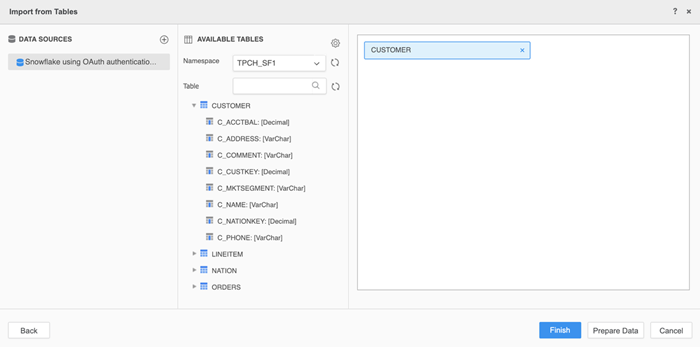
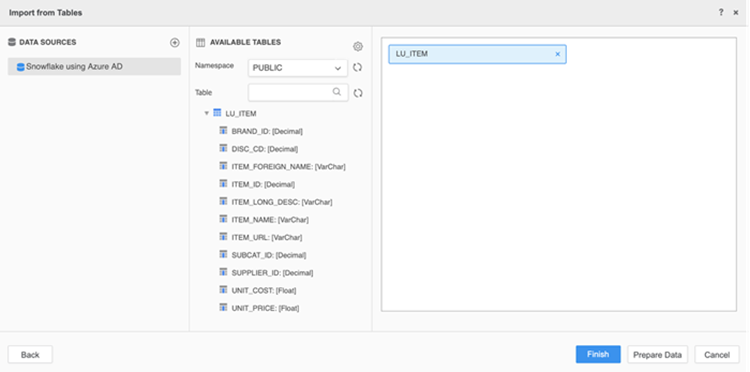
After logging in, tables and columns that are visible by the Okta user are displayed.
Learn to configure Snowflake OAuth connectivity with Entra ID.
Prerequisites
The web server must support HTTPS protocol.
You must have a Snowflake account with an External OAuth integration to Entra ID. See Configure Microsoft Entra ID for External OAuth for more information.
Get the Init OAuth URL and Refresh Token URL
- Go to the Microsoft Azure Portal and authenticate.
- Navigate to Azure Active Directory.
- Click on App Registrations.
- Click the Snowflake OAuth Resource created in Step 1: Configure the OAuth Resource in Entra ID.
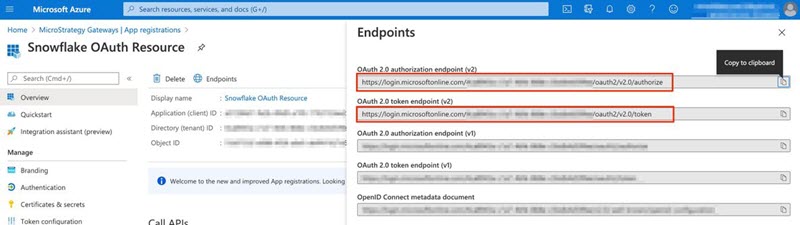
- Go to Overview > Endpoints.
-
Copy the Oauth 2.0 authorization endpoint (v2) and OAuth 2.0 token endpoint (v2).
Get the Scope
-
In the same application, go to API Permissions and click the API/Permission name.
A dialog appears.
- Copy the URL and paste in the field. The URL is similar to https://[AzureDomain]/[id]/session:scope-any.
-
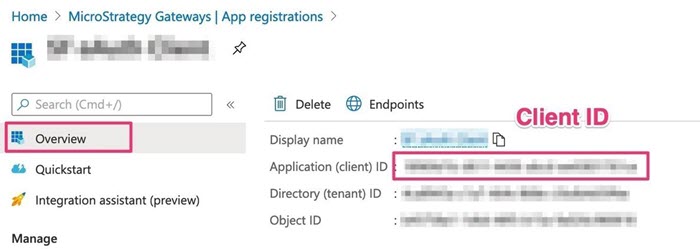
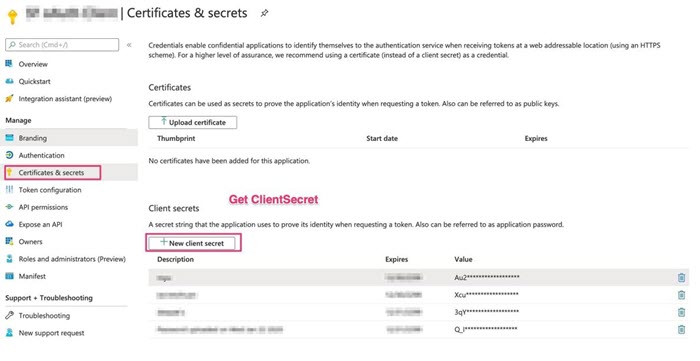
Get the Client ID and generate a new Client Secret (if not recorded).
Create a Data Import Database Role with OAuth Authentication
Once the ClientID, ClientSecret, Tenant ID, Scope, Authorization URL, and Token URL are collected, you can connect to Snowflake using OAuth.
- Open Strategy Web (https://<severname>/MicroStrategy/servlet/mstrWeb).
-
Click Create > Add External Data.
-
Choose Snowflake.
- In the Select Import Options dialog, select the Select Tables option.
- Click Next.
- Next to Data Sources, click New Data Source .
- In the Data Source dialog, select Snowflake from the Database and Version drop-downs.
-
Select the OAuth Connection option and complete the required fields.
-
Starting in Strategy One (March 2025), in OAuth Grant Type, choose an option depending on your desired workflow:
-
To use a Client Credential workflow, choose Client Credentials. Users will be prompted to enter credentials when accessing the source.
-
To use an ID token flow, choose Authorization Code. Users will be directed to the SSO login when accessing the source.
-
- Click Save.
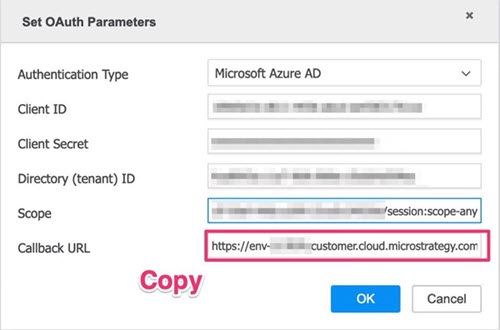
- In the OAuth Properties dialog, choose Microsoft Azure AD from the Authentication Type drop-down and complete the required fields.
-
Copy the Callback URL, as it is needed to whitelist in Entra ID.
- Click OK to save the database connection.
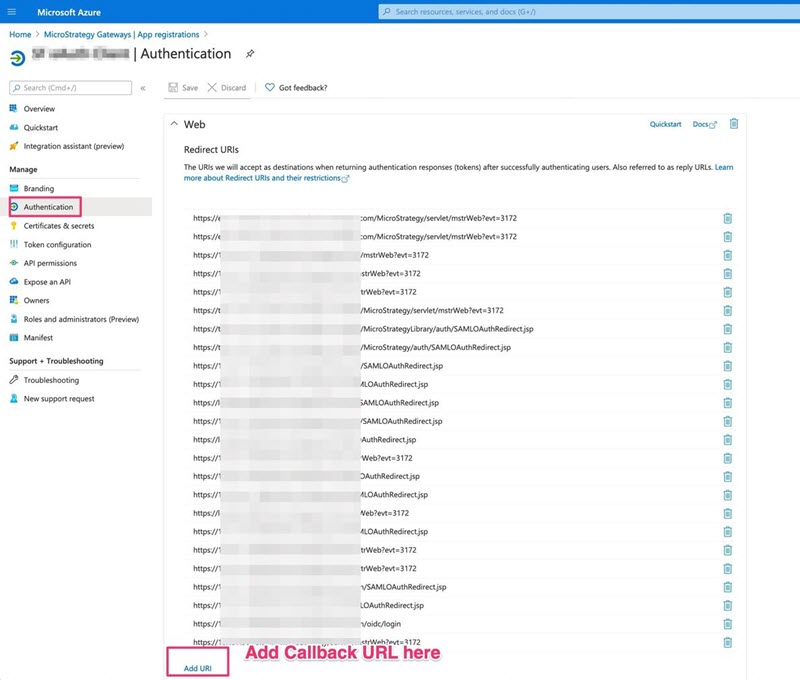
- Access the application in Entra ID.
-
Go to Application > Web > Redirect URIs and click Add URI.
-
Modify the metadata to allow the storage of long properties.
Applied Server: Strategy Metadata Warehouse
-
Back up the metadata warehouse before any operation. Use Strategy DB Query Tool or other database connectors to connect to Strategy Metadata Repository, and execute the following query for the appropriate warehouse type.
For warehouse types not listed below, please contact Strategy Support for help.
For MySQL:
ALTER TABLE DSSMDACCPROP MODIFY PROP_VAL NVARCHAR(30000);

INSERT INTO DSSMDSYSPROP (NAME, PROP_VAL) VALUES ('MAXACCPROPVALCOLUMNLEN', '30000');
For SQL Server:
ALTER TABLE DSSMDACCPROP ALTER COLUMN PROP_VAL VARCHAR(8000);

INSERT INTO DSSMDSYSPROP (NAME, PROP_VAL) VALUES ('MAXACCPROPVALCOLUMNLEN', '8000');
For PostgreSQL:
ALTER TABLE DSSMDACCPROP ALTER COLUMN PROP_VAL TYPE VARCHAR(90000);

INSERT INTO DSSMDSYSPROP (NAME, PROP_VAL) VALUES ('MAXACCPROPVALCOLUMNLEN', '30000');
-
-
Go back to Strategy Web and click on the newly created database instance.
The Entra ID authentication dialog appears.
Your browser must allow popups.
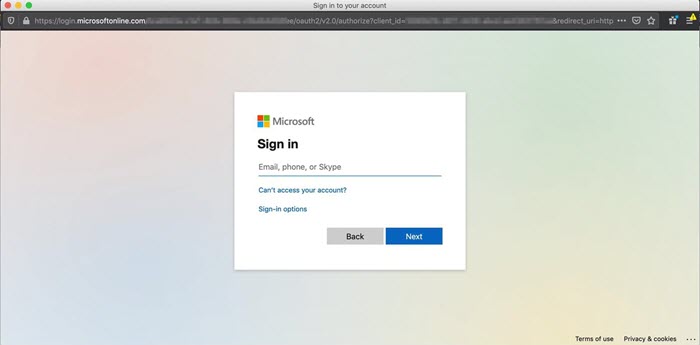
After authenticating, the catalog is populated.
Troubleshooting
If you experience errors, please enable the logs.
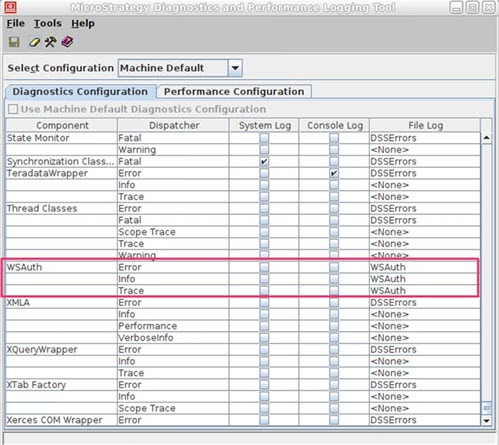
More information can be found in WSAuth.log and DSSErrors.log. It also recommended that you place the log file for the WSAuth components directly in the DSSErrors.log.