Strategy One
Connect to SAP S/4HANA from Web or Workstation
Learn how to connect to SAP S/4HANA via the Data Source dialog and handle your connection.
Upon successful connection, you can begin importing data.
How to Authenticate
The SAP S/4HANA connector does not support live connect mode.
-
In Workstation, next to Datasets, click Create a new dataset
 and choose a project.
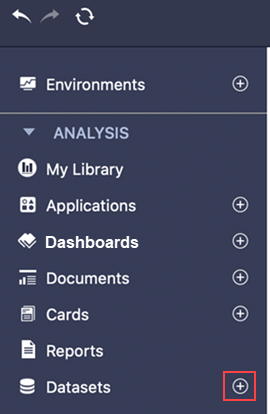
-
In Strategy Web, click the Create button > Add External Data.
In Strategy Workstation, click Create a new dataset
and choose a project.
-
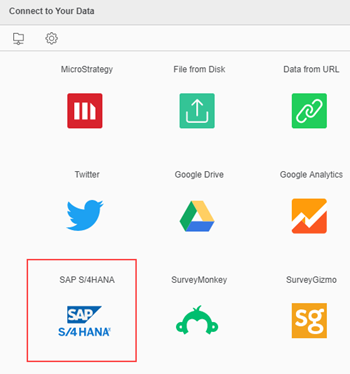
Select the SAP S/4HANA connector.
-
Next to Data Sources, click New Data Source
to add a new connection. 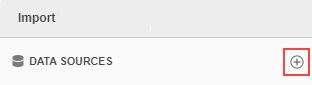
The Data Source dialog appears when there are no new database roles or connections.
-
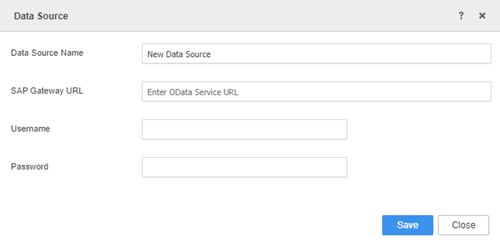
Enter your connection credentials in the Data Source dialog.
-
Data Source Name: A unique connection name is required.
If you enter an existing name, the following error is returned: The database connection name already exists.
-
SAP Gateway URL: The Service URL for the ODATA service.
For details on URL formats supported by the connector, see URL Handling.
You can also get the Service URL for your CDS view by logging into SAP S/4HANA > Communication Users > Inbound Services. For details, see Maintain a Communication Arrangement for Inbound Communication.
- Username: The username of a valid user account in SAP S/4HANA.
-
Password: The password of a valid user account in SAP S/4HANA.
You can create a username and password in the Communication Systems under Communication Management. You must log into SAP S/4HANA Cloud System to get your credentials. For details, see Maintain a Communication Arrangement for Inbound Communication.
To connect to your SAP s/4HANA Cloud System to your SAP Cloud Platform Consumer account, refer to the SAP Help Portal.
-
- Click Save.
Data Source Handling
Administrators can delete database connections created via Strategy Web by going to Developer Administration > Configuration Managers > Database instances.
-
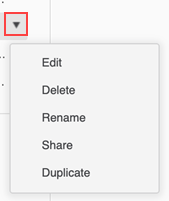
Under Data Sources, hover over your connection and click the more icon
 .
. 
-
Select one of the following options:
- Edit: Modify the fields in the Data Source dialog.
- Delete: Remove your connection from Data Sources.
- Rename: Rename your connection.
-
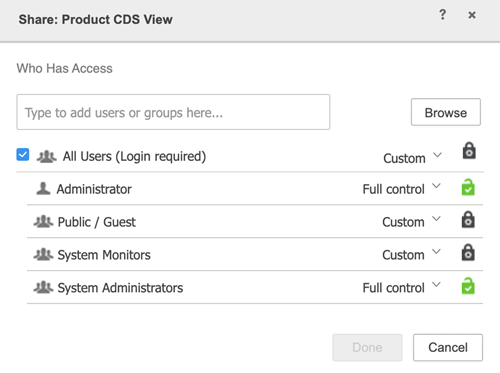
Share: Share your connection and grant controlled access to other users.
-
Duplicate: Create a duplicate connection.
By default, the duplicated connection's name begins with Copy of , followed by the original connection name. You can rename the duplicated connection.
For security reasons, the duplicated connection is populated with the hardcdded string,
PWDHIDDEN123!@#. Clicking on the connection, without changing the password, returns the following error message: Your credentials and/or authentication mode are incorrect.Administrators can delete the database connections created via Web by going to Developer > Administration > Configuration Managers > Database Instances.
- Click on the newly created connection and select from any of the displayed tables.
Once a connection is established, you can get started with the data importing process.