Strategy ONE
View Objects
Starting in Strategy One (March 2025), you can view snapshots from a content's Additional Information.
On the Library Home page, your dashboards display as tiles in Grid View or as a list in List View.
- Grid View
- List View
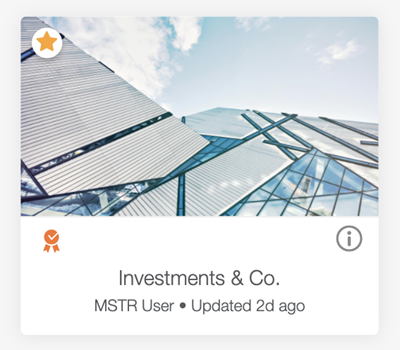
On each tile, you can see the name of the item, the author, and when the item was last updated or viewed.
The icons on the item vary depending on the status, certification level, and recent interaction.
![]()
New item
![]()
Updated item

Certified
![]()
Collaboration
Additional Information
In the grid view, click Additional Information ![]() to:
to:
|
|
Favorite |
Add the object to your Favorites section. |

|
Share |
Share the object with other users via link or invitation. |

|
Subscribe |
Create and manage subscriptions. |

|
Export to Excel |
Export the object to Excel. |
|
|
Export to CSV | Export the dashboard to a comma-separated value (CSV) file, beginning in Strategy One (May 2025). |

|
Export to PDF |
Export the object to a PDF. |

|
Download |
Download the dashboard as an .mstr file. For Strategy Mobile, this downloads the dashboard cache, including bookmarks and links, for offline use. |

|
Reset |
Reset a dashboard to its original state or re-prompt a dashboard. |

|
Remove |
Remove the object from your library. |

|
Edit |
Edit the object. When you edit a document, Strategy Web opens in a separate browser tab. |
|
|
Manage Access | Manage access to the object by adding users and groups and editing permissions. |

|
Author |
The object's author. |

|
Updates |
When the object was last modified or viewed. |
|
|
Collaboration |
View comments and discussions on the object. |
Most of these options are also available from the right-click menu. In addition, you can certify the object. Certified items have typically been reviewed by trusted members of your organization and are considered official sources of content, based on reliable data.
Favorites
From the Library Home page, you can easily add content to your Favorites to easily access your most-used objects.
-
To add content to the Favorites section, click Favorite
 on the tile. The star icon appears yellow and the content can be found in the top section of Library Home and in the Favorites tab (if the application displays a Favorites tab).
 -
To un-favorite content, click Favorite
 again. The content is then removed from the Favorites section and tab.
 -
You can also favorite and un-favorite content from the Additional Information section and, when the object is open, the toolbar beginning in Strategy One (July 2025).
Grouping
To organize your library, create new groups for specific content. There is no limit to the number of groups that you can create in your library. You can also edit or delete groups at any time.
To add content to an existing group or create a new group:
-
Go to Library Home and click
 Multi-select.
 To exit Multi-select mode, click Done at the bottom right of the screen.
-
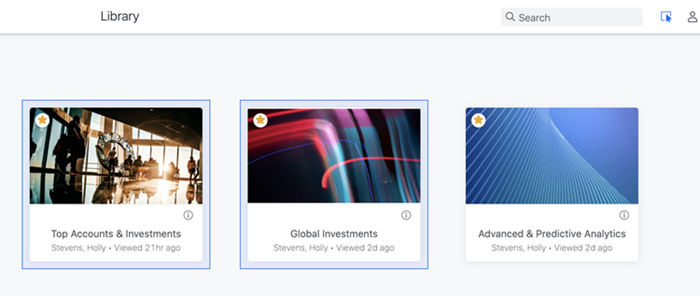
Continue to select the content for the custom group.
The content you select are highlighted in blue.
-
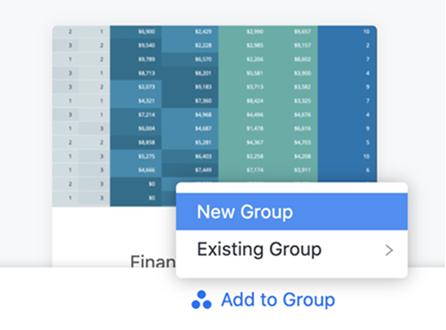
Go to Add to Group at the bottom of the screen.
-
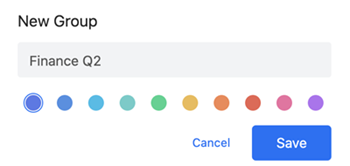
Add content to an existing group or create a new group.
For a new group, create a group name and select a group color.
-
The group is automatically saved. To view groups, click on the Library icon from the Home page. The left sidebar menu appears, showing all existing or newly created groups.
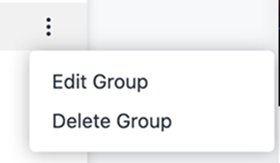
To Edit or Delete groups, click Options
 . You can change the name of the group or color associated with the group.
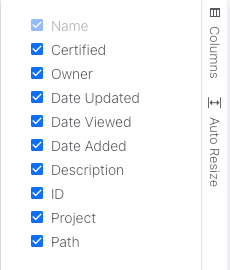
In each row you can see the following:
-
The name of the item
-
The certified status
-
When the item was last updated
-
The author
-
A description
You can re-sort, resize, and reorder this information using the columns and column headers.

Click Columns to open the Column side panel to enable and disable information.
Click Auto Resize to automatically expand the width of all columns to fit your screen.
The icons on the item vary depending on the status, certification level, and recent interaction.
![]()
![]()
New item
![]()
Updated item

Certified
![]()
Dashboard Template
![]()
Collaboration
Shortcuts
In the list view, you can right-click a row or hover over the row to see shortcuts.
|
|
Favorite |
Add to your Favorites section. |

|
Share |
Share with other users via link or invitation. |

|
Subscribe |
Create and manage subscriptions. |

|
Export to Excel |
Export to Excel. |
|
|
Export to CSV | Export the dashboard to a comma-separated value (CSV) file, beginning in Strategy One (May 2025). |

|
Export to PDF |
Export to a PDF. |

|
Download |
Download the dashboard as an .mstr file. |

|
Reset |
Reset a dashboard to its original state or re-prompt a dashboard. |

|
Remove |
Remove the object from your library. |

|
Edit |
Edit the object. When you edit a document, Strategy Web opens in a separate browser tab. |

|
Author |
The author of the object. |

|
Updates |
When the object was last modified or viewed. |
|
|
Collaboration |
View comments and discussions on the object. |
|
|
Additional Information | View more details, such as the time the object was certified and last viewed, its object ID, and related content. Many of the shortcuts listed above are also available. |
Favorites
From the Library Home page, you can easily add content to your Favorites to easily access your most-used objects.
-
To add content to the Favorites section, do one of the following:
-
Right-click the row and click Favorite
 , or hover over the row and click Favorite
 . The star icon appears yellow and the content can be found in the top section of Library Home and in the Favorites tab (if the application displays a Favorites tab).
-
-
To un-favorite content, click Favorite
 again. The content is then removed from the Favorites section and tab.
 -
You can also favorite and un-favorite content from the Additional Information section and, when the object is open, the toolbar beginning in Strategy One (July 2025).
Grouping
To organize your library, create new groups for specific content. There is no limit to the number of groups that you can create in your library. You can also edit or delete groups at any time.
To add content to an existing group or create a new group:
-
Go to Library Home and select the check boxes next to the content that you want to include.
The content you select highlights in blue.

-
Right-click a selected dashboard or document and click New Group or Move to Group and choose a group. You can also access these options when you click More
 at the end of the row.
For a new group, create a group name and select a group color.

-
The group is automatically saved. To view groups, click on the Library icon from the Home page. The left sidebar menu appears, showing all existing or newly created groups.
To Edit or Delete groups, click Options
 . You can change the name of the group or color associated with the group.
Open and Edit a Dashboard Without Loading the Data
You can open and edit an existing dashboard without its underlying data in pause mode. This allows you to see dashboard images, text boxes, and visualization containers without loading any data.
-
From Library Home, right-click on the dashboard to open and click Edit without Data.
-
Edit the dashboard as needed.
-
From the top toolbar, click Resume Data Retrieval
 load the dashboard's data.
Related Content
You can view recommended content under Related Content and manage what is seen via the Library Administration Control Panel.
