Strategy One
Integrate Strategy with Microsoft Entra ID (Formerly Azure AD) Single Sign-On
Starting in MicroStrategy ONE (September 2024), you can use Redshift Native JDBC drivers to implement OIDC Single Sign-On with Microsoft Entra ID.
Integrate Redshift Native IdP Federation with Microsoft Entra ID
-
Follow Set Up Your Azure Application in Integrate Amazon Redshift Native Idp Federation with Microsoft Azure AD Using a SQL Client to set up your OAuth App and Client App Azure Applications.
-
Follow Collect Azure AD Information in Integrate Amazon Redshift Native Idp Federation with Microsoft Azure AD Using a SQL Client to save information for your later configuration.
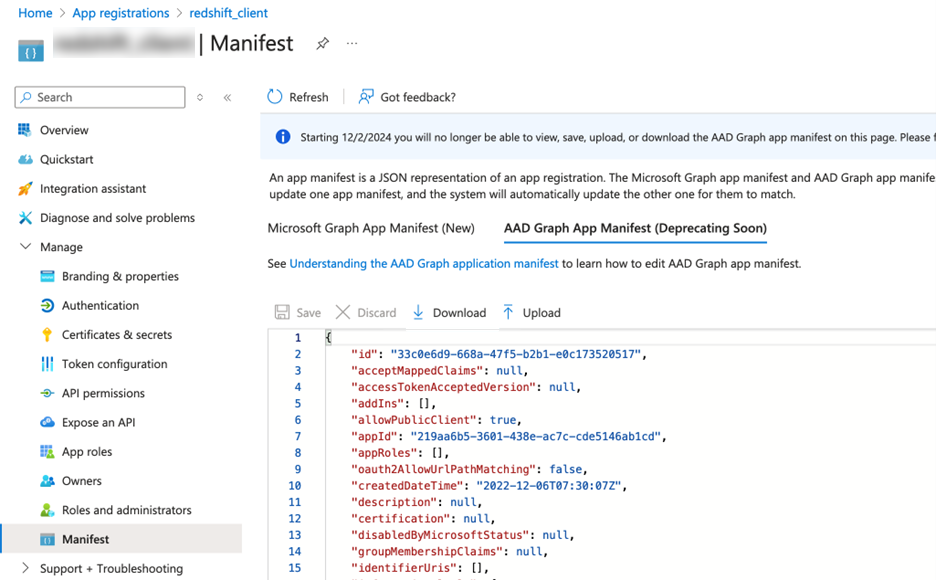
When you check the Manifest section, switch to AAD Graph App Manifest to find the access token version.
Client_id and client_secret are from the Client App you created in step 1 and Audience is from the OAuth App you created in step 1.
-
Configure IdP on Amazon Redshift:
-
Log in to Amazon Redshift with superuser credentials using query editor v2 or any SQL client.
-
Create an Identity Provider in Redshift using the following SQL template:
CopyCREATE IDENTITY PROVIDER <idp_name> TYPE azure
NAMESPACE '<namespace_name>'
PARAMETERS '{
"issuer":"<Microsoft_Azure_issuer_value>",
"audience":["<Microsoft_Azure_token_audience_value>"],
"client_id":"<Microsoft_Azure_clientid_value>",
"client_secret":"<Microsoft_Azure_client_secret_value>"
}';For example, the following code uses a v1.0 access token:
CopyCREATE IDENTITY PROVIDER test_idp TYPE
azure NAMESPACE 'oauth_aad'
PARAMETERS '{
"issuer":https://sts.windows.net/87f4aa26-78b7-410e-bf29-57b39929ef9a/,
"audience":["api://991abc78-78ab-4ad8-a123-zf123ab03612p"],
"client_id":"123ab555-a321-666d-7890-11a123a44890",
"client_secret":"KiG7Q~FEDnE.VsWS1IIl7LV1R2BtA4qVv2ixB"
}';The following code uses a v2.0 access token:
CopyCREATE IDENTITY PROVIDER test_idp TYPE
azure NAMESPACE 'oauth_aad'
PARAMETERS '{
"issuer":
https://login.microsoftonline.com/87f4aa26-78b7-410e-bf29-57b39929ef9a/v2.0,
"audience":["991abc78-78ab-4ad8-a123-zf123ab03612p"],
"client_id":"123ab555-a321-666d-7890-11a123a44890",
"client_secret":"KiG7Q~FEDnE.VsWS1IIl7LV1R2BtA4qVv2ixB"
}'; -
Follow Set up Amazon Redshift Permissions to External Identities in Integrate Amazon Redshift Native Idp Federation with Microsoft Azure AD Using a SQL Client to grant user permissions.
-
Strategy Configuration
Create a Data Source Using OIDC Single Sign-On Authentication Mode
-
Open the Workstation window.
-
Connect to an environment.
-
In the Navigation pane, click
 ,next to Data Sources.
 -
Search and choose Amazon Redshift from the data source list.
-
In the Default Database Connection drop-down list , click Add New Database Connection.
-
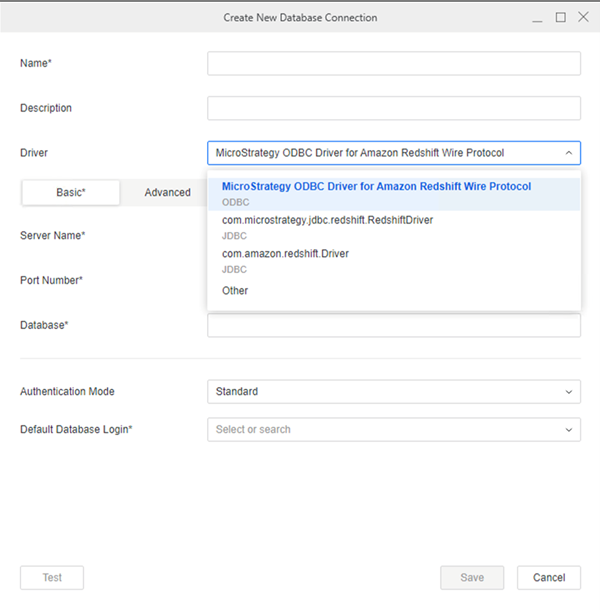
Type a Name.
-
In the Driver drop-down list, choose the Redshift Native JDBC driver (com.amazon.redshift.Driver).
-
Type a Server Name, Port Number, and Database.
-
In the Authentication Mode drop-down in the Basic tab, choose OIDC Single Sign-On.
-
In the Authentication Service drop-down list, choose an authentication service or click Add New Authentication Service.
For more information, see Manage OAuth Enterprise Security with Identity and Access Management (IAM) Objects.
-
In Scope, enter your scope using the following template:
openid <API scope noted in step 1 ofIntegrate Redshift Native IdP Federation with Microsoft Entra ID>. -
Click Save.
-
In the Add Data Source dialog, enter a Name and optionally choose Projects for further data manipulation.
-
Click Save.
Create and Map Users to Entra ID
-
Open the Workstation window.
-
Connect to an environment.
-
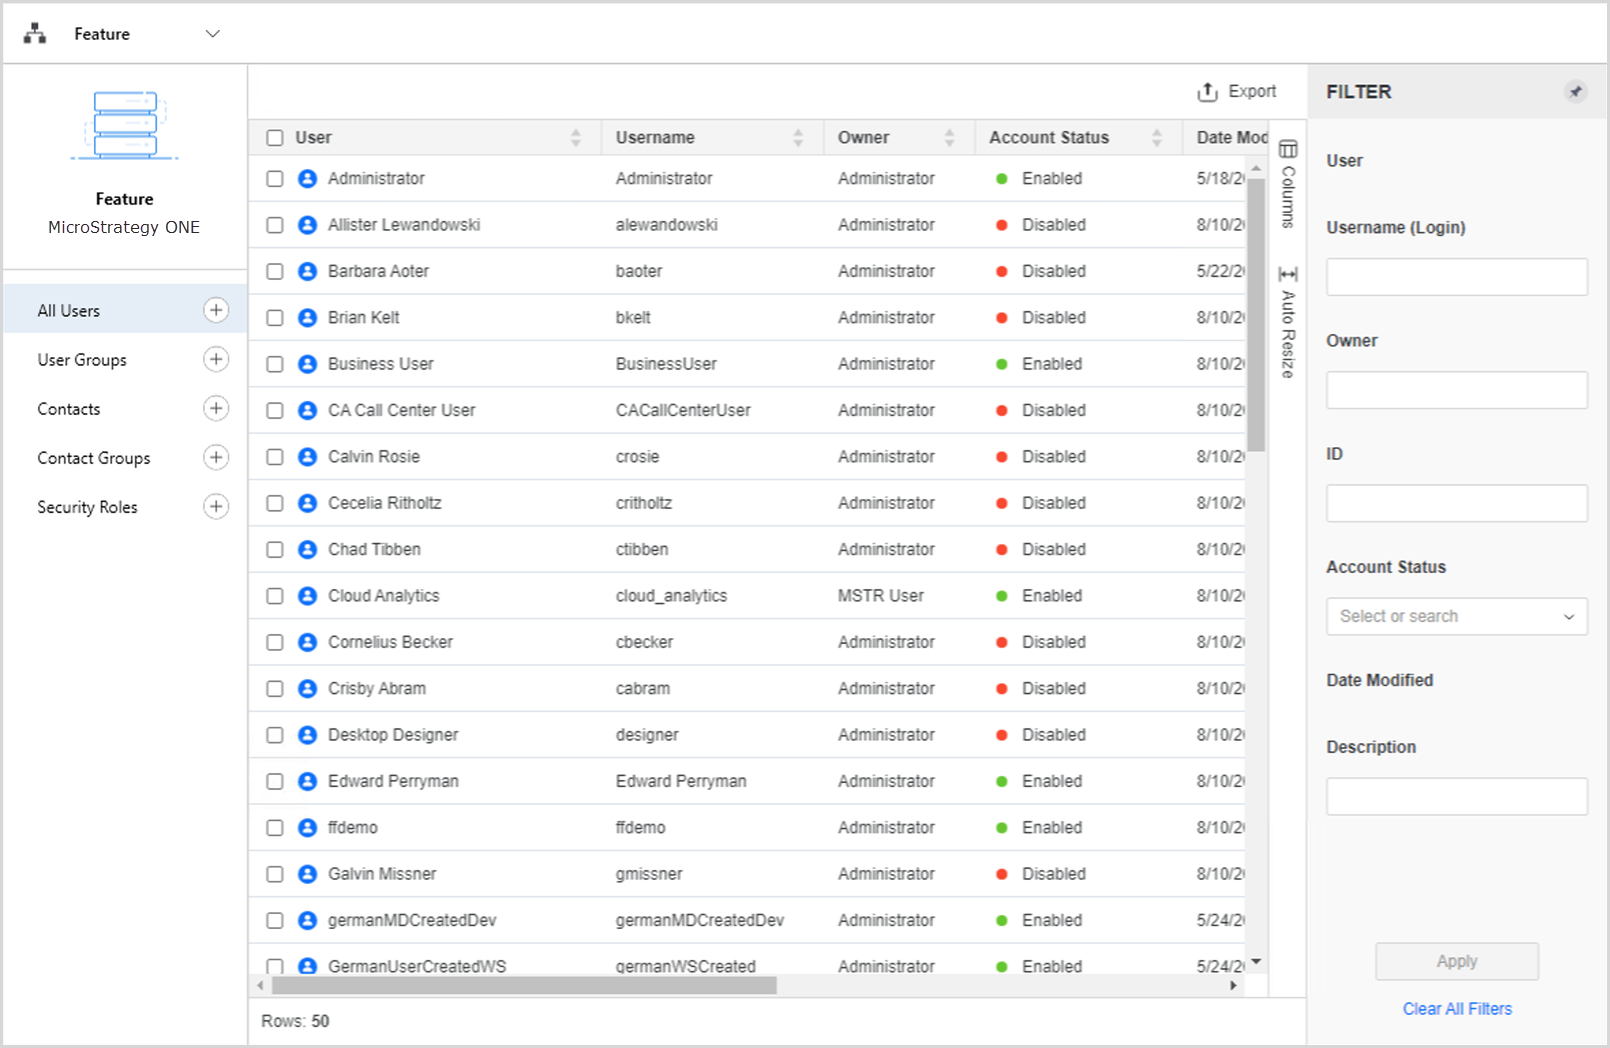
In the Navigation pane, click Users and Groups.
-
Click
 next to All Users.
-
Type a Full Name, Email Address, Username, and other optional fields.
-
In the left pane, click Privileges and select the checkbox next to the following privileges:
-
Access data from Databases, Google BigQuery, Big Data, OLAP, BI tools
-
Create and edit database instances and connections
-
Create and edit database logins
-
Create configuration objects
-
Create dataset in Workstation
-
Configure project data source
-
Monitor Database Connections
-
Use Workstation
-
-
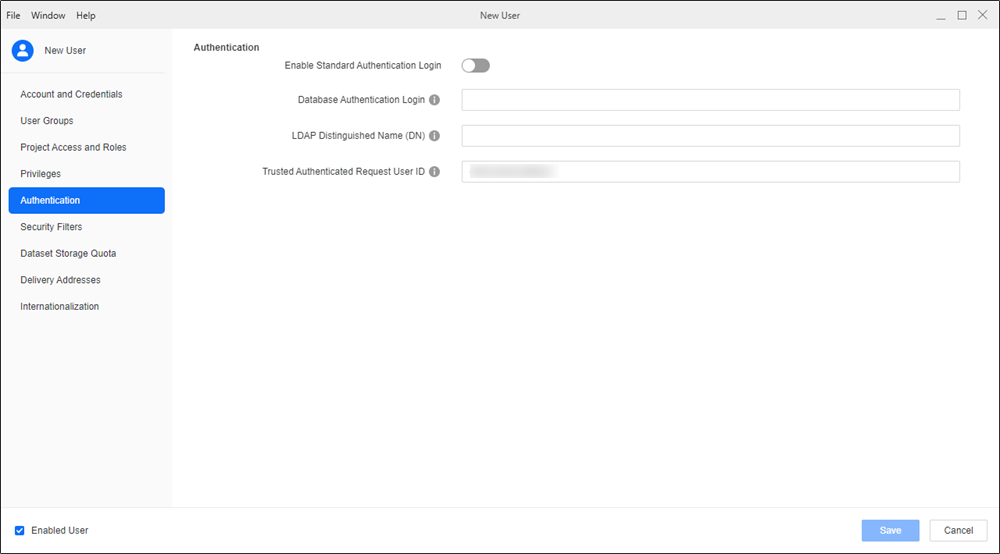
In the left pane, click Authentication.
-
In Trusted Authentication Request User ID, type the Microsoft Entra ID user's email address.
-
Click Save.
Configure OIDC
For more information, see Enable OIDC Authentication for MicroStrategy Library.
-
Open Workstation and connect to your environment using standard authentication and administrator credentials.
-
Right-click the connect environment and choose Configure OIDC under Configure Enterprise Security.
-
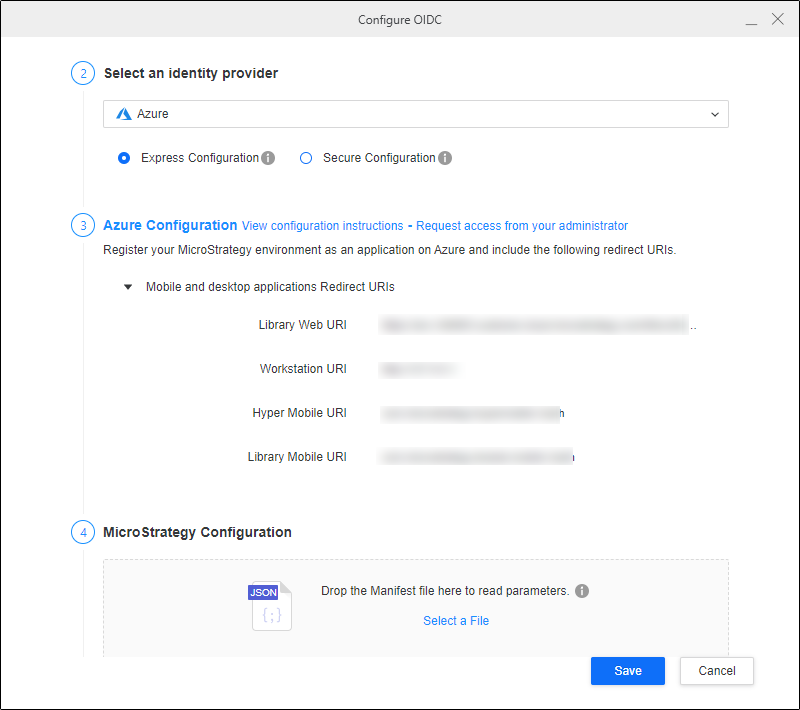
In step 2, choose Azure from the drop-down list.
-
Copy the Strategy Library URI and Workstation URI into the mobile and desktop application's sign-in redirect URIs in the Client App you created in Entra ID above.
-
In the Microsoft Entra ID left pane, click Manifest under Manage.
-
Click the AAD Graph App Manifest tab and click Download.
-
In Strategy Workstation, upload the manifest file in Strategy Configuration.
-
Click Save.
-
Restart the web server.
Single Sign-On with OIDC
-
Open the Workstation window.
-
Connect to an environment.
-
Right-click the environment and choose Environment under Edit.
-
Select Default OIDC and click Continue.
-
A browser displays. Log in using your Microsoft Entra ID credentials.
-
Use a Strategy Administrator account to assign privileges to the new user.
You do not need to perform this step if you mapped a Strategy user to an Entra ID account and granted privileges.
-
In the Navigation pane, click
 ,next to Datasets.
 -
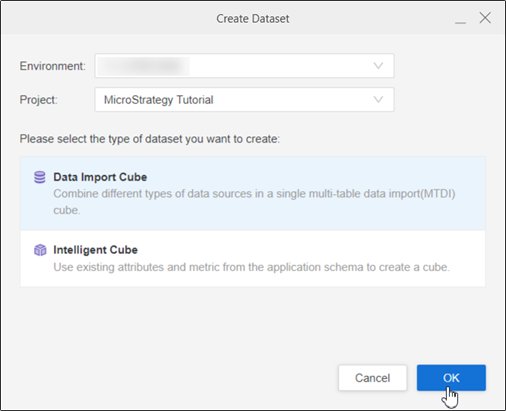
Choose a Project and select Data Import Cube.
-
Click OK.
-
Choose the data source you created.
The namespaces and tables display.
