Strategy One
Enable OIDC Authentication with AWS Databricks Using Databricks Identity Provider
Starting in MicroStrategy ONE Update 11, integrating Strategy with AWS for sign-sign on (SSO) with OpenID Connect (OIDC) authentication is supported.
Learn to configure Databricks OIDC authentication with AWS using Databricks Identity Provider (IDP):
- Prerequisites
- Configure an Application in Databricks Internal Identity Provider
- Configure Strategy for AWS Databricks OIDC Authentication
- Test the OIDC Connection
- Limitations
Prerequisites
You must have the E2 version of the Databricks platform for your Databricks on AWS account.
Add a User in Account Console and Workspace
- Log in as an Administrator to https://accounts.cloud.databricks.com/.
- In the navigation menu, click User management.
- Click Add user.
- Enter the user email address and click Save.
- Log in to the workspace using your Administrator credentials. The URL is similar to
https://<deploymentName>.cloud.databricks.com. - Click your username and select Admin Settings from the drop-down.
- Click Add user.
- Enter the user email address.
- Click Invite, then Give user access.
Set Up SSO for Your Databricks Account Console and Workspace
Configure Account Console
Configure Databricks Workspace
If your account was created after June 21, 2023, unified log in is enabled on your account and no further action for this perquisite is needed.
If your account was created before June 21, 2023, unified log in is not enabled on your account. The single-sign-on (SSO) for your account and for each workspace is managed separately. You must configure SSO to the same identity provider at the account level and on your workspaces. For more information, see https://docs.databricks.com/administration-guide/users-groups/single-sign-on/index.html#workspace-sso-application-examples.
To configure SSO for Entra ID or Okta, see the following links:
- https://docs.databricks.com/administration-guide/users-groups/single-sign-on/azure-ad.html
- https://docs.databricks.com/administration-guide/users-groups/single-sign-on/okta.html
Configure an Application in Databricks Internal Identity Provider
Authenticate to the Account API
- Create a
.netrcfile withmachine,login, andpasswordproperties: - Enter
-nin your curl command to invoke the.netrcfile.
echo machine accounts.cloud.databricks.com login <username> password <password> >> ~/.netrcReplace <username> and <password> with the account administrator's email address and password.
If you have a $ in your password, enter \ before the $.
Enroll Your Databricks Account into OAuth
- Run the following command to invoke the .netrc file enroll your Databricks account:
- Run the following command to verify that you Databricks account is enrolled in OAuth:
curl -n -X POST https://accounts.cloud.databricks.com/api/2.0/accounts/<accountId>/oauth2/enrollmentReplace <accountId> with your account ID.
curl -n -X GET https://accounts.cloud.databricks.com/api/2.0/accounts/<accountId>/oauth2/enrollmentReplace <accountId> with your account ID.
Create an Application in Databricks Internal Identity Provider
You can create a native or web application to connect to databricks using OAuth. If you are using Workstation to use the OAuth connection, you should create a native application. If you are using Web to use the OAuth connection, you should create a web application.
Create a Native Application
- Run the following command to create a native application:
-
Open the Workstation window.
- In the Navigation pane, click
 , next to Enterprise Security.
 - Choose an environment.
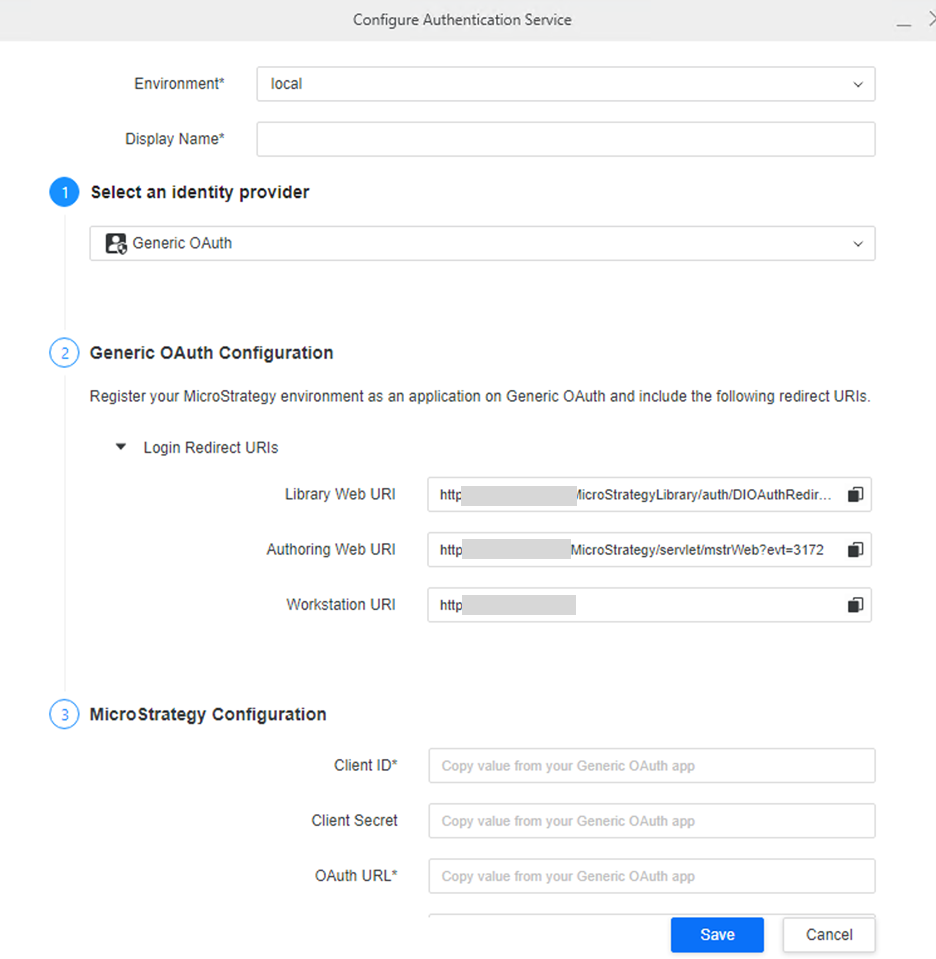
- From the identity provider drop-down, select Generic OAuth.
- Once you run the command, a client ID is generated and an output similar to the following is returned:
-
Note the client ID and client secret as these will be used to configure authentication service.
curl -n -X POST -d '{"redirect_urls": [ "<Workstation URI>", "<Library Web URI>", "<Authoring Web URI>", "<Redirect URI 4>"], "confidential": false, "name": "<CustomNativeAppName>"}' https://accounts.cloud.databricks.com/api/2.0/accounts/<accountId>/oauth2/custom-app-integrationsReplace <CustomNativeAppName> with your application name and <accountId> with your account ID.
Replace the URI names with the URIs that can be found in Strategy Workstation when you configure an authentication service:
{"integration_id":" <Integration ID>","client_id":" <Client ID>","client_secret":""}Create a Web Application
-
Run the following command to create a web application and generate a client ID and client secret:
-
Open the Workstation window.
- In the Navigation pane, click , next to Enterprise Security.
- Choose an environment.
- From the identity provider drop-down, select Generic OAuth.
-
Note the client ID and client secret as these will be used to configure authentication service.
curl -n -X POST -d '{"redirect_urls": [ "<Authoring Web URI>", "<Other Redirect URI>"], "confidential": true, "name": "<CustomWebAppName>"}' https://accounts.cloud.databricks.com/api/2.0/accounts/<accountId>/oauth2/custom-app-integrationsReplace <CustomNativeAppName> with your application name and <accountId> with your account ID.
Replace the URI names with the URIs that can be found in Strategy Workstation when you configure an authentication service:
API for Integration Application
Use the following links and commands to list, delete, and update your application:
-
To list your applications, see
https://accounts.cloud.databricks.com/api/2.0/accounts/<accountId>/oauth2/custom-app-integrations. Replace<acountId>with your ID. -
To delete an application, run the following command:
-
To update an application, run the following command:
-
Open the Workstation window.
- In the Navigation pane, click , next to Enterprise Security.
- Choose an environment.
- From the identity provider drop-down, select Generic OAuth.
curl -n -X DELETE https://accounts.cloud.databricks.com/api/2.0/accounts/<Account ID>/oauth2/custom-app-integrations/<Integration ID>Replace <Account ID> and <Integration ID> with your account and integrations IDs.
curl -n -X PATCH -d '{ "redirect_urls" : "<Redirect_URL1>", "<Redirect_URL1>", "<Redirect_URL13>"], "confidential" : false, "name" : "<app-name>" }' https://accounts.cloud.databricks.com/api/2.0/accounts/<accountId>/oauth2/custom-app-integrations/<application-integration-id>Replace <app-name> with your application name and <accountId> and <application-integration-id> with your account and application integration IDs.
Replace the URL names with the URIs that can be found in Strategy Workstation when you configure an authentication service:
For more information, see https://docs.databricks.com/api/account/customappintegration.
Configure Strategy for AWS Databricks OIDC Authentication
Create and Map a Strategy User to a Custom IDP User in Workstation
- Open the Workstation window.
- In the Navigation pane, click Environments.
- Log in to your environment with administrator privileges.
- In the Navigation pane, click Users and Groups.
- Click next to All Users.
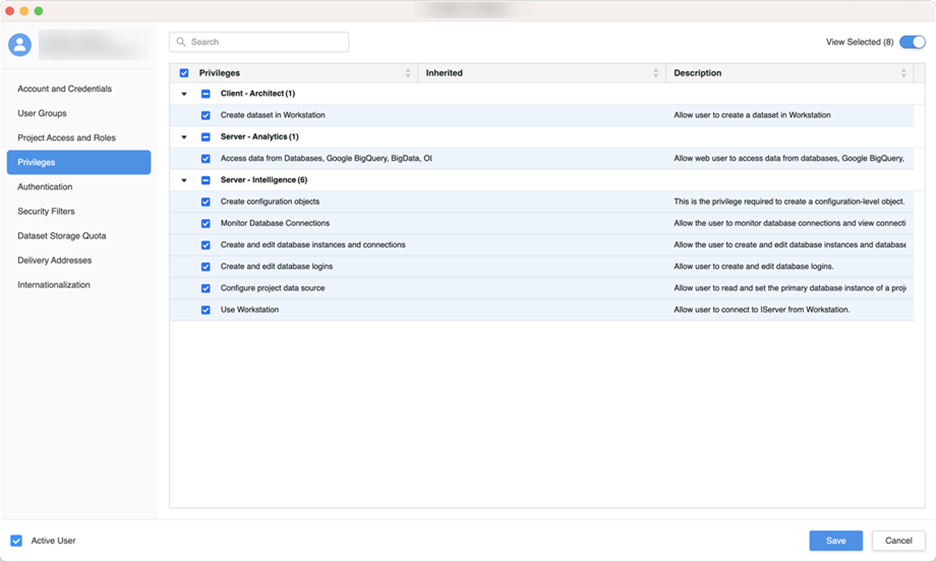
- In the left pane, click Privileges and add the following privileges:
- Access data from Databases, Google BigQuery, BigData, OLAP, BI tools
- Create and edit database instances and connections
- Create and edit database logins
- Create configuration objects
- Create dataset in Workstation
- Configure project data source
- Monitor Database Connections
- Use Workstation
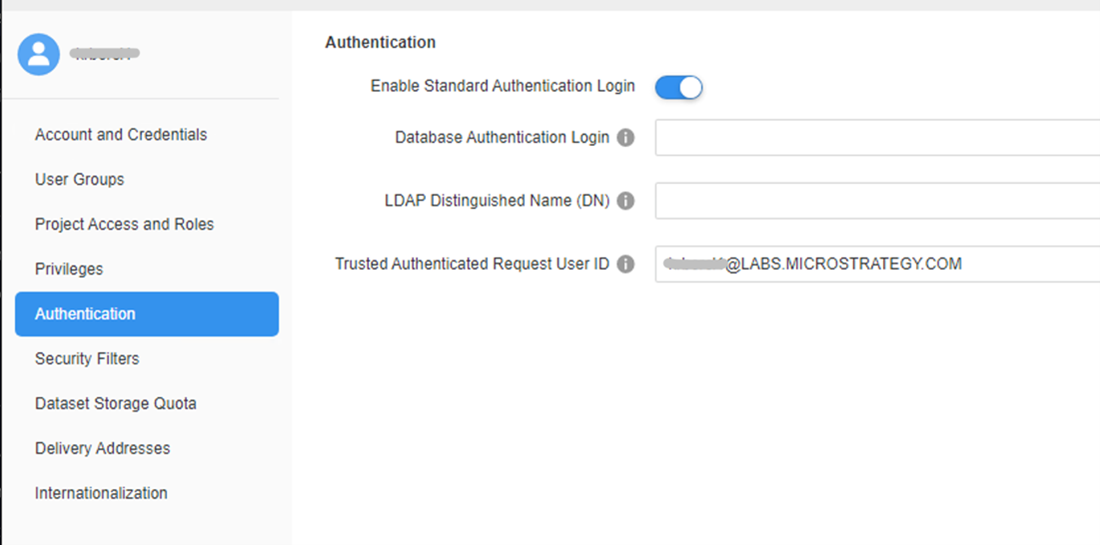
- In the left pane, click Authentication.
- Enter a user's email address in Trusted Authenticated Requires User ID.
- Click Save.
Configure Strategy Library in Workstation
- Open the Workstation window.
- Connect to your Library environment using standard authentication. You must have administrator privileges.
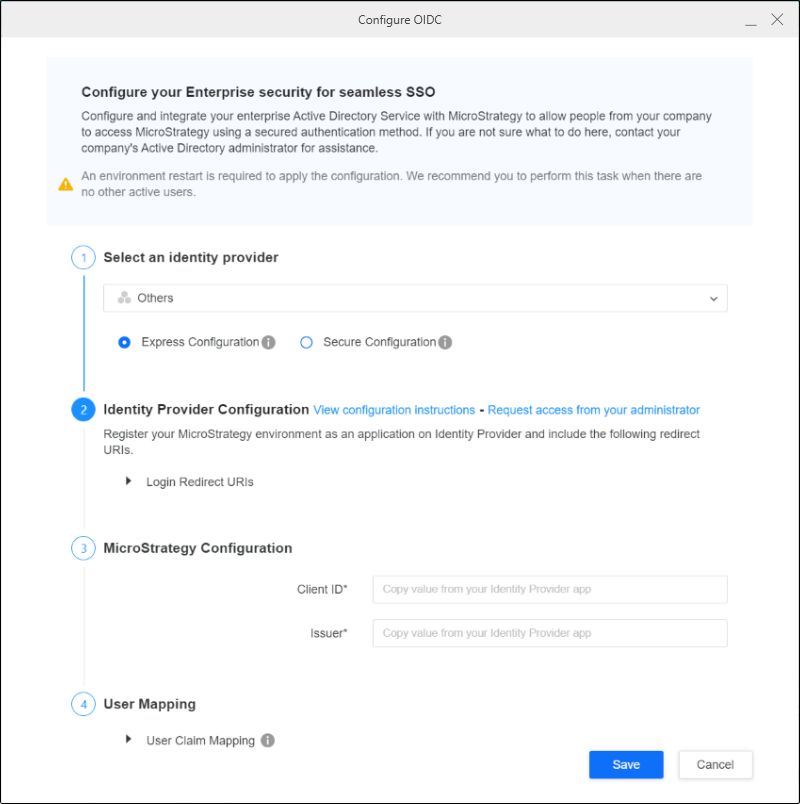
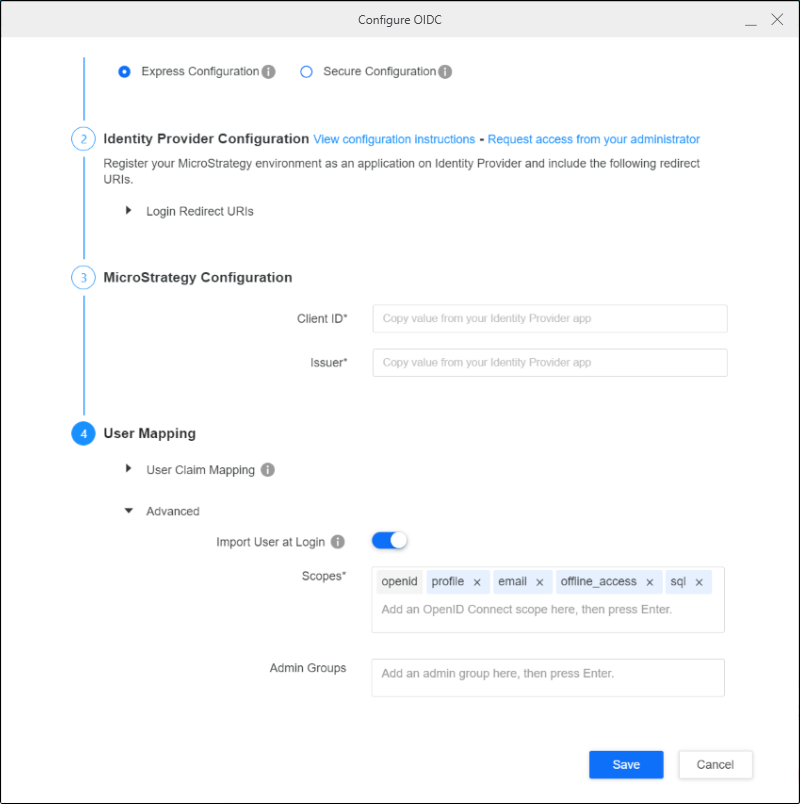
- Right-click your connected environment and click Configure Enterprise Security > Configure OIDC.
- From the identity provider drop-down, select Others.
- Copy the Mobile and desktop applications Redirect URIs and add them to the native application URIs using the API for Integration App.
- In Strategy Configuration, enter your Client ID and Issuer. Issuer is similar to
https://<accountId>.cloud.databricks.com/oidc. - Expand the Advanced drop down in User Mapping.
- Insert the following scopes in Scopes:
- openid
- profile
- offline_access
- sql
- Click Save.
- Restart the web server.
For more information on enabling OIDC authentication, see Enable Single Sign-On with OIDC Authentication.
Test the OIDC Connection
- Open the Workstation window.
-
Check that the environment is using the Default OIDC authentication mode.
- Log in to your Strategy environment.
- In the Navigation pane, click Environments.
- Right-click the environment you are using and click Edit Environment Information.
- Verify that Default OIDC is selected in Authentication Mode.
- In the Databricks IDP log in page, click Single Sign On and sign in.
- In the Strategy Navigation pane, click next to Datasets.
- Click Data Import Cube, then click OK.
- Select the Databricks gateway.
- Select the data source that you created.
- The namespaces and tables display.
Limitations
The OIDC workflow functions correctly in Strategy Workstation. However, note that seamless operation may not be guaranteed in Strategy Library and Web environments due to Databrick's lack of support for nonce validation. Databricks is actively working to resolve this issue and Strategy is closely monitoring their progress. Strategy will communicate any updates or improvements that may address this limitation.