Strategy ONE
Create a Collection View Widget
Sample name: MicroStrategyMobileCollectionViewWidget
Display:

Location: Sample Xcode project available for download here: MicroStrategyMobileCollectionViewWidget
Functionality showcased: This sample illustrates how you can create a collection view mobile widget to display data in a document on an iOS mobile device. It showcases how to create a custom flow layout. Refer to the Apple documentation for more information on the iOS Collection View class used in this sample.
Using the sample: The following instructions help you deploy this sample to your mobile device or simulator. They also provide a detailed explanation of how to create a sample document that uses the collection view widget.
- Install the Collection View Widget web plug-in:
- Download the Collection View Widget web plug-in.
- Extract the contents of the plug-in.
Copy the extracted plug-in folder to the plugins folder of your MicroStrategy Web installation directory.
The plug-in folder is called Collection ViewWidget. It is in a zip file called CollectionViewWidgetPlugin.zip. Make sure that you copy the Collection ViewWidget folder to the plugins folder, and not the zip file.
- Restart your web server.
- Create a document that uses the collection view widget:
- Open MicroStrategy Web or Desktop and create a new document.
- Add a dataset that has an attribute hierarchy and use it to create two grids in the document. In these sample instructions, we use a dataset with Category, Subcategory, Item and two metrics, Cost and Profit.
- Drag the dataset to the document to add the main grid. In these sample instructions, we leave all of the attributes and metrics in the main grid.
- Drag the dataset to the document again to add a second grid. This grid will act as a secondary data provider. In these sample instructions, we remove all of the attributes, except the Subcategory attribute,and both of the metrics from this grid.
- Create a derived metric called Item-Count and add it to the second grid. To do this, right-click Item in the dataset panel and choose Create Metric -> Count. Drag the new derived metric Count (Item) to the second grid.
- Assign the collection view widget to the main grid and configure the size of the widget.
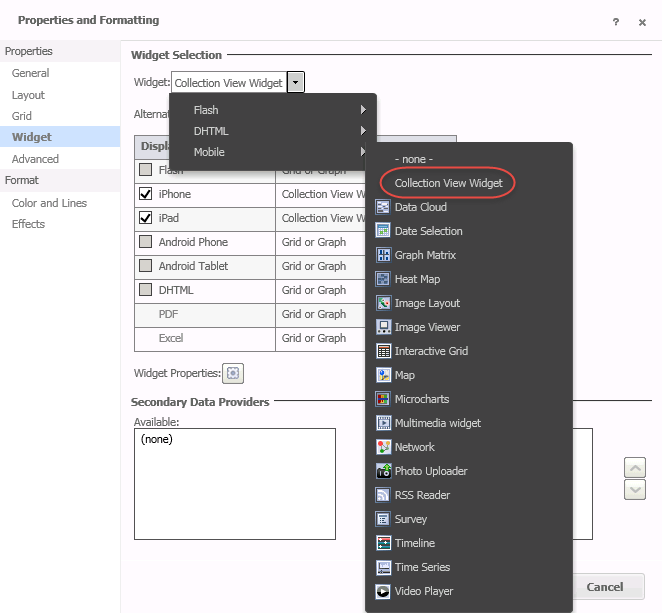
- Right-click the main grid and choose Properties and Formatting.
On the Properties and Formatting page, choose Widget in the left pane. In the right pane, from the Widget drop-down, choose Mobile -> Collection View Widget.
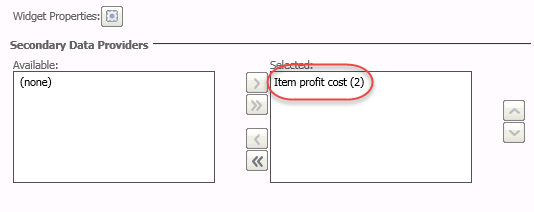
Under Secondary Data Providers, move the secondary data grid that you added in an earlier step from Available to Selected.
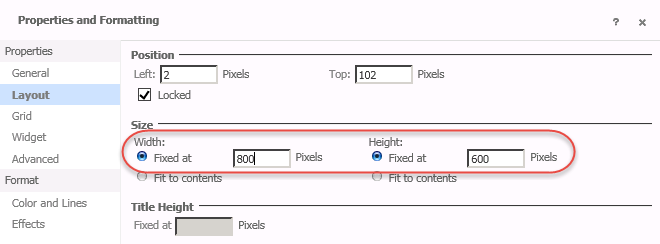
Choose Layout in the left pane and set the size in the right pane. For these sample instructions, set the width to Fixed at 800 pixels and the height to Fixed at 600 pixels.
- Click Apply and OK.
- Configure the document header.
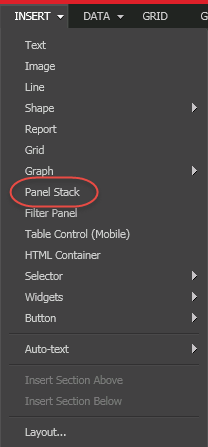
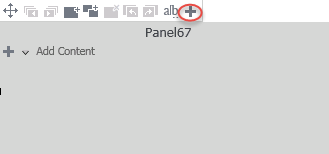
Create a panel stack for the header. Choose Insert -> Panel Stack and use the cursor to add the panel to the document.
- Add the content you want to display in the header.
Add the text you want to display in the header (+ -> Text).
To access values from the grid, you use the same syntax as with documents viewed in Web, except that you use # # instead of { }. For example,#Region@DESC# or #[Call Center]@DESC#. In these sample instructions, we use:
The category is #Category@DESC# and subcategory is #Subcategory@DESC#.

- If you want to use images, you can insert an image in the panel stack and configure it with the same syntax.
- Configure the appearance of the header panel stack.
- Right-click the panel stack and choose Properties and Formatting.
On the General tab, give the panel stack a name and uncheck the Visible checkbox so that it is not selected. In these sample instructions, we name the panel stack HeaderPS.

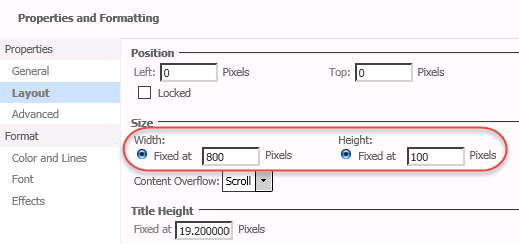
On the Layout tab, under Size, set the width to Fixed at 800 pixels and the height to Fixed at 100 pixels.
- On the Format tabs, configure the panel stack so that it looks the way you want the header to look. You can set the color for the text and the background, choose the font, and add special effects. You can use shapes, such as lines and arrows, to design your header.
- Click Apply and OK.
- Configure the grid cells
- Create a panel stack for the grid cells. Choose Insert -> Panel Stack and add it to the document.
- Add the content you want to display in the cells.
Add the text you want to display in the cells (+ -> Text). To access values from the grid, you use the same syntax as with documents viewed in Web, except that you use # # instead of { }. In these sample instructions, we use three separate text boxes:
Category: #Category@DESC#
Subcategory: #Subcategory@DESC#
Item: #Item@DESC#
- If you want to use images, you can insert an image in the panel stack and configure it with the same syntax.
- Configure the appearance of the cell panel stack.
- Right-click the panel stack and choose Properties and Formatting.
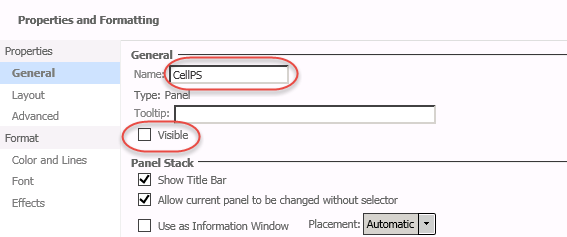
On the General tab, give the panel stack a name and uncheck the Visible checkbox so that it is not selected. In these sample instructions, we name the panel stack CellPS.
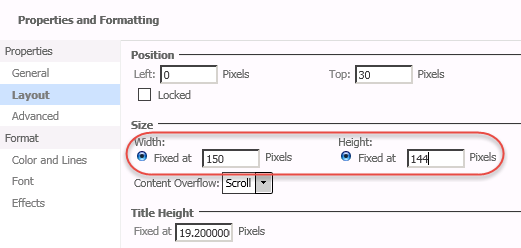
On the Layout tab, under Size, set the width to Fixed at 150 pixels and the height to Fixed at 144 pixels.
- On the Format tabs, configure the panel stack so that it looks the way you want the cells to look. You can set the color for the text and the background, choose the font, and add special effects. You can use shapes, such as lines and arrows, to design your cells.
- Click Apply and OK.
- Configure the widget properties.
- Select the main grid, right-click it, and choose Properties and Formatting.
- On the Properties and Formatting page, choose Widget in the left pane and click the Widget Properties icon in the right pane.
On the Collection View Widget Properties page:
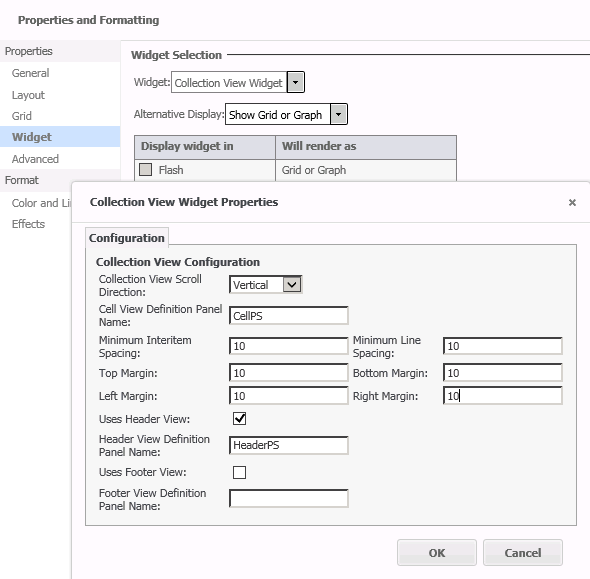
- Set the Collection View Scroll Direction to Vertical.
- Set the Cell View Definition Panel Name to CellPS.
- Set all six Spacing and Margin values to 10.
- Set the HeaderView Definition Panel Name to HeaderPS.
- Uncheck Uses Footer View.
- Click OK.
- Click Apply and OK.
- Save the document.
-
Install the Mobile SDK on your development machine.
-
On a Mac® computer, go to the MicroStrategy Download site and download the iOS Client file for the latest MicroStrategy Mobile iOS SDK.
The latest MicroStrategy Mobile SDK may or may not be the same version as the version of Intelligence Server you are using.
- Double-click the downloaded MicroStrategy Mobile SDK.dmg file.
- Click Agree to accept the terms of the license agreement. This opens the disk image.
- Create a MicroStrategyMobile folder on your local drive and copy all the Mobile SDK folders to it.
- Eject the disk image.
-
- Build and deploy the sample.
-
Open the MicroStrategyMobile folder.
-
Double-click MicroStrategyMobile.xcodeproj to launch the project in Xcode®.
-
Make sure that the appropriate scheme (MicroStrategyMobileIPhone or MicroStrategyMobileIPad for iPhone and iPad respectively) is selected.
-
In the OSX Finder, navigate to the MicroStrategyMobileCollectionViewWidget directory.
- Select and drag all the .h and .m files from the Custom folder in Finder and drop them into the Custom folder of the MicroStrategy Mobile Xcode project you have open.
- When you are prompted, select the target(s) for the desired platforms.
- Open the MicroStrategyMobileCollectionViewWidget Xcode project. Drag the vis.plist file from Custom/finalBundle.bundle/Contents/Resources and drop it in the MicroStrategyMobile Xcode project.
-
Click the Run button to compile and deploy the application to a simulator. Confirm that it compiles and deploys successfully.
To upload the application to a device, set the destination in the scheme to the mobile device and then build and run. For other requirements on deploying to a device, refer to documentation from Apple. You can access useful links to the Apple documentation from the Distributing iPhone or iPad Applications topic.
- Use the sample.
- In the simulator or device, open MicroStrategy Mobile and navigate to the document you created.
Double-click the document to view the Collection View widget.