Strategy One
Configure Notification Emails When Sharing Content in Library
Starting in Strategy One (March 2025), you can customize the notification email that users receive when an alert subscription is created in Library.
Starting in MicroStrategy ONE (December 2024), you can customize the notification email that users receive when a subscription is created in Library. You can also select the color of the text, the content area background, and the email background for all emails.
Starting in MicroStrategy 2021 Update 8, the Application editor allows administrators to customize the notification email that users receive when content is shared in Library or when they are sent a message via collaboration. Use this feature to provide a white-labeled experience for different organizations or groups of users, including when you embed Library in your own application.
Configure the Email and Specify the Sender
-
Open the Workstation window.
-
In the Navigation pane, click Applications.
-
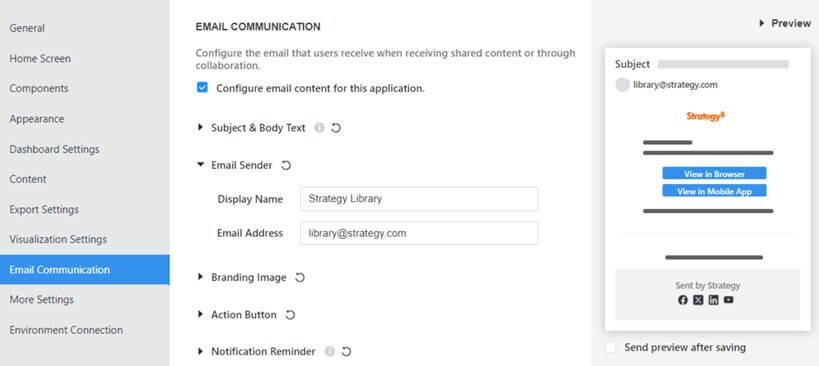
In the left pane, click Email Communication.
-
Select the Configure email content for this application check box.
-
Expand the Email Sender section.
-
The Display Name is automatically set to Strategy Library and the Email Sender is set to library@strategy.com, although you can change either of these. The Display Name shows along with the email address in the From area of the email.
-
To view how the email looks to the recipient, expand the Preview area.
- To customize the email content, you can:
- After you have completely customized the email content, you can continue customizing the other elements of the application, such as the appearance or components. If you click Save, the entire application is saved and you return to the main Workstation interface.
If users do not receive email communications, it is likely they are being blocked by your spam filter. To resolve this, add library.microstrategy.com to your email whitelist or change the Email Address.
Customize the Subject and Body Text
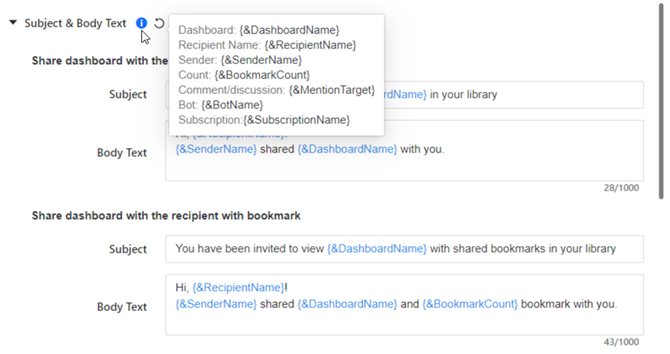
The subject and body text are automatically created for different notification types, using dynamic text to include the dashboard name, recipient name, and other information. To view a list of dynamic text, click the information icon ![]() next to Subject & Body Text.
next to Subject & Body Text.
You can edit the subject and body text for the following notifications:
-
Sharing a dashboard
-
Sharing a dashboard bookmark
-
Sharing an agent
-
Subscribing to content
-
Subscribing to alerts, beginning in Strategy One (March 2025)
-
Inviting a user to a discussion
-
Mentioning or tagging a user in a comment or discussion
-
Expand the Subject & Body Text section.
-
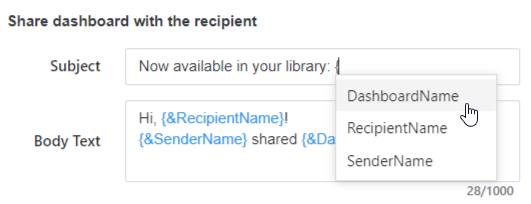
As you type text in a box, type a curly bracket { to display dynamic text in the suggestions list. Select the text to include.
-
To reset all the subject and body text to the defaults, click Reset
 next to Subject & Body Text and click Yes.
Hide or Replace the Branding Image
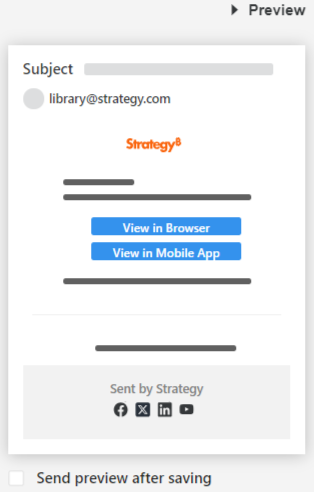
The orange Strategy logo is automatically displayed at the top of the email, as shown in the Preview below:
You can replace the logo with your own image or not display an image at all.
-
Expand the Branding Image section.
-
To change the image, type the Image URL of the new image.
-
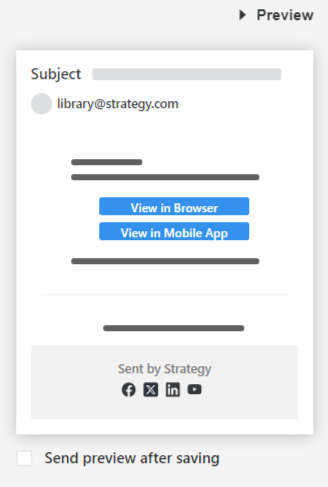
To remove the image from the email, disable Show Image. You can see in the Preview that the logo area is removed.
-
To return to the default MicroStrategy logo, click Reset
 next to Branding Image and click Yes.
Configure the Action Buttons to Open the Content
You can configure the URL of the action buttons that allow the user to open the content in a Web browser and in the Library Mobile application.
-
When you configure the button to open in a browser, users can be directed to a host Web application embedded with Strategy Library. Employ Library’s Embedding SDK to integrate Library in your application to display the content or shared bookmark.
-
When you configure the button to open in Mobile, users on a mobile email client can deep link directly to the Mobile application using a specific URL scheme or universal link.
Both buttons are enabled by default, displaying the text View in Browser and View in Mobile App on blue buttons, as shown in the Preview below.
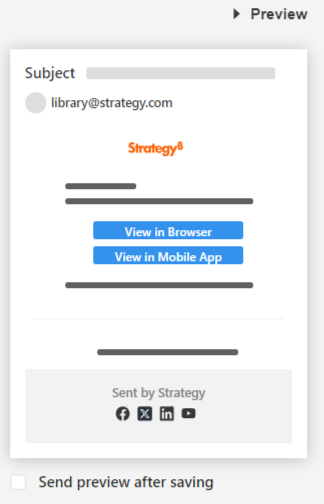
You can disable each button so that it does not display; in the Preview below, the Browser button is disabled.
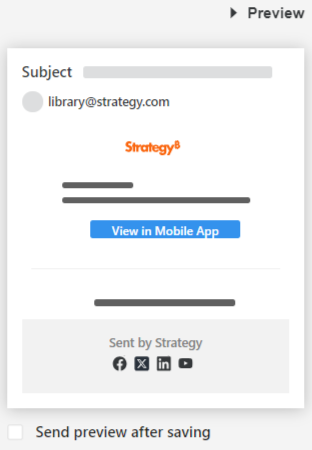
-
Expand the Action Button section.
-
In the Button 1 box, type the text to display on the button, replacing the default View in Browser.
-
Select the color of the button from the drop-down list.
-
Select the color of the font from the second drop-down list.
-
In the Host Web Portal box, type the URL of the web page you are embedding in Library.
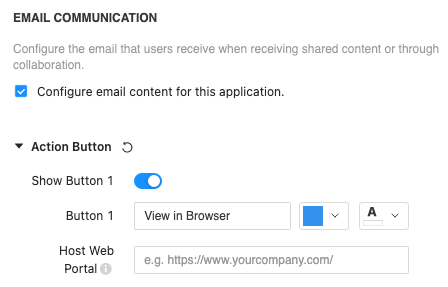
When sharing or collaborating in Library within the application, additional parameters are automatically appended to this URL so that the embedded Library opens the correct content. This URL must be added in the Library security settings. See How to handle dashboard link in email in the Embedding SDK help for more information on how to handle the link parameters when embedding Library into your own Web application.
-
To remove the web browser button completely, disable Show Button 1.
-
In the Button 2 box, type the text to display on the button, replacing the default View in Mobile App.
-
Select the color of the button from the drop-down list.
-
Select the color of the font from the second drop-down list.
-
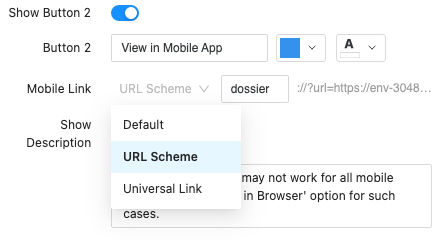
In the Mobile Link drop-down list, do one of the following:
-
To link to your Mobile application's URL, select URL Scheme and specify your own mobile application’s URL scheme.
- To use a universal link, select Universal Link. You must have configured the link in Library and via the Library Mobile SDK.
See Deep Link to Library from Other Applications on iOS to learn more about deep linking and configuring a universal link.
-
-
To remove the Mobile App button completely, disable Show Button 2.
-
You can show additional information below the buttons. You can customize the information or hide it, as described below:
-
Type the text to display in the box below Show Description.
-
To remove the description, disable Show Description.
-
-
To return to the default button settings, click Reset
 next to Action Button and click Yes.Click Save.
Configure the Action Button to Open the Content in a Web Browser
Configure the Action Button to Open the Content in the Mobile Application
Complete the Button Customization
Customize the Notification Reminder
By default, the email contains a reminder of unread notifications for the recipient, displayed above the Sent By section of the email. You can customize the content or disable the reminder.
-
Expand the Notification Reminder section.
-
Type the replacement text in the Reminder box. You can type a curly bracket { to display the dynamic text to include the number of new notifications.
-
The recipient can click the Link Text to navigate to the Notification Center in the default Library or in the configured Host Web Portal. Type replacement text in the Link Text box. Starting in MicroStrategy ONE (December 2024), you can select a color for the link text from the color palette.
-
To remove the reminder from the email, disable Show Reminder.
-
To return to the default reminder content (the text in both the Reminder and Link Text boxes), click Reset
 next to Notification Reminder and click Yes.Click Save.
Remove the Links to Update Subscription and Unsubscribe
Beginning in Strategy One (June 2025), you can determine whether links to update the subscription and unsubscribe are included in the subscription email. The update subscription link opens the subscription in Strategy Library. The unsubscribe link opens Strategy Library and automatically unsubscribes the user. These links work in the Library browser on a computer or mobile device, not in the Library Mobile app. In addition, the user must have the correct privilege to update the subscription and the subscription must allow recipients to unsubscribe.
By default, the links are enabled. To disable them, follow the steps below:
-
Expand the Subscription Management Link section.
-
Clear the Include Links to Update Subscription and Unsubscribe check box.
Customize the Sent By Information
By default, the email displays the text Sent By Strategy. You can change the name of the sender or disable the section.
-
Expand the Sent By section.
-
Type the sender name in the Sent By box. (This text displays after the words Sent By in the email.) Use the Preview to see your change.
-
To remove the Sent By section from the email, disable Show Sent By Info.
Customize the Social Media Links
You can customize the links to various social media or disable any of the social media. For example, you can include your LinkedIn channel but not a YouTube channel. By default, all social media links to Strategy's channels.
-
Expand the Social Media section.
-
For each social media listed, type the replacement channel in the box or disable it.
Customize the Email Colors
Starting in MicroStrategy ONE (December 2024), you can select the color of the text, the content area background, and the email background.
-
Expand the Color section.
-
Select the color for each piece of the email.
