MicroStrategy ONE
Visualizing trends: Microcharts widget
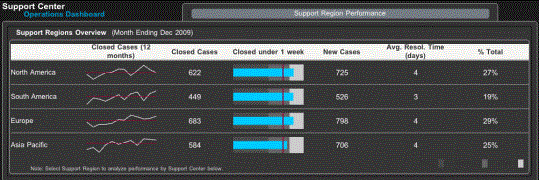
The Microcharts widget for iOS and Android devices lets users visualize trends in a metric at a quick glance. Depending on the number of metrics used in the underlying report, the Microcharts widget can display one, two, or three microcharts. For example, bar and sparkline microcharts convey trends in a metric, and bullet microcharts compare a metric's actual value to its targets. An example of a Microcharts widget is shown below:
The Microcharts widget can be used in the following modes:
-
Grid mode: This is the default setting. In this mode, all attributes except the last one from the left are grouped and displayed as rows in the widget.
-
You can display Grid mode in Tree mode, which groups the rows in the widget logically. Users can collapse and expand the rows as needed to see more detailed data.
-
If the widget is displayed on an iPhone or iPad, users can sort the widget based on a column in the widget. Users can sort the widget based on:
-
Attribute elements or metric values
-
Elements in a consolidation
-
Attribute elements or metric values with thresholds applied
-
KPI List mode: In this mode, key performance indicators (KPIs), such as Profit, Revenue, and so on, are displayed in a list. Each KPI is represented by its own row of microcharts.
If your widget contains subtotals, you can control where the subtotals are displayed when the widget is sorted. Edit the subtotals to display at the top or bottom of each group. For steps, see the Document Creation Guide.
Ticker mode and Vertical Scroll mode are not available for mobile devices.
You can also define Information Windows that display when the widget is tapped. For instructions on creating an Information Window, see Providing additional information to users: Information Windows.
Creating a Microcharts widget
Prerequisites
In a document, create a Grid/Graph that meets the following minimum requirements:
-
For a Microchart widget in Grid mode, the report must have at least two attributes in the rows. The last attribute from the left is used as the X-axis for the bar graph and sparkline microchart.
-
For a Microchart widget in KPI List mode, the report must have only one attribute in the rows.
-
At least two metrics in the columns. The first metric from the left determines the height of the bars for the bar microchart, and the peaks of the sparkline microchart. The second metric displays a horizontal reference line for both microcharts.
You can add objects from multiple datasets to the Grid/Graph containing the widget. You must have the correct privileges and the project must allow Grid/Graphs to use multiple datasets. For steps to allow Grid/Graphs to use multiple datasets, see the Adding Text and Data chapter of the Document Creation Help.
Displaying the Microcharts widget in KPI List mode
By default, if the Grid/Graph has only one attribute row, the Microcharts widget displays in KPI List mode. To configure other properties of the widget, you must run the document in Flash Mode in MicroStrategy Web, and then change the properties, as described in the steps below.
You must determine how many of the metrics to use for each KPI. For example, if you specify three metrics for each KPI, the first three metrics from the left are used for the first KPI, the next three for the second, and so on.
To display the Microcharts widget in KPI List mode
-
In MicroStrategy Web, navigate to the document where you have defined the Microcharts widget, and open it. The document should open with the Microcharts widget displayed.
-
Right-click the Microcharts widget, and select Properties. The Microcharts properties dialog box opens.
-
From the drop-down list at the top left, choose Mode. If your widget has a single attribute row, the KPI List Mode check box is enabled by default.
-
In the Metrics per KPI field, type the number of metrics to use for each KPI.
-
Click OK.
-
Click Save to save the document.
If the widget contains more than one attribute, the KPI List Mode check box is disabled.
Enabling Smooth Scroll mode
You can enable Smooth Scroll mode to ensure that the metric columns displayed in the widget on an iPad or Android with MicroStrategy Mobile have enough space.
In Smooth Scroll mode, if there is enough space on the mobile device to display all the attribute columns in the widget plus at least one metric, the attribute columns are allowed to take up as much space as they require. If space is limited, however, priority is given to displaying the metrics in the widget, and attributes are displayed in the remaining space. Users can perform a horizontal swipe gesture to view the metric columns that cannot fit on a single page.
To enable Smooth Scroll mode for a Microcharts widget
-
Right-click the widget and select Properties. The Microcharts dialog box opens.
-
From the drop-down list, select Mode.
-
Select the Enable Smooth Scroll Mode for Metrics (Mobile Only) check box.
-
From the Metric Column Spacing drop-down list, determine how to size and display columns in the widget by selecting one of the following:
-
To display columns as more compact in width, select Compact.
-
To display columns using the default width, select Normal.
-
To display columns as wider than the default, select Large.
-
Click OK to apply your changes.
Selecting a display theme for the widget
You can select a display theme to use to display the Microcharts widget on a mobile device. Display themes are used only for widgets displayed on mobile devices.
To select a display theme for the Microcharts widget
-
Right-click the widget and select Properties. The Microcharts dialog box opens.
-
From the drop-down list, select Options.
-
From the Choose Theme drop-down list, select a color theme to use to display the widget, as follows:
-
To display the widget using a light-colored theme, select Light (default).
-
To display the widget using a dark-colored theme, select Dark.
-
To display the widget using custom color options that you define, select Custom. The colors that you select for the widget in the Microcharts dialog box will be used to display the widget on a mobile device.
-
Click OK to apply your changes.