Strategy One
Connect to Microsoft Dynamics 365 With Refresh Token OAuth Authentication
Strategy ships the Microsoft Dynamics 365 JDBC driver to connect Microsoft Dynamics 365 as a data source using the Refresh Token authentication method. Refresh Token OAuth authentication is supported by MicroStrategy Developer, Strategy Web, and Strategy Workstation in Local and Server Mode.
This method is suggested for developer or administrator accounts. Data sources created using a connection string with refresh token will have access to the data available for the account which the refresh token was obtained for.
To obtain the required parameters for User Level OAuth authentication, refer to Required Parameters for Authentication in Microsoft Dynamics 365.
Get a Refresh Token via the Postman Application
- Download the Postman app.
-
Create a GET request with the following information:
- GET to Service URL: https://mywebinstance.api.crm.dynamics.com/api/data/v9.1/
-
Authorization: OAuth 2.0
-
Access Token: Available Tokens
-
Header Prefix: Bearer
-
Token Name: My_Token_Name
-
Grant Type: Authorization Code
-
Callback URL: http://localhost
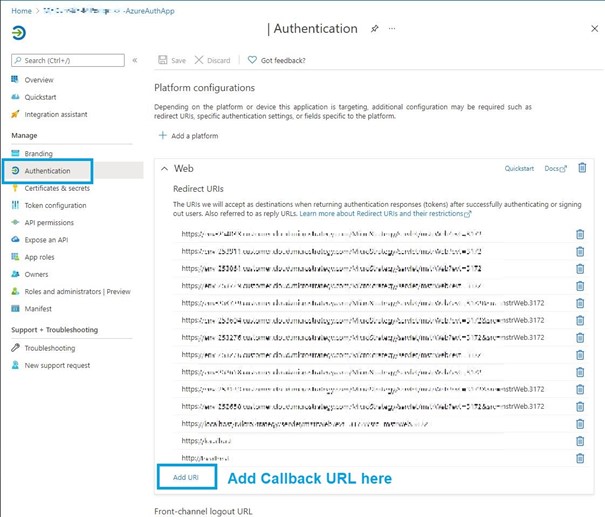
Add Callback URL to your application:
- Access the application in Entra ID (formerly Azure AD).
-
Go to Application > Web > Redirect URIs and click Add URI.
-
Auth URL: Authorization URI endpoint
-
Access Token URL: Token URI endpoint
-
Client ID: Client ID for your application
-
Client Secret: Client secret for your application
-
Scope: Scope defined for user
-
Client Authentication: Send as Basic Auth Header
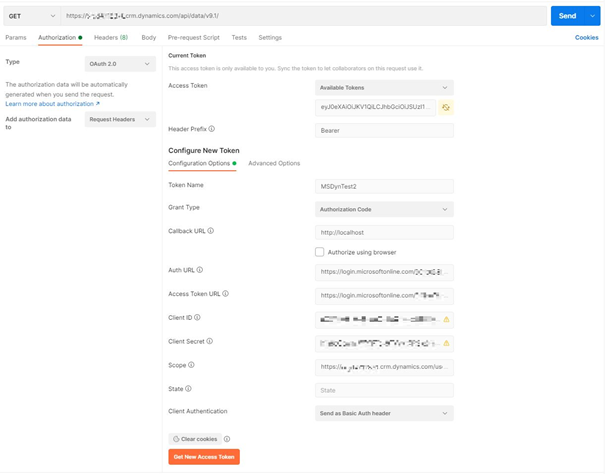
-
- Click Get New Access Token.
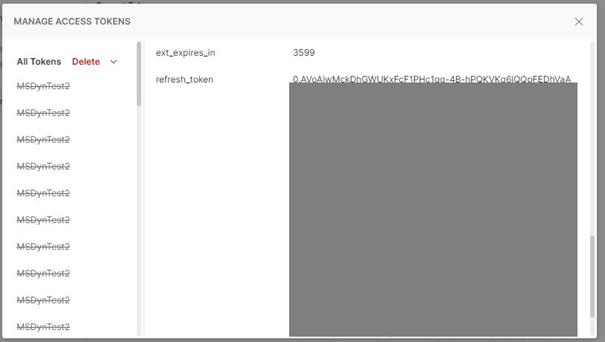
-
Copy the refresh_token parameter.
- Build a connection string.
In a text editor, use the connection string template to build a connection string for your Microsoft Dynamics 365 instance:
JDBC;DRIVER={com.microstrategy.jdbc.dynamics365.Dynamics365Driver};URL={jdbc:microstrategy:dynamics365:ServiceUrl=SERVICEURL;AuthenticationMethod=OAuth2;TokenUri=TOKENURI;ClientId=CLIENTID;ClientSecretCLIENTSECRET;RefreshToken=REFRESHTOKEN};Replace SERVICEURL, TOKENURI, CLIENTID, CLIENTSECRET, and REFRESHTOKEN with appropriate values.
The resulting string should look similar to the following:
JDBC;DRIVER={com.microstrategy.jdbc.dynamics365.Dynamics365Driver};URL={jdbc:microstrategy:dynamics365:ServiceUrl= https://orgd123456.crm.dynamics.com/api/data/v9.1/;AuthenticationMethod=OAuth2;TokenUri= https://login.microsoftonline.com/1234abcd-9876-3456-c120-c1234b9876bb/oauth2/v2.0/token;ClientId= 1a2b3c4d-432f-4aa5-abc8-123457654e15;ClientSecret= asgre3435_WMJKSFIO384KDNF_e4-x83;RefreshToken= 0.AVsahjfs34njkHJH34jkj2F1PHc1qg-7B-fjsikjdkHS8nHkvdcsNJ832.FSFas8736AD};
Connect to Microsoft Dynamics 365
- Developer
- Web
- Workstation
- Open MicroStrategy Developer.
-
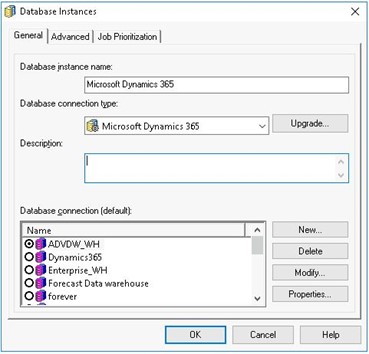
Go to the Data Instance configuration.
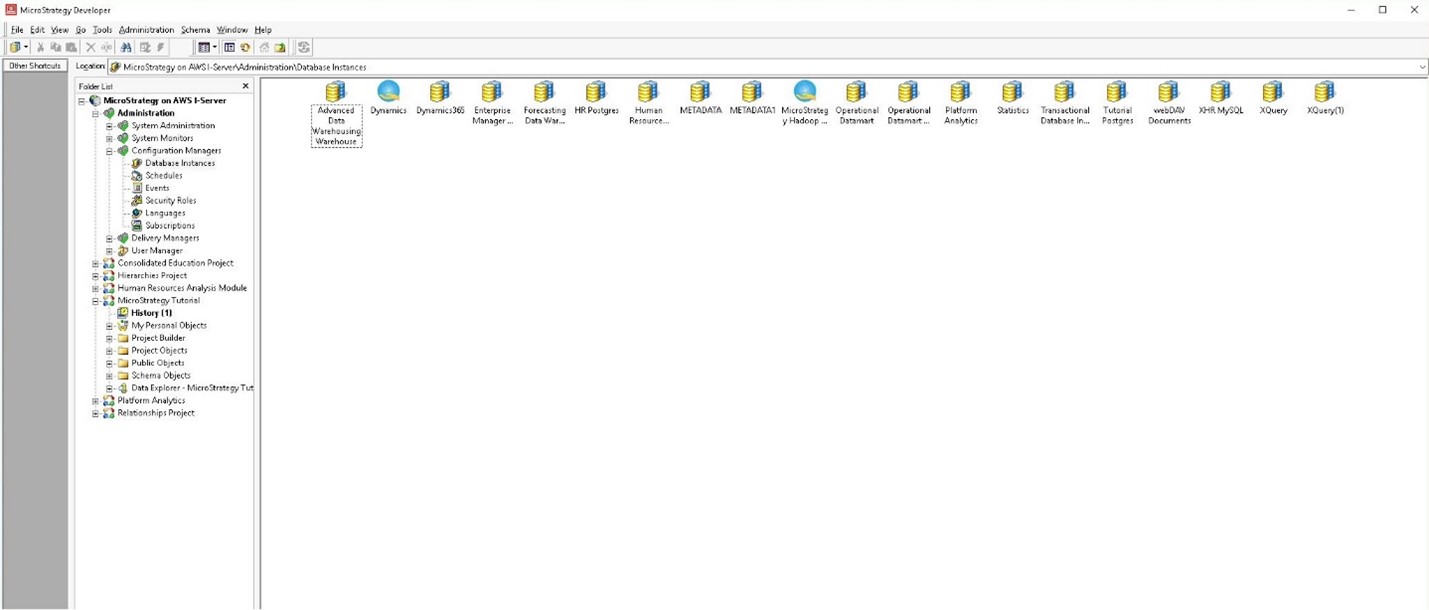
- Right-click in the Database Instance dialog and select New > Database Instance.
- Enter a database instance name.
-
From the Database connection type drop-down, choose Microsoft Dynamics 365
- Click New.
-
In the Database Connections dialog, enter a database connection name.
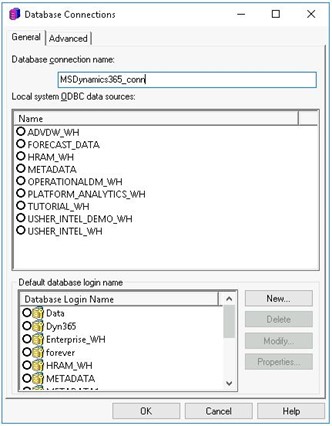
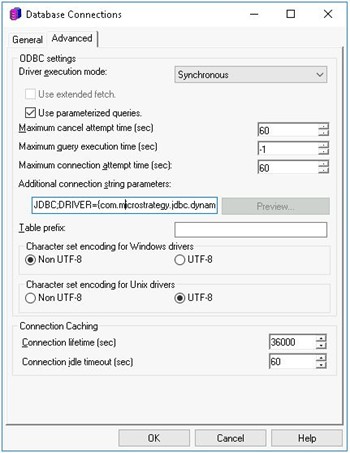
- Go to the Advanced tab.
-
In the Additional connection string parameters field, paste the connection string.
- Return the General tab.
- Click New.
-
In the Database Logins dialog, select the Use network login ID (Windows authentication checkbox.
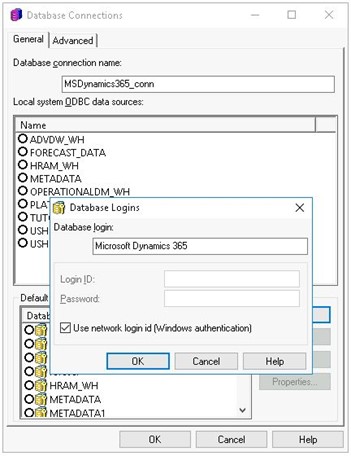
- Click OK in the Login, Connections, and Database Instances dialogs.
The database instance is created and can be used to query the database.
-
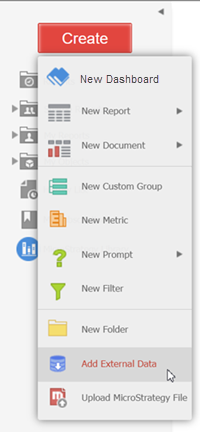
In Strategy Web, click on the Create button > Add External Data.
-
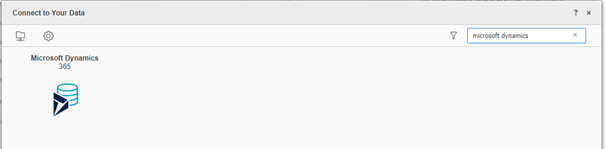
Find and select the Microsoft Dynamics 365 connector from the data source list.
-
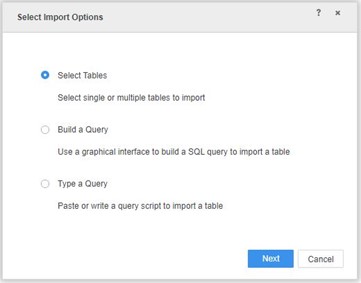
In the Select Import Options dialog, select an option and click Next.
-
Next to Data Sources, click New Data Source
 to add a new connection.
-
In the Data Source dialog, click Advanced settings and select the Edit connection string checkbox.
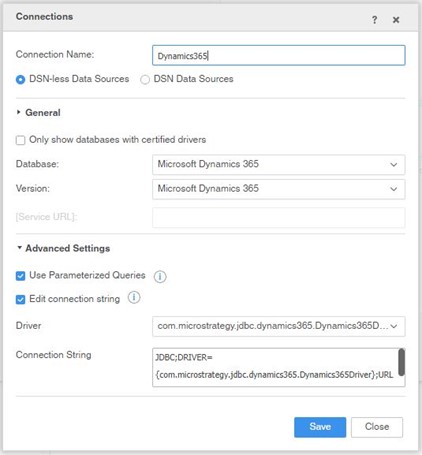
- Paste the connection string in the Connection String field.
- Click Save.
- Click on the newly created database instance.
-
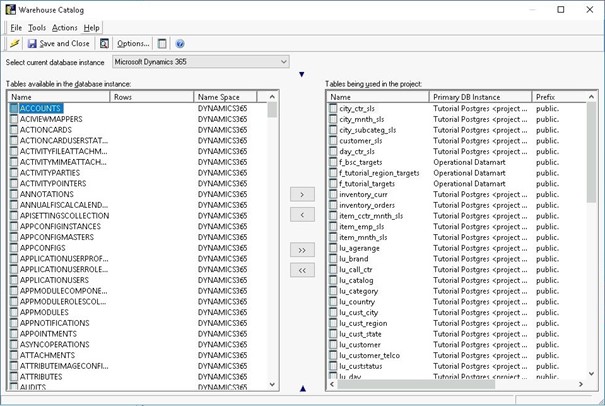
In the Import dialog and under Data Sources, select the DYNAMICS365 namespace. Other namespaces contain system tables.
After authenticating, the catalog is populated.

-
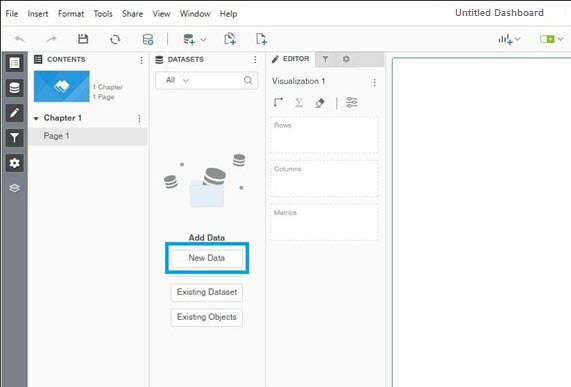
In Workstation, next to Datasets, click Create a new dataset
(Local Mode). 
If you are in Server Mode, click Create a new dashboard
. -
Click New Data.
-
Find and select the Microsoft Dynamics 365 connector from the data source list.
-
In the Select Import Options dialog, select an option and click Next.
-
Next to Data Sources, click New Data Source
to add a new connection.
-
In the Data Source dialog, click Advanced settings and select the Edit connection string checkbox.
- Paste the connection string in the Connection String field.
- Click Save.
- Click on the newly created database instance.
-
In the Import dialog and under Data Sources, select the DYNAMICS365 namespace. Other namespaces contain system tables.
After authenticating, the catalog is populated.
Related Articles
KB485063: Troubleshooting the Strategy Dynamics 365 connector in Strategy