Strategy One
Preview Feature: Create Form Transactions in Dashboard
Starting in Strategy One (March 2026), you can use form transactions to add, edit, or remove data from relational databases using the provided column mapper or your own defined SQL statements. This is available as a preview feature.
Preview features are early versions of features and are not to be used in a production environment as the core behavior remain subject to change between preview and GA. By selecting to expose preview features in Strategy Workstation, you can access these features and use them as you would any other dashboard functionality. The official versions of preview features are included in subsequent releases.
To configure form transactions in dashboards, you must have at least the Web configure Transaction privilege.
To interact with or use form transactions in dashboards, you must have at least the Execute Transaction privilege.
Enable the Form Transactions Preview Feature
By default, you cannot create a form transaction. To enable the preview feature, complete the following steps.
-
In your browser, open the Strategy REST API Explorer by appending
/MicroStrategyLibrarywith/api-docs/index.html?visibility=all. -
Create a session and authenticate it. In the Authentication section, use
POST /api/auth/admin/login. -
Click Try Out. Modify the request body by providing your user name and password.
-
Click Execute.
-
In the response, find and copy the
X-MSTR-AuthToken. -
To view the current feature status:
-
In the Configurations section, look up
GET /api/v2/configurations/featureFlags. -
Click Try Out.
-
Set the proper
X-MSTR-AuthTokenyou found above. You can also get this by inspecting the browser network XHR requests. -
Click Execute.
-
Search for
BI/formtransactionin the response body to find its status details. When the feature is inactive, it is set to 0. After it is activated, it is set to 1. -
Find the
idvalue to continue to activate the feature.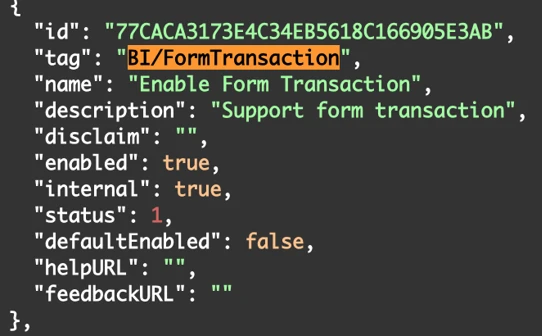
-
-
In the Configurations section, look up .
-
Click Try Out.
-
Set the proper
X-MSTR-AuthTokenyou found above. You also can get this by inspecting the browser network XHR requests. -
Set
idto the sameidvalue you found above, such as77CACA3173E4C34EB5618C166905E3AB. -
Set the
statusvalue to1. -
Click Execute.
-
View the current feature status again to verify that the feature is enabled.
Create and Configure a Form Transaction
-
Edit the dashboard.
-
In the toolbar, do one of the following:
-
Click Panel Stack and choose Form Panel.
-
Click Information Window and choose Form Window.
A blank form panel or form window displays.
-
-
Add text boxes.
Only text fields can be configured as transactions in Strategy One (March 2026). Other field types such as rich text, images, shapes, and HTML containers can be added to the form panel or window, but they cannot be configured as transaction fields.
The value or dynamic value of the text box will be pre-populated as the default value of the input control, using dynamic text such as {Purpose}.
-
Click More
 in the upper right corner of the form panel or window, and choose Configure Transaction. Alternatively, in the Form Panel Options tab of the Format panel. click Use SQL to start the configuration.
 -
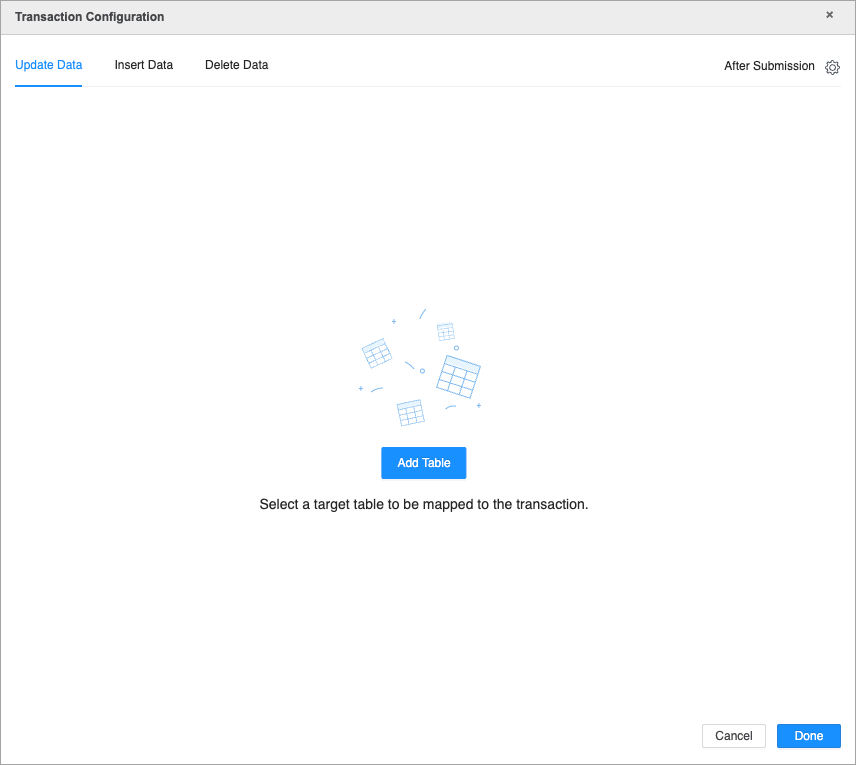
Choose to update, insert, or delete data and click Add Table.
If you are creating a SQL form transaction, you can only use one transaction type (update, insert or delete).
-
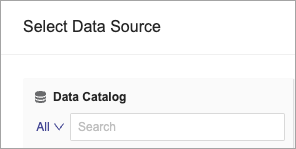
Select a data source.
The user selected to configure the data source must have permissions to update, insert, and delete data.
-
Use the Object Browser panel to search for the desired attributes and metrics, and drag them into the Editor panel.
-
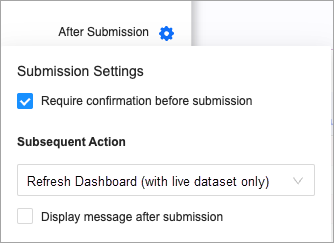
To personalize the submissions settings, do one of the following:
-
Click Settings
 in the upper right corner of the transaction configuration dialog to personalize the submission settings.
 -
Starting in MicroStrategy ONE Update 11, in the Format panel > Transaction Option tab, you can click More
 next to Transaction. Click After Submission and personalize your submission settings.
-
-
Click Input Configuration to set rules and select the control type for your columns.
-
Column selection and requiredness
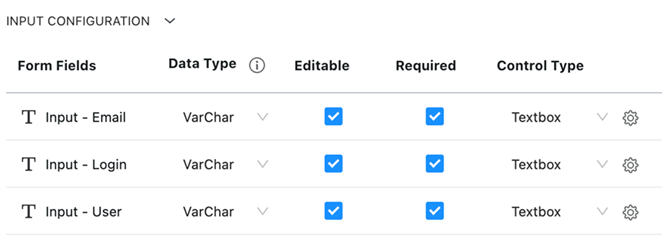
-
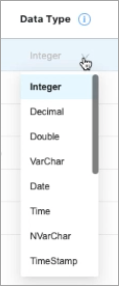
Data type selection
-
Control type selection and configuration
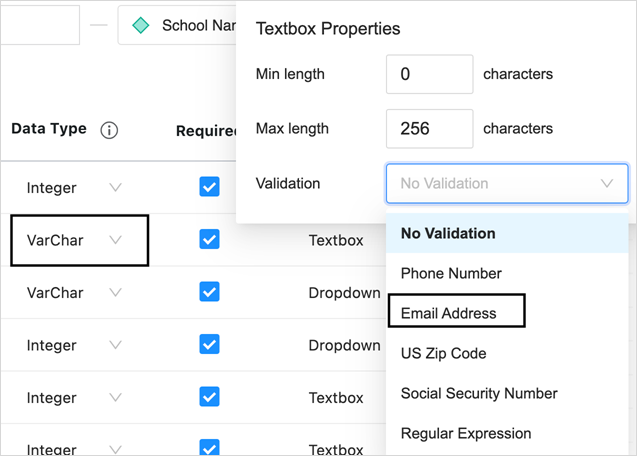
Textbox controls:
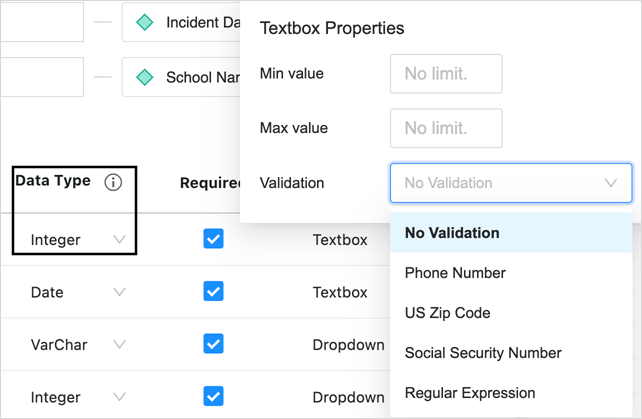
For the Textbox control type, depending on the data type, number and string based configurations are provided with corresponding validations.
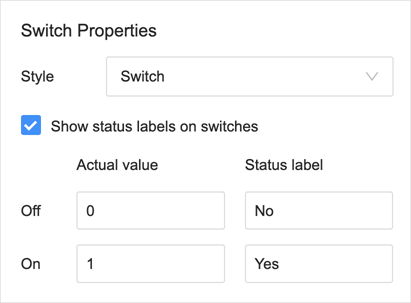
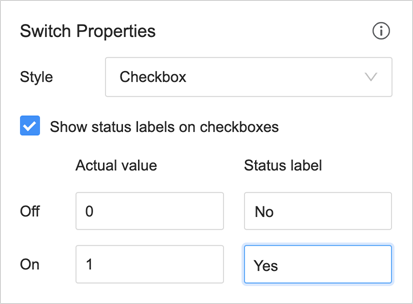
For the switch control type, both switch and checkbox styles are supported.
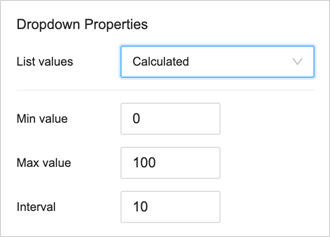
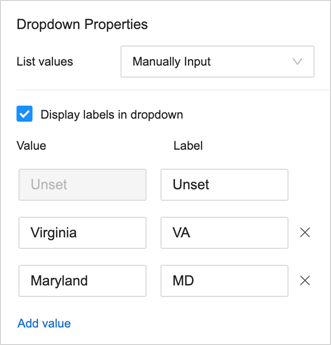
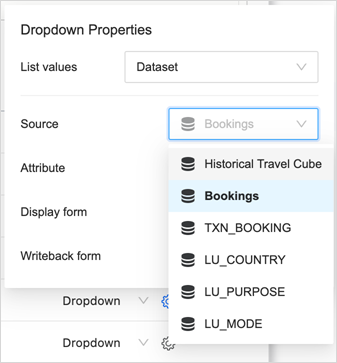
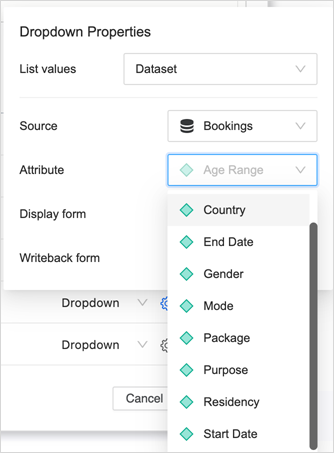
For the Dropdown list control type, calculated list, manual input list, and a data driven input control list is supported. For the Calculated list, you can set the value range and interval size.
For manual lists, you can define labels to display the data.
From the DDIC (data driven input control) dropdown list, you can choose any dataset in the dashboard, an attribute from that dataset, and pick display attribute forms and the attribute form to write back.

For the Slider control type, both range and manual input are supported.

-
-
Click Done to complete your transaction and Save your dashboard.
-
You can pause transaction manipulations to apply configuration changes. Perform one of the following:
-
Click More
in the upper right corner of the visualization and choose Edit Transaction. In the transaction configuration dialog, toggle the action that you want to pause. -
Select the grid. In the Format panel under the Transaction tab, toggle the action that you want to pause.
-
Click More
in the upper right corner of the grid. Choose Pause Actions then select the check box of the action that you want to pause.
-
Format Form Transactions
-
In the dashboard, open the Format panel.
-
Click Textbox Options.
-
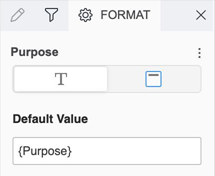
Type the Default Value. After the mapping configuration, the value of the text box displays here for modification.
-
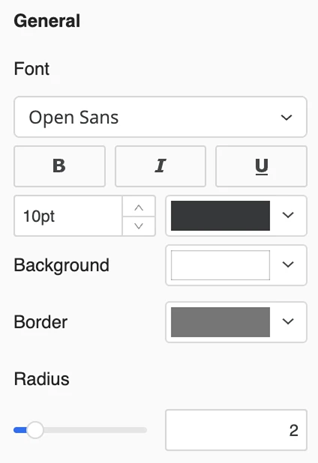
In the General area:
-
Select the desired font, style, size, and color for the text.
-
Select the background, border, and radius for the container.
-
-
If a text box allows a single line, the control displays as a Textbox.

-
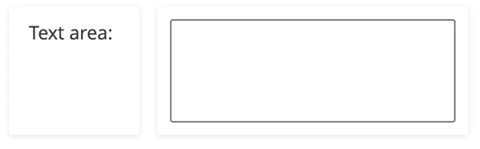
If the text box uses a Varchar or NVarchar data type and no validation is configured, the control instead displays as a Text Area, allowing users to enter multiple lines of data.
-
For a drop-down:
-
Set the Width to be Auto or Fixed
-
Choose the Selection Fill color.
-
-
For a slider:
-
Set the Slider color and Selection color.
-
-
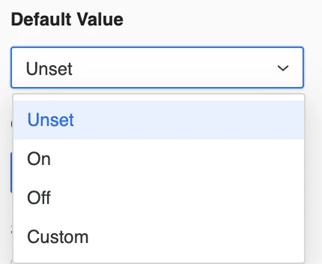
For a toggle or check box switch:
-
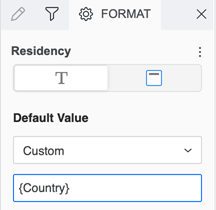
Select the Default Value: Unset, On, Off, or Custom.
-
If you select Custom, you can specify the default value using dynamic text, such as {Country} as shown below:
-
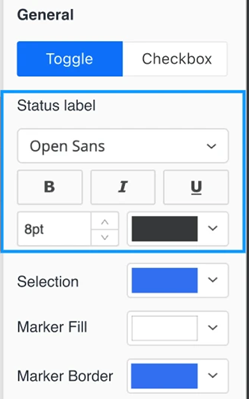
In the General format area, click Toggle. Select the colors for Selection, Marker Fill, and Marker Border for the toggle.
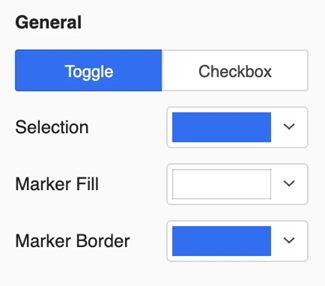
-
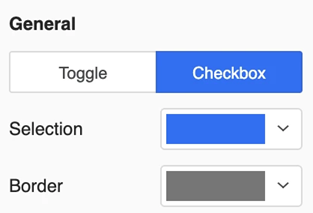
In the General format area, click Checkbox. Select the colors for Selection and Border for the check box.
-
If you selected the Show Status Labels on Switches check box during the configuration process, a Status Label area displays in the Format panel. Use it to select the font formatting for the label.
-
-
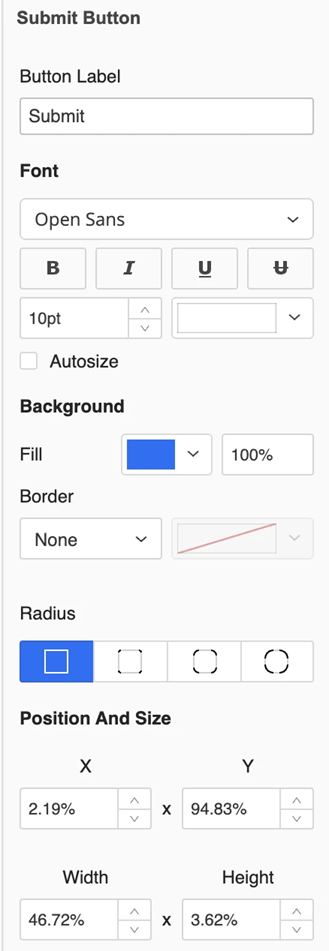
For the Submit and Reset buttons:
-
Type a Button Label.
-
Specify the font options.
-
Select the Autosize check box to allow the text to automatically adjust to fit the button size.
-
Specify the Background Fill and Border.
-
Select the Radius of the buton.
-
-
Save the dashboard.