Strategy One
Manage Data Sources
A data source, also known as a database instance, is a configuration object that links Strategy to an enterprise data warehouse. The connection parameters stored in data source objects allow architects to pull tables from the warehouse into the Strategy schema layer for modeling.
The Data Source dialog shows available data sources for a given environment. You can filter, sort, view properties, and edit security access for a given data source object.
- Open the Workstation window with the Navigation pane in smart mode.
- Log into your environment. You must have the following privileges:
- Create and edit database instances and connections
- Create and edit database logins
- Create configuration objects
-
In the Navigation pane, click Data Sources. The data source grid lists details including object name, project, location, owner, date modified, description, and ID. To change which columns display, click Columns. Select the check boxes for the columns you want to display; clear the check boxes for the columns to hide.
-
Select an Environment from the upper-left drop-down list.
-
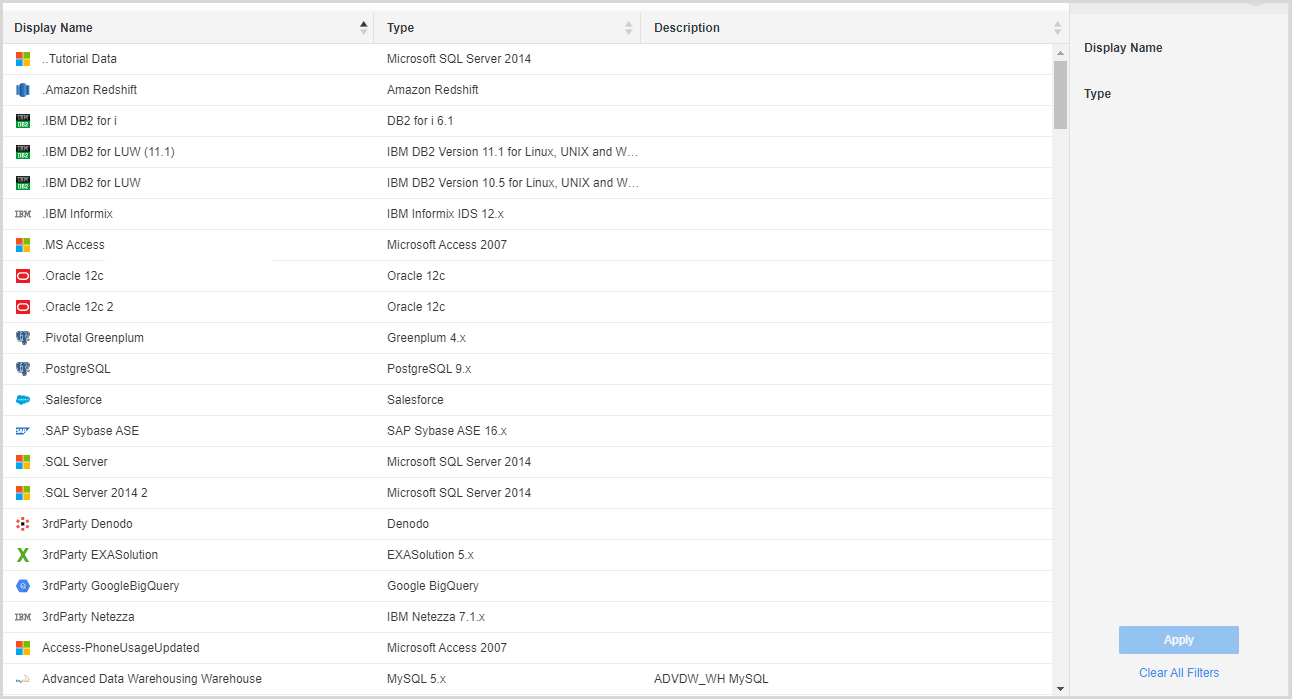
Filter the data source grid to focus on specific data source. Make multiple selections in the Filter panel and Apply them to the grid. You can filter on Name,
The filter summary displays at the top of the grid. You can use it, as well as the Filter panel, to edit the filters.
-
To remove a specific filter, click Show More. Click the delete icon
 next to the filter. For example, you can remove the Owner filter but keep the Type filter.
 -
To edit a specific filter, click Show More. Click the edit icon
 next to the filter and make changes. Click Apply.
 -
To clear all filter selections, click Clear All.
-
-
Right-click the data source and choose Properties. In the Properties window, you can:
-
View information such as object ID, owner, and last modified date
- View component and dependent objects
-
View internal comments
-
View the change journal
-
-
To change privileges for users or user groups, in the left pane of the Properties window, click Security Access.
-
Select the level of permission for each user or user group, using the Permissions drop-down list.
- To customize permissions, select the user or group. In the permissions band at the bottom of the window, select or clear the individual permissions.
- To change permissions for multiple users and groups all at once, click Advanced Security Access. When complete, click OK to return to the main Security Access page.
-
- Click OK to save the changes and close the Properties window.
-
To save the data source information to a .csv file, in the Data Sources window, click Export
 in the top right corner. This file includes the data sources in the grid and the applied filter.
 -
Enable Autofresh to refresh the database connections every thirty seconds. You can also click Refresh to manually refresh when necessary.