Strategy One
Publish to Power BI Cloud Using an On-Premise Gateway
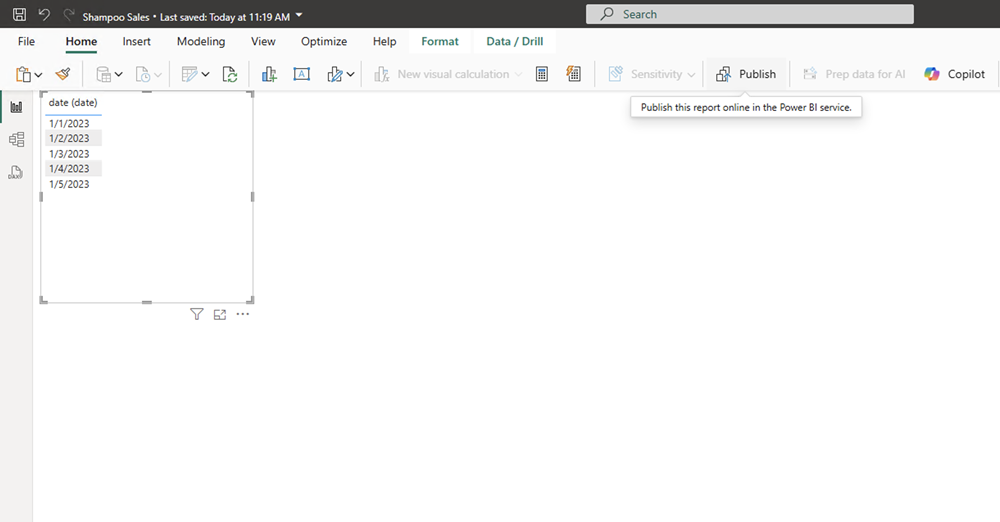
After you build your report, you can publish it to the cloud.
Prerequisites
-
Access to a client machine on Windows that can be accessed with your corporate credentials
-
Create a report on Power BI Desktop.
Publish to Power BI Cloud
-
Download the gateway in Standard mode. For more information and the download file, see Connect to on-premises data sources with a Power BI gateway.
-
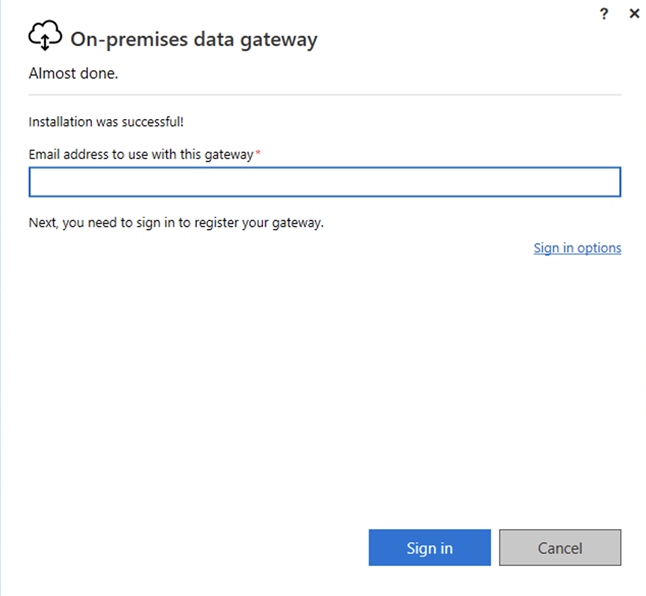
Open the gateway installer.
-
Type your email address and click Sign in.
-
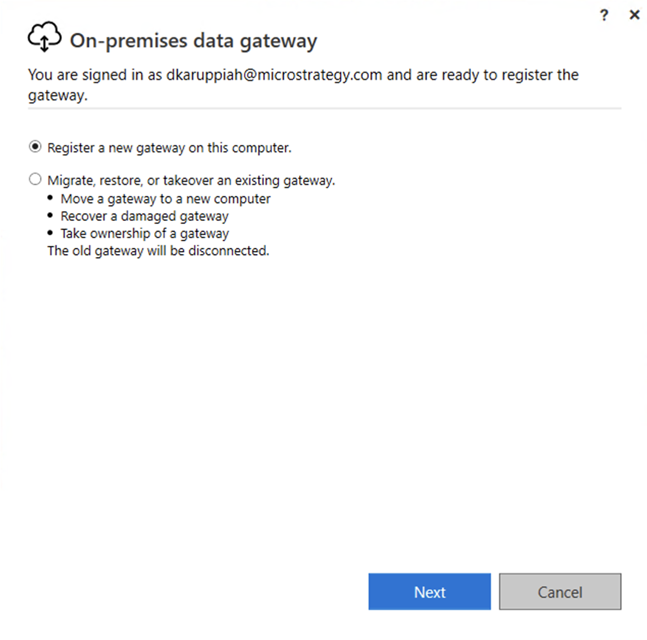
Select Register a new gateway on this computer and click Next.
-
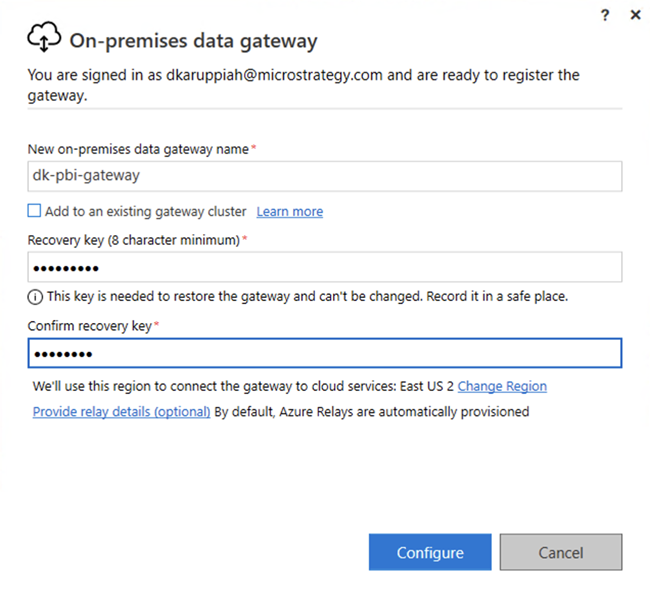
In New on-premises data gateway name, type a name.
-
Type a Recovery key.
-
Re-enter the recovery key and click Configure.
-
After the gateway displays a successful confirmation, click Close.
-
Go to Power BI Cloud and sign in using your corporate credentials.
-
Ensure you can access the gateway in Power BI:
-
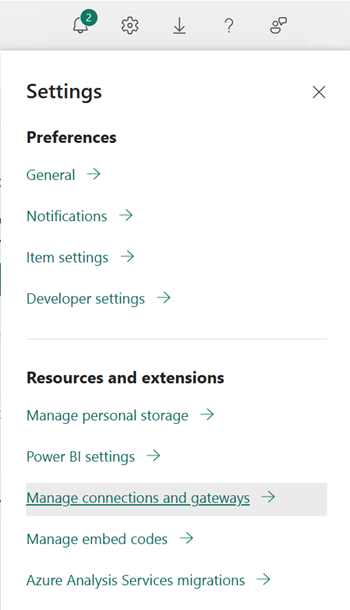
Click Settings in the top navigation.
-
Click Manage connections and gateways.
-
Click the On-premises data gateways tab and click Check Status.
-
Ensure Online displays.
-
-
In Power BI Desktop, open data source and add columns and other items.
-
Click Publish.
-
If needed, type a name for your file and click Save.
-
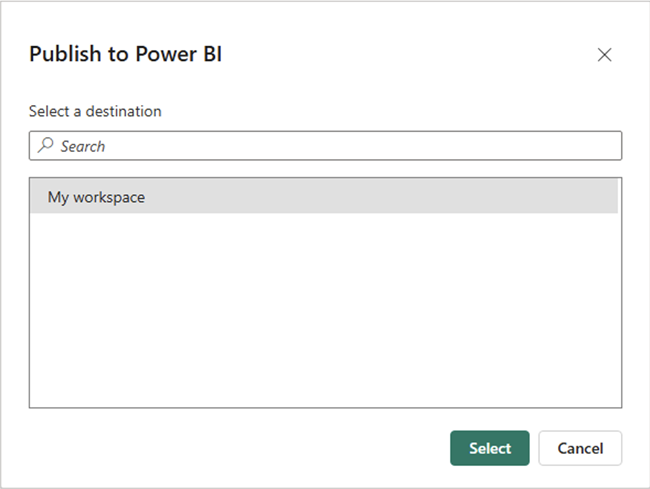
Choose a workspace and click Select.
-
Go to the Power BI Cloud workspace and choose the model.
-
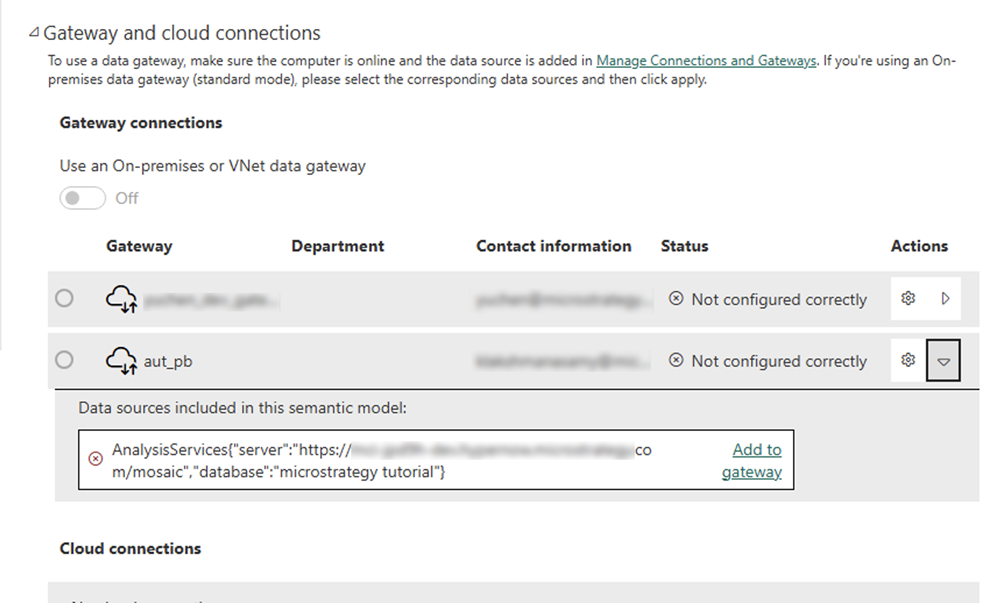
Expand File and click Settings.
-
Expand the Gateway and cloud connections tab.
-
Select your data source and click Add to gateway.
-
Type a Connection name.

-
Enter the corporate credentials you use for Power BI Cloud and the gateway.
In Username, use a
domain\loginformat. For example,TECH_Services\jdoe. -
Ensure the Server field value is the same server used in Power BI Desktop. This value must match exactly, including case sensitivity.
-
Click Create.
-
Expand the Maps to drop-down list and choose the connection you just created.
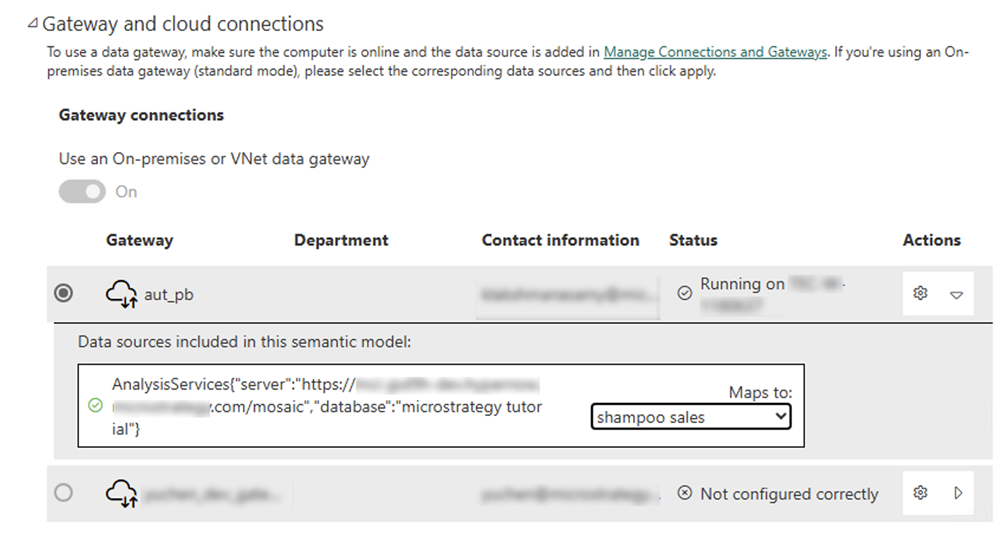
-
Click Apply.
-
Open your new data source.
-
Click Explore this data and choose columns to view insights.