Strategy One
Create and Edit Schedules
Starting in Strategy One (October 2025), you can translate schedule names and descriptions. You can also choose to set a custom time zone at the schedule level or use each recipient’s own time zone for email subscriptions. Setting the custom time zone is included in the steps below. Using each recipient's time zone is included in Create Email Subscriptions.
Starting in MicroStrategy ONE (December 2024), you can view a schedule's dependent subscriptions.
Strategy users can create schedule objects to define when a given task is to be executed. Scheduled tasks include administrative workflows such as sending an email subscription or triggering a cube refresh.
Strategy supports two types of schedule objects:
- Time-based schedules, which execute at a set date and time or on a regular cadence. An example of a time-based schedule may be a weekly recurrence that executes every Monday morning at 9 am.
- Event-based schedules, which execute when their associated event is triggered manually or through an automated script. Event-based schedules are often associated with events such as Books Closed or On Database Load.
In addition to Workstation, you can create schedule objects in Developer and the mstrio-py Python packages.
-
Open the Workstation window with the Navigation pane in smart mode.
- In the Navigation pane, click Monitors and click
 , next to Triggers, or click , next to Schedules. To create a schedule or event, you must have the Create and edit schedules and events privilege.
 - Select an Environment in the drop-down list. The schedule object appears across all projects in the selected environment.
- Type a Name for your schedule object.
- Select the Start date and End date for your schedule object.
-
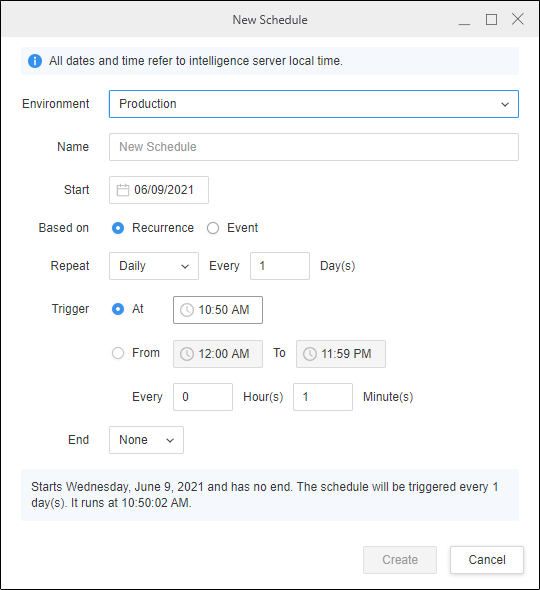
To create a time-based schedule, from the Based on drop-down list, select Recurrence. Specify the following:
- Repeat patterns. Choose from Daily, Weekly, Monthly, or Yearly and specify the number of days, weeks, or months between executions. Note that changing between Daily, Weekly, Monthly, and Yearly changes the available parameters for defining your schedule.
- Trigger time. Based on the days you select, you can also choose to schedule executions during specific times or intervals.
- To specify a regular time for the schedule to execute, select At and define the time.
- For more continuous deliveries, select From. Specify the time window and interval.
- Timezone.
-
To create an event-based schedule instead, from the Based on drop-down list, select Event. Choose an existing event object or create a new one.
-
A Summary of your schedule’s delivery cadence displays in the tooltip at the bottom of the editor. This description changes dynamically based on the parameters you provide for your schedule object. By default, this summary is used as the schedule's description. To create your own summary, follow the steps below:
-
Disable Use Summary as Description.
-
Type a description in the Summary box.
-
- Click Create to save the schedule object.
-
-
Right-click an object to view its properties, ACLs, change journal (starting in MicroStrategy ONE (September 2024)), and dependent subscriptions (starting in MicroStrategy ONE (December 2024)). In addition, you can edit, delete, translate, and duplicate a schedule object.
-
Starting in Strategy One (October 2025), to translate the vault connection name:
-
Right-click the database connection and choose Translate.
-
Click the Columns dialog box to display all the languages supported by the project.
-
Select the check box next to your preferred languages.
-
Double click a cell and enter the preferred translation.
-
Click Save.
-
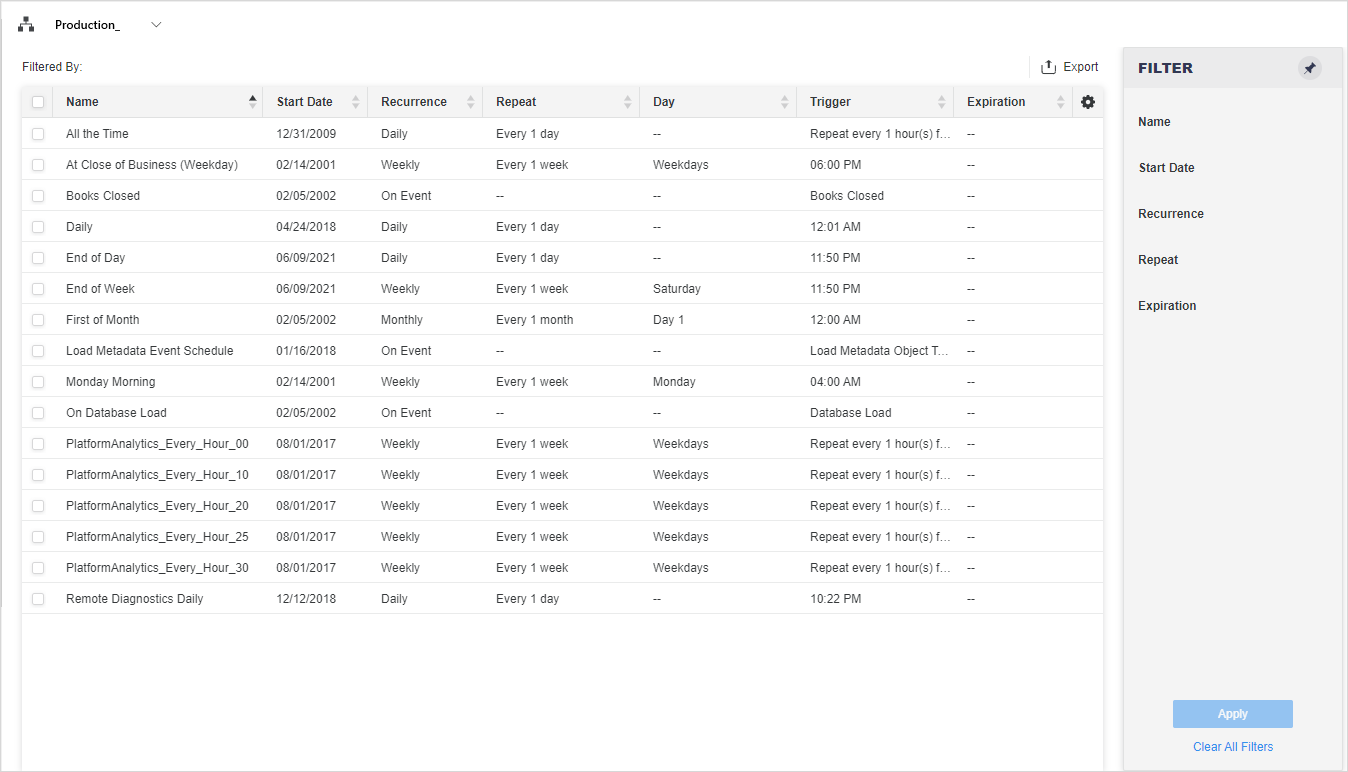
Filter Panel Lists Name, Start Date, Recurrence, Repeat, and Expiration. You can make multiple selections from this filter and apply them to the grid. The filter summary appears at the top of the grid, and you can remove elements or clear all filter selections from there.
Schedules Grid Lists object details including Name, Recurrence, Repeat, Day, and Expiration. Columns can be shown or hidden by clicking the gear icon in the top right of the grid.